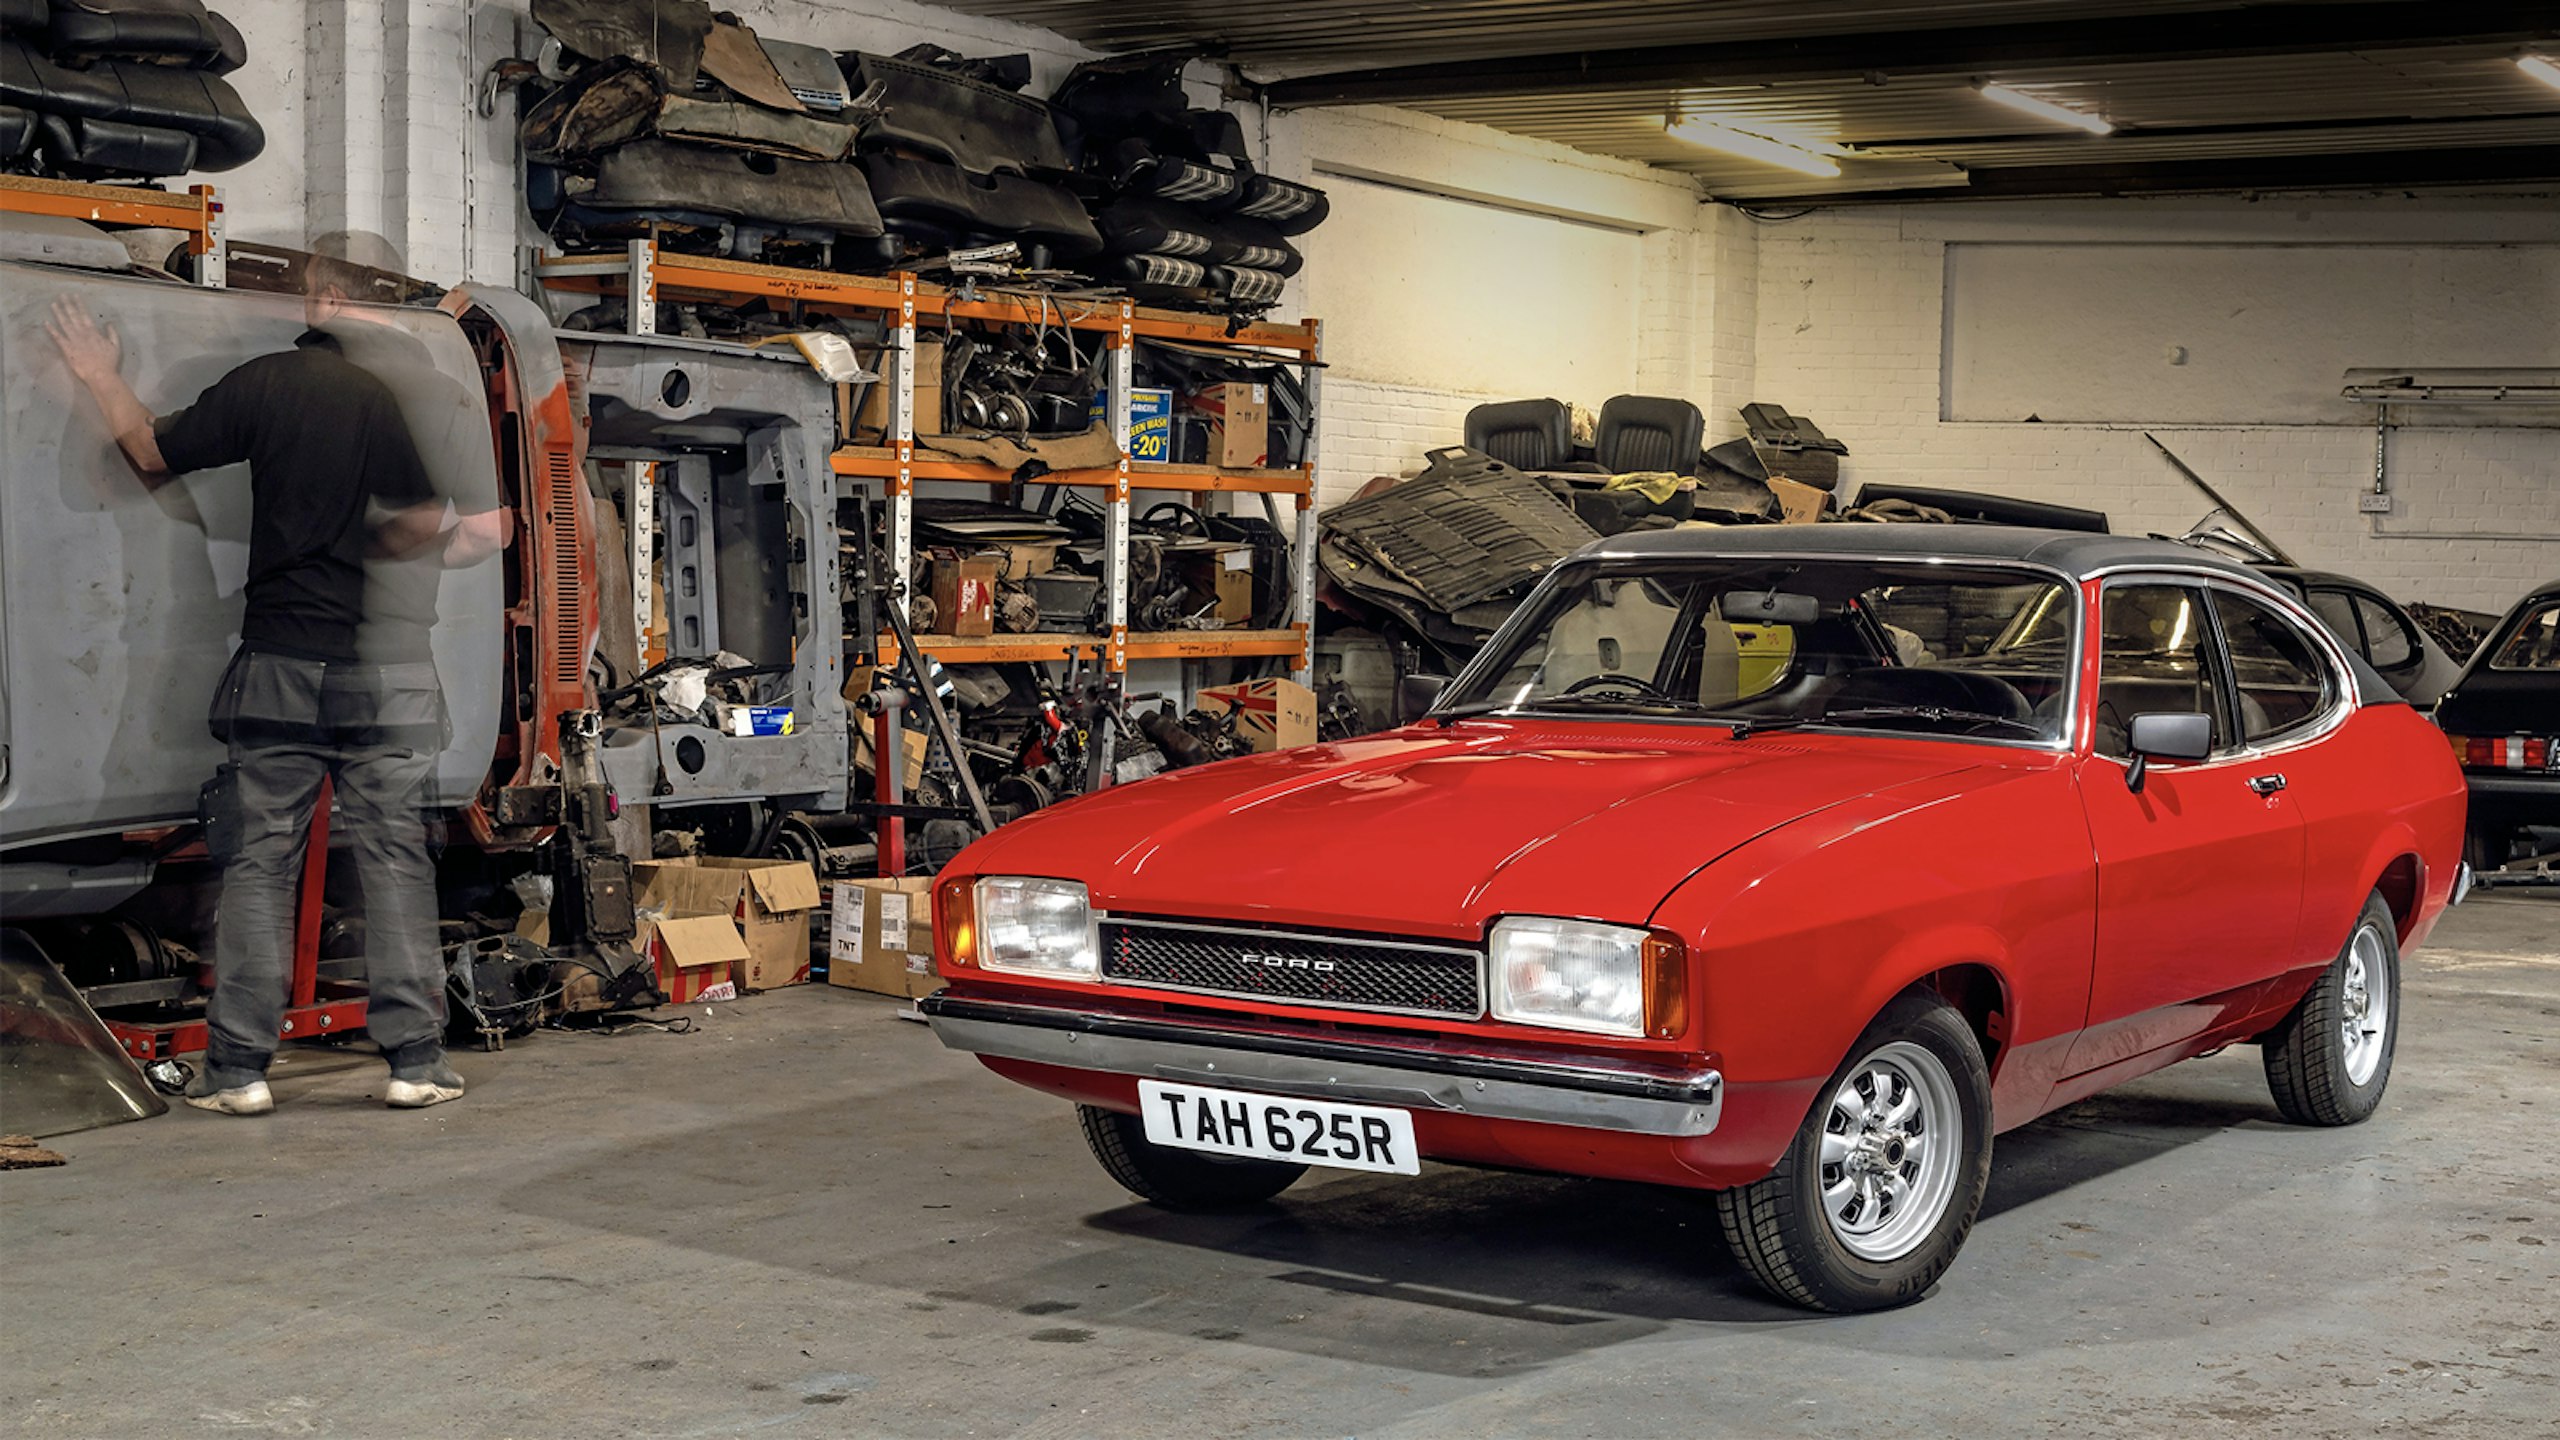
[ Epic Restoration ]
When the owner of this Ford Capri GL died halfway through its restoration, it looked like the project was doomed. But rather than give up, specialist Steve Mangham saw the build though to construct a car his friend would be proud of
Words & Photography DAN SHERWOOD
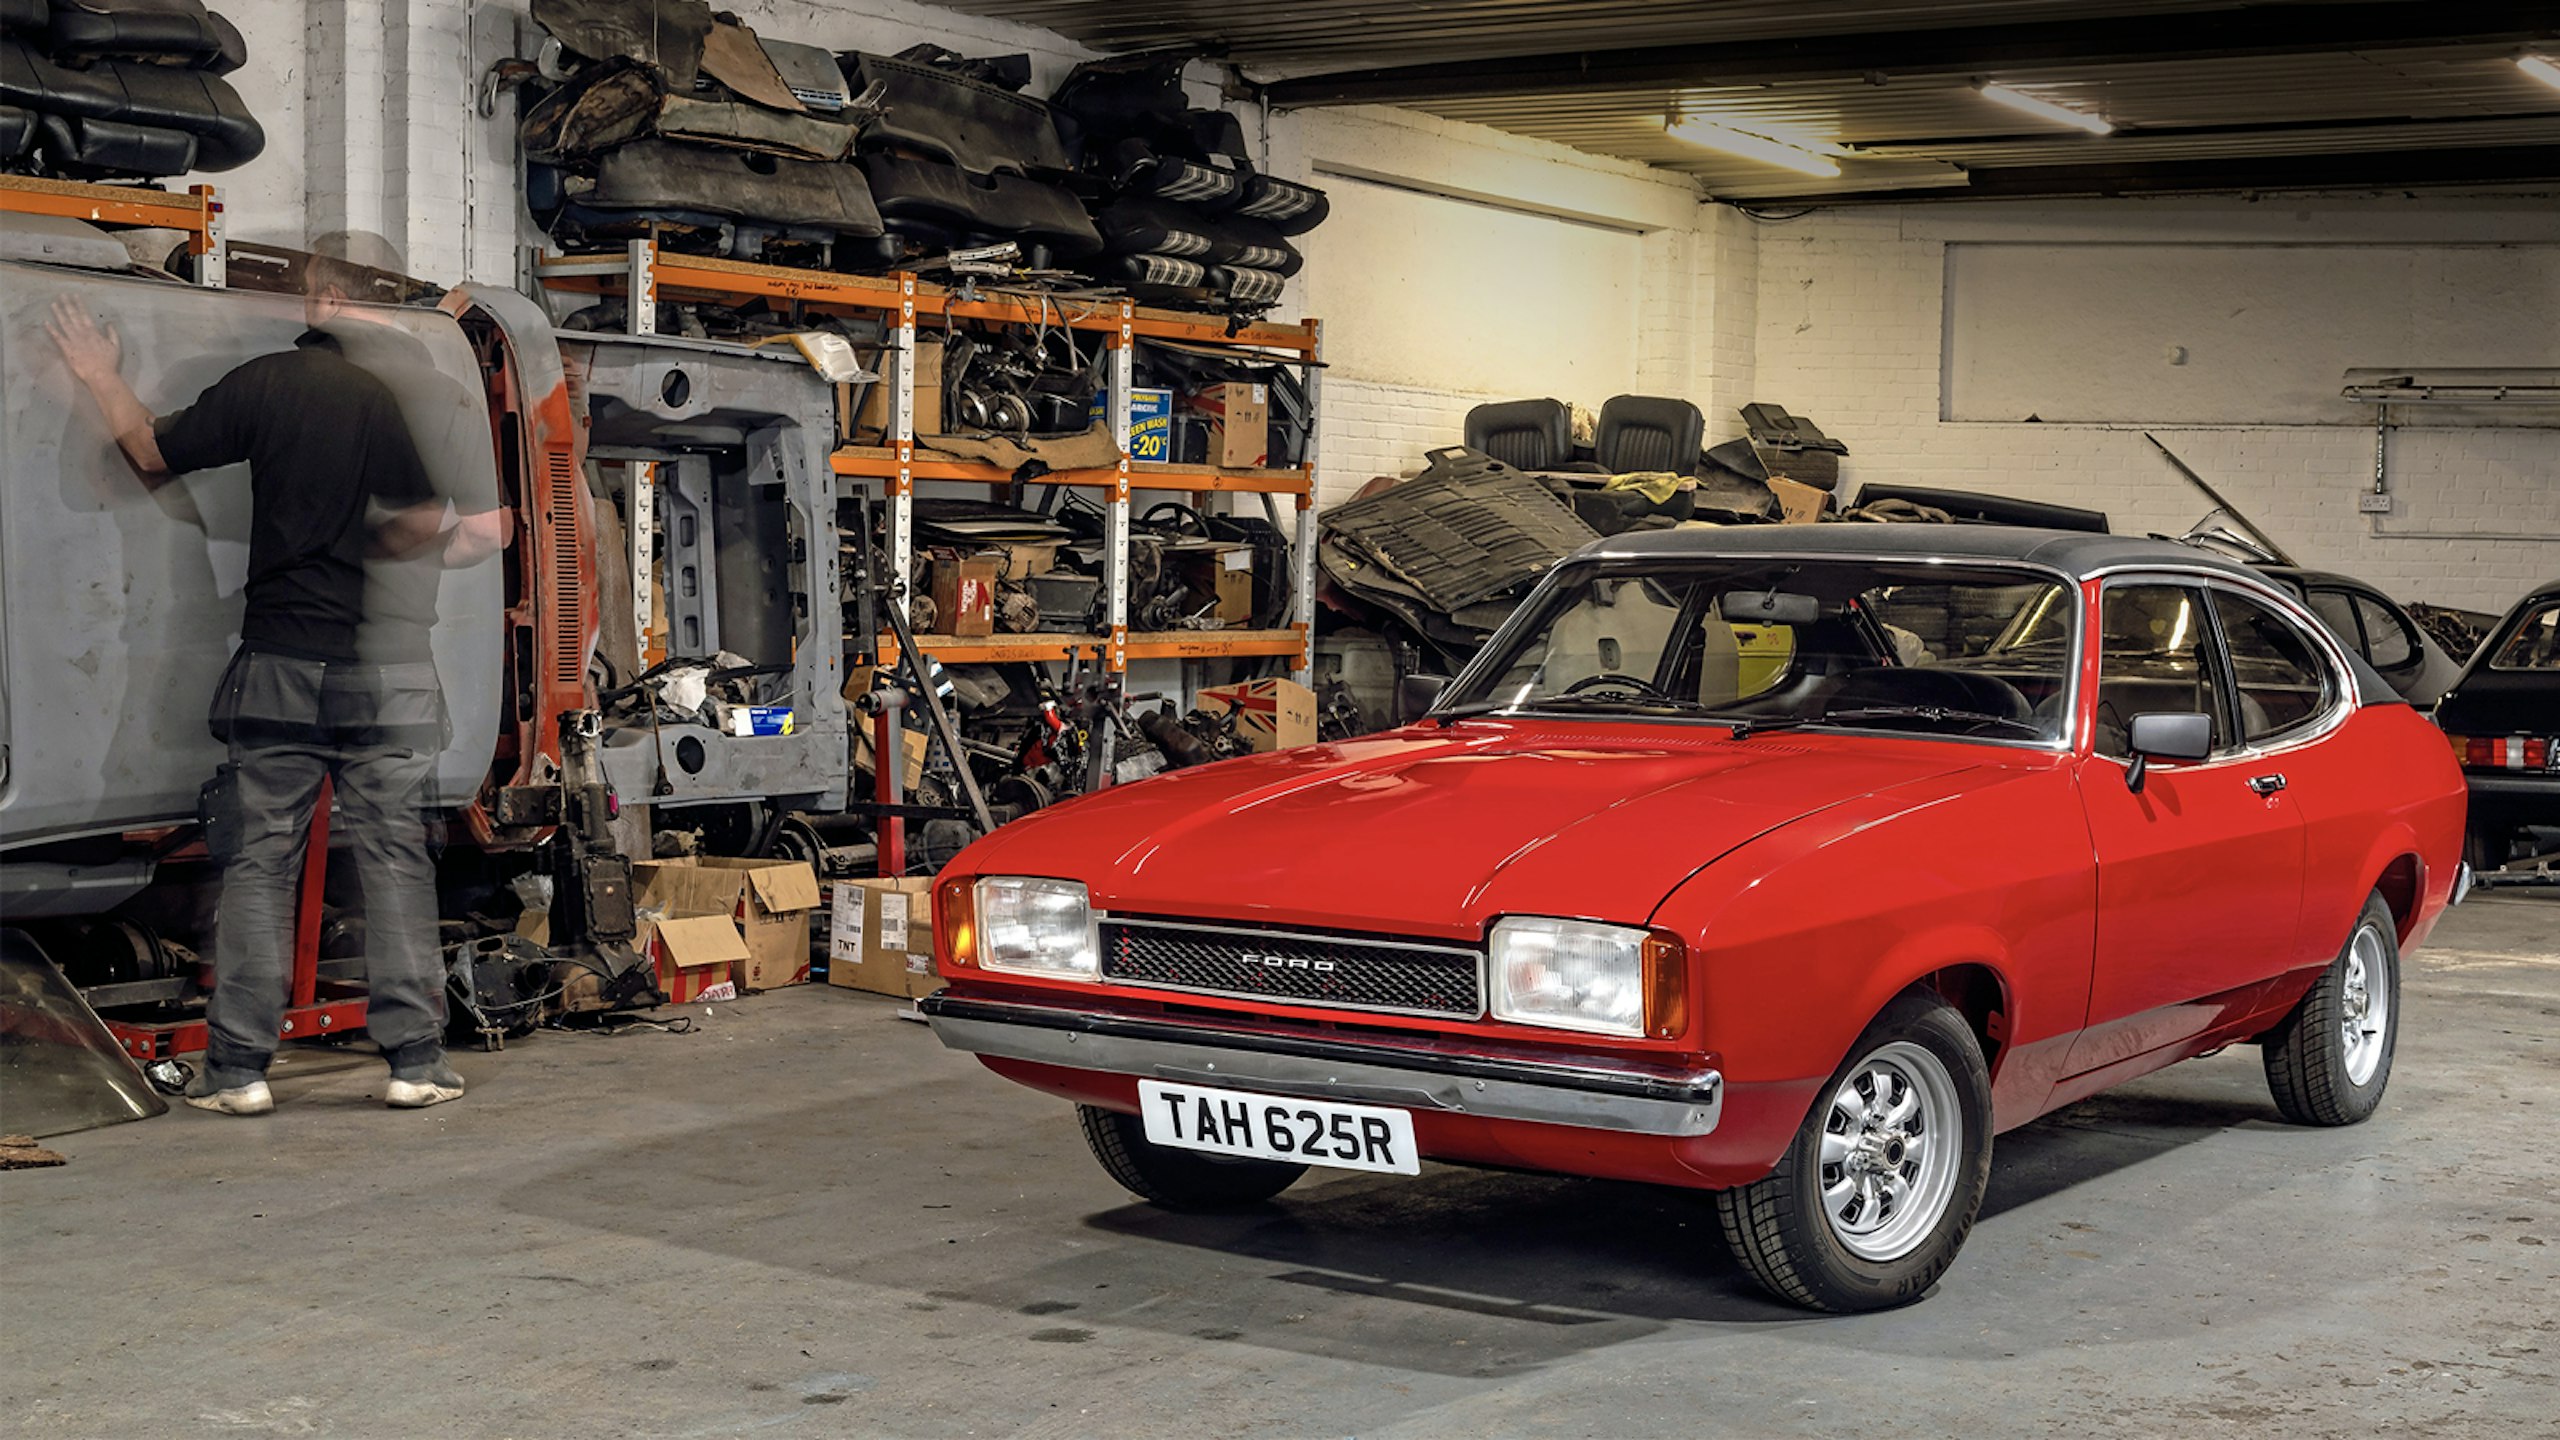
To be honest, neither myself, nor even the car’s owner, had any idea what was going to roll into the yard that morning,’ chuckles Steve Mangham, recalling the first time he set eyes on this now immaculately restored Venetian Red Ford Capri MkII parked before us. ‘We knew it was a very original example but, because it had been bought blind over the internet, there was no way of accurately assessing its condition until it arrived. When it did, it was immediately obvious this was going to be a complete nut-and-bolt restoration job.’
As the owner of Doncaster-based Ford restoration specialist, S M Restorations, Steve is a seasoned veteran when it comes to resurrecting even the most battered of Blue Oval-badged machinery, with more than a passing penchant for those of the Capri variety. In fact, there have been very few projects over the years that he hasn’t been able to bring back from the dead.
Rolling on temporary wheels, what came off the trailer was hardly a car at all, more of a basic ’shell. The engine was missing, as were the transmission and brakes. It had no glass, lights, electrics, or interior, just the tatty, but crucially original, Roman Bronze paintwork that seemed to be holding the corroded metalwork in a vaguely Capri-like shape.
‘Much like me, the car’s owner Chris Taylor was no stranger to the process, having had numerous cars restored in the past, so he was confident that I could work with what we were presented with,’ Steve says. ‘In fact, when the car arrived, I had another Capri in the workshop that I was restoring for him.’
Chris and Steve first met around 12 years ago, initially speaking through online forums, but later, in real life, at various Ford shows, the pair quickly bonding over their mutual love for the swoopy Blue Oval coupé. ‘We were best mates,’ says Steve. ‘So, when, in spring 2021, Chris asked me to restore a Capri for him, I had no hesitation in saying yes.’
Chris had started his Capri collection with an early MkI model and planned to bookend the range with a late 280 Brooklands – the other car Steve was working on – but he had always dreamed of owning a Venetian Red MkII GL, the exact model from his childhood. ‘Chris had searched everywhere for a Venetian Red GL but couldn’t find one. In the end, he had to settle for the 1975 Roman Bronze bodyshell and simply respray it.’ Steve says.
Low point
‘When Chris passed away there was a certain realisation that the car may never be finished and it would be sold on as an unrealised project.’
Steve Mangham
Stripdown
Once the ’shell was maneuvered into the workshop, it was mounted on a custom chassis jig, so Steve could get a better look at what he was working with and start the stripdown. ‘It was in a terrible state. The whole car was suffering from severe corrosion, especially the floorpan and the bottom half of the bodywork. It was only really the roof that was free from rot, which is common because moisture always sits at the lowest points.’
With little parts needing to be removed, it was a simple case of unbolting the front crossmember and suspension legs and disconnecting the rear axle and leaf springs to get the car back to a basic bodyshell. ‘When dealing with heavily corroded ’shells like this, you always come up against stubborn bolts that have rusted in place,’ Steve says. ‘On the Capri it was all four of the crossmember bolts that refused to budge.’ After a series of heat cycles with a blow torch to try and free them, resulting in one of them snapping before it released, Steve was left with no choice but to drill them out to affect the release of the crossmember. Once everything was removed, the parts were boxed up and sent to Chris to be kept for spares, because Steve planned to replace them all with new old stock items rather than reuse them.
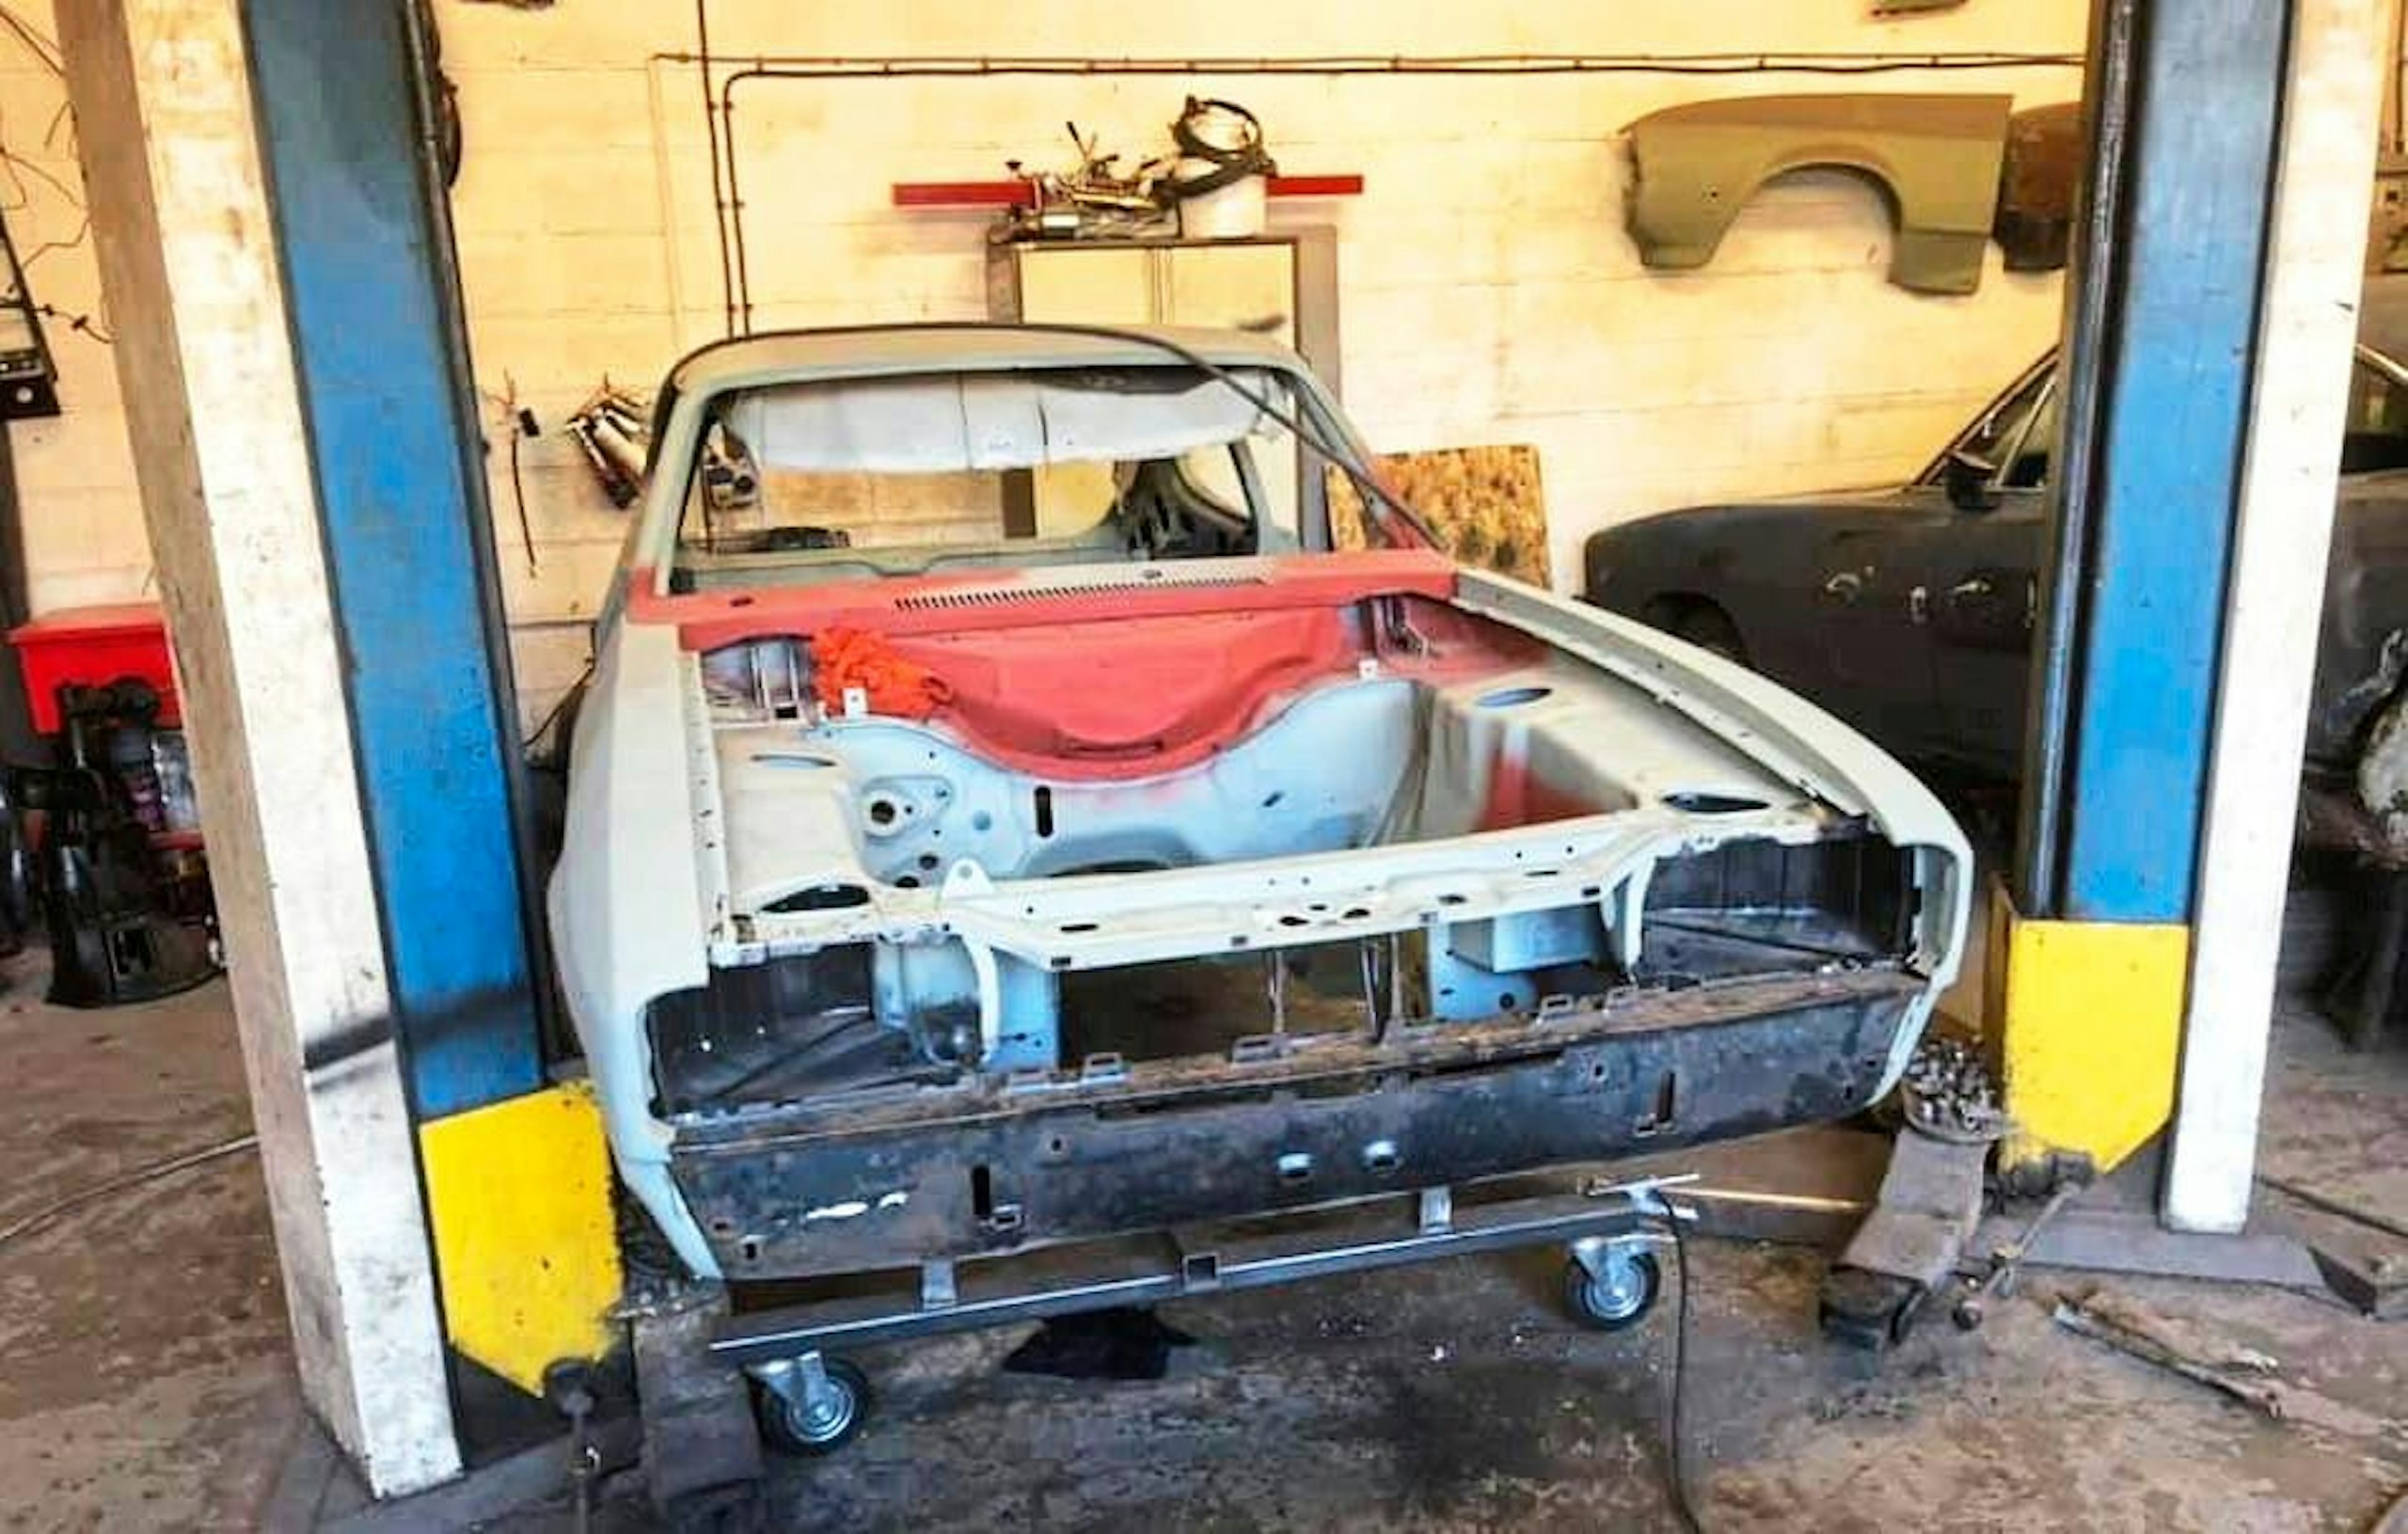
Once back from soda blasting, extent of work very obvious
The stripped bodyshell was sent for soda blasting by Philip Robinson at Sodatec In Halifax. ‘We prefer to use a soda blasting process rather than acid dipping because it’s a non-corrosive procedure that’s much easier to work with and has fewer potential drawbacks,’ Steve explains. ‘When a bodyshell is dipped, the acid gets into every area, including box sections, seams, chassis rails and double-skinned areas. This means it can be very difficult to ensure it has been completely flushed out and neutralised, causing its own rust issues to develop later on. It can also dissolve factory seam sealer – which can be very difficult to reapply in many hard-to-reach areas – weaken thin metal panels and needs immediate e-coating to prevent the onset of surface corrosion.’ Like shot or sand blasting, soda blasting offers a non-corrosive solution and works by firing a substrate of sodium bicarbonate onto the metalwork, effectively stripping paint and blasting away areas of corrosion. It works in a much less aggressive way than the other two methods, which, if you’re not careful, can stretch and warp panels because of heat build-up.
‘When the ’shell returned from blasting, I was actually quite shocked at just how bad it was,’ Steve remembers. ‘The rust had penetrated deep into the bodywork and the deeper we delved the more issues we found. There really wasn’t much left.’
Although concentrated at the lower levels, there was evidence of rot on almost every single panel. Both rear wheelarches had dissolved, patched repairs to the sills were uncovered, and there was extensive damage at base of the A-pillars and along the top of the rear quarters – the nearside was particularly bad with numerous holes along the swage line. The scuttle panel, bulkhead and battery tray were also corroded beyond repair and both driver and passenger footwells had holes the size of Steve’s head. ‘It was definitely more than I’d bargained for, but nothing I hadn’t encountered numerous times before.’
Bodywork
As expected from his initial assessment, it was only the roof skin, the bulkhead and the front inner wings that were deemed suitable for reuse, with the rest of the body requiring reconstruction using genuine Ford new old stock parts.
‘We sourced a lot of the genuine Ford panels from Cologne in Germany, because this is where the Capri was assembled from 1970 and there are still parts shops that hold stock for them over there,’ Steve says. ‘Any panels we couldn’t get as genuine OEM items we bought from Ex-Pressed Steel Panels in Keighley, the leading suppliers of new blueprinted panels in the UK.’
With the new panels ready and waiting, Steve began the labour-intensive process of removing the damaged ones by drilling out the original spot welds. ‘We try to replace the panels whole where possible and limit the use of patching sections,’ Steve explains. ‘This produces the very best result not only in terms of the final aesthetic, but also for structural strength and future corrosion resistance.’
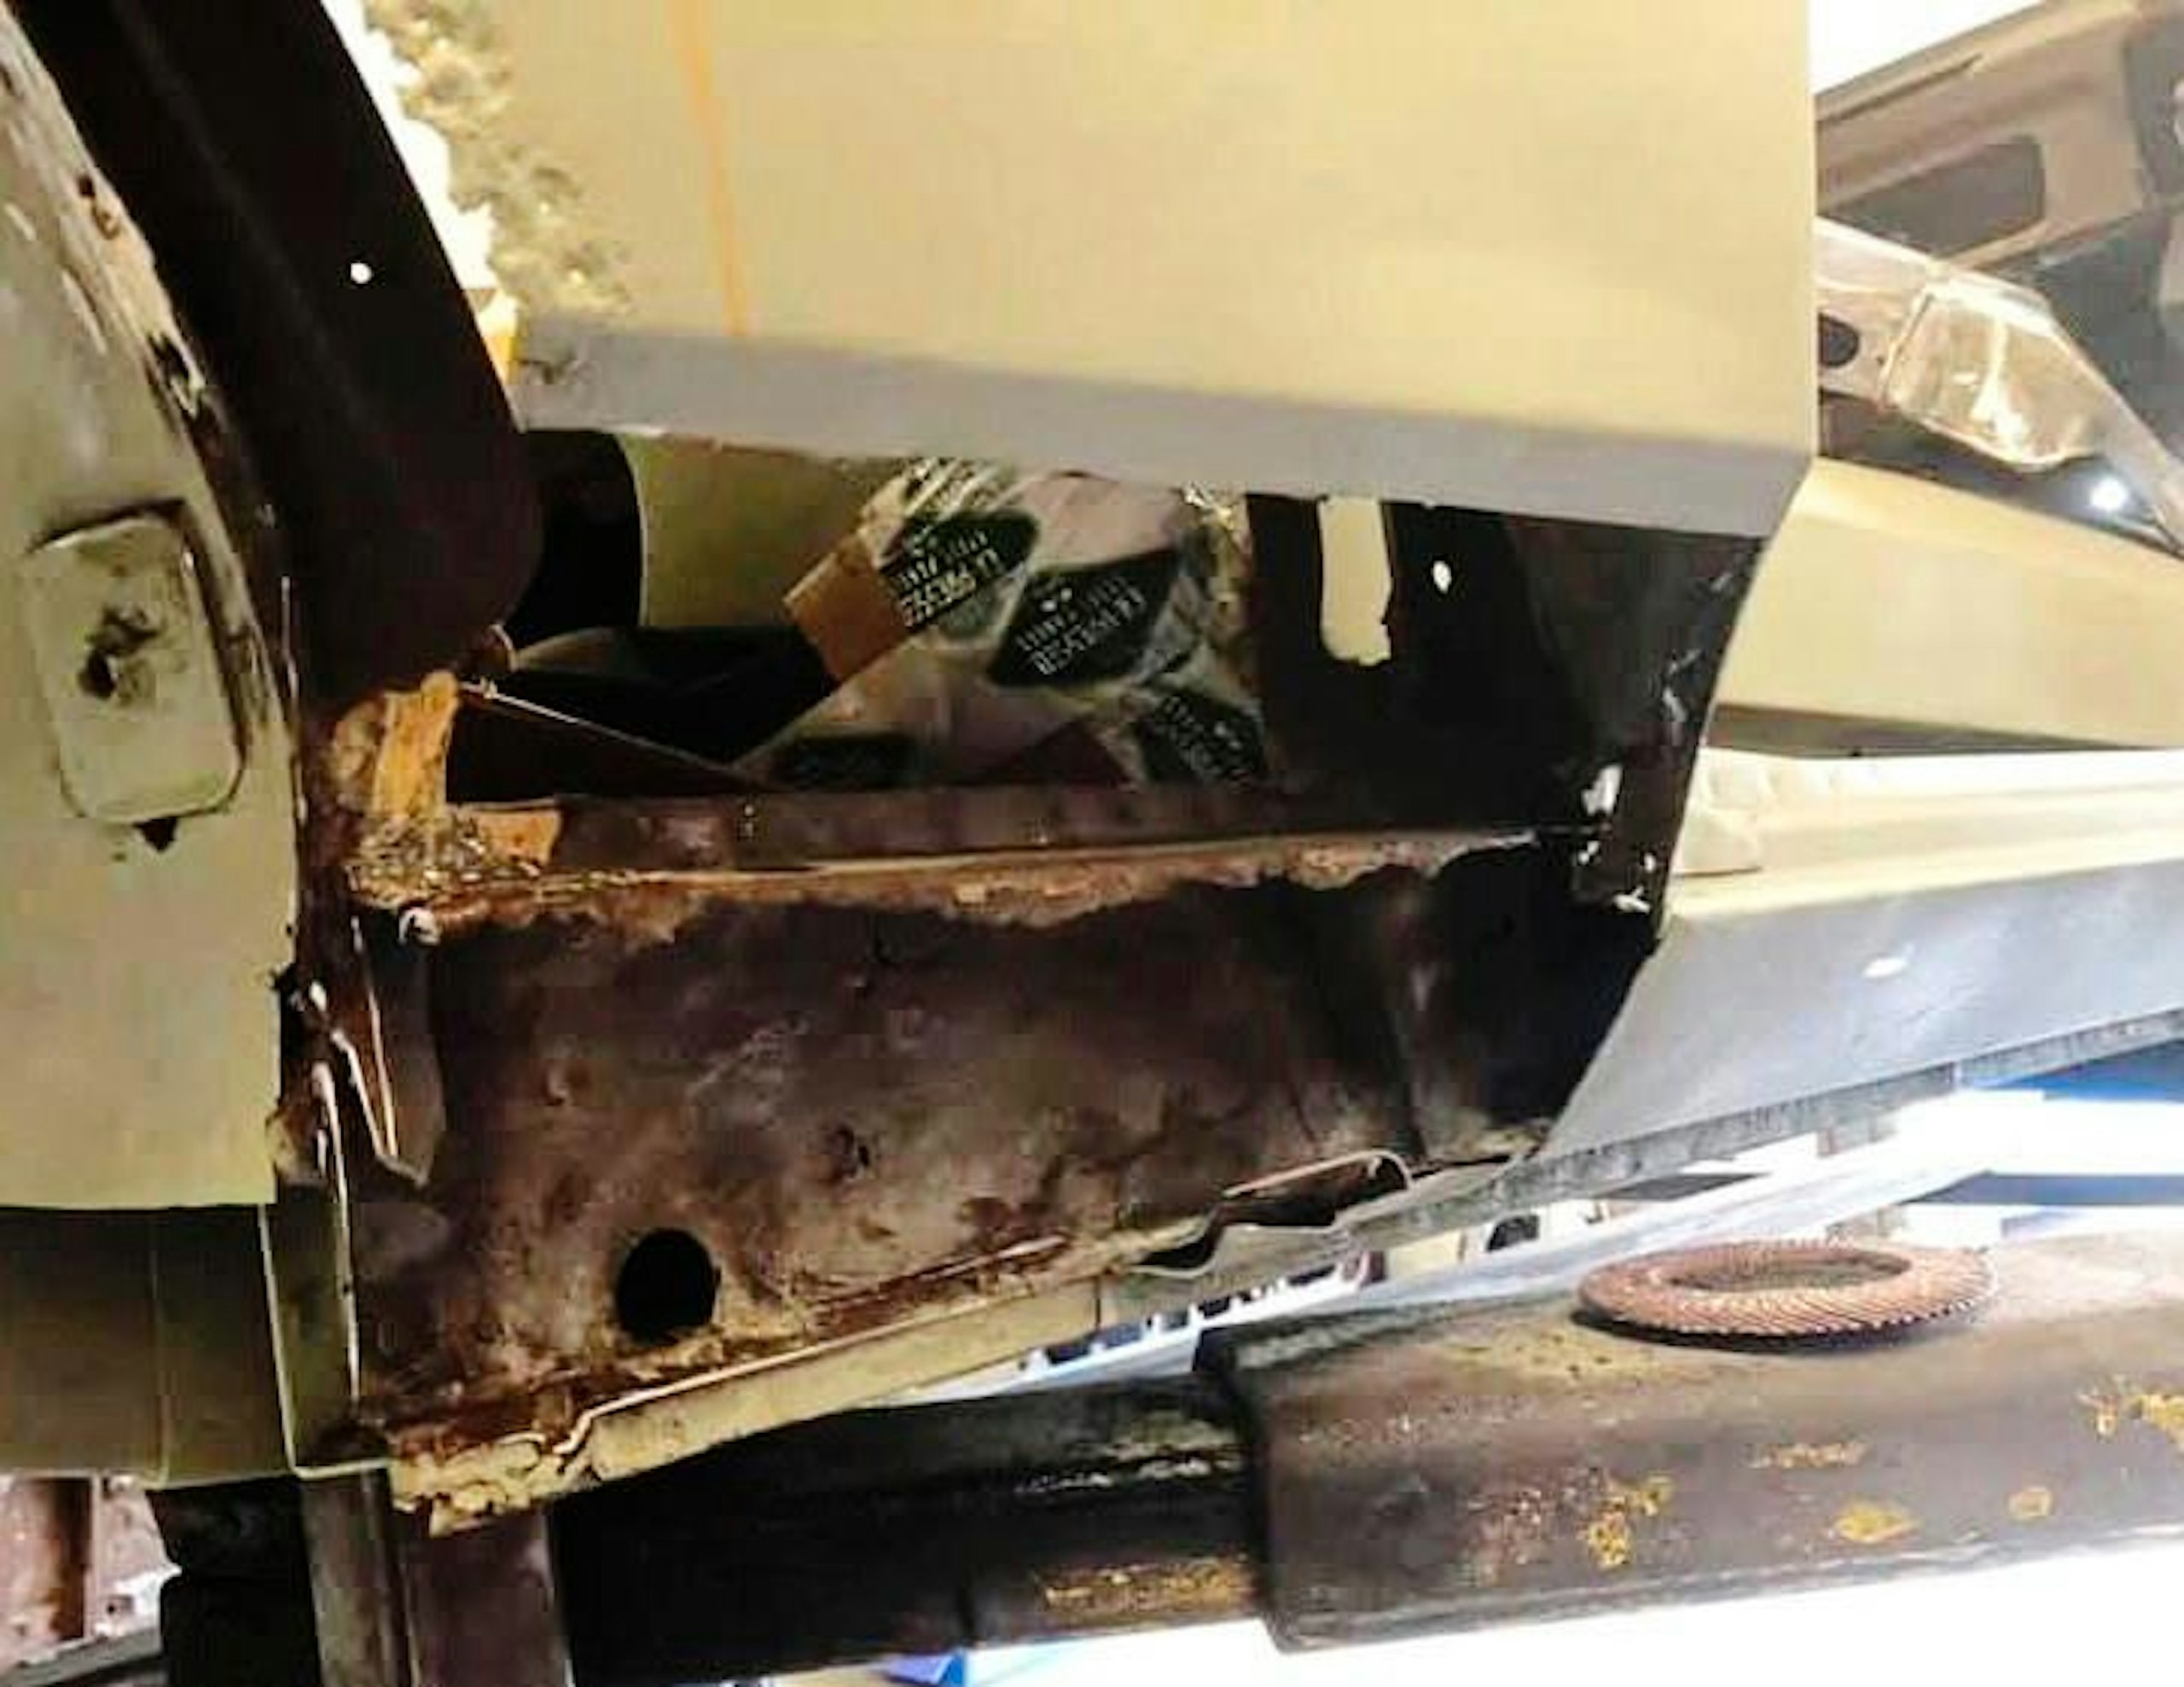
Bottom half of body suffered most corrosion
When it comes to his choice of welding apparatus, Steve uses whichever is most suited to the job in hand. ‘I tend to use metal inert gas (MIG) welding on areas that are out of sight or require excellent structural strength such as floorpans, chassis rails and sills,’ he says. ‘It’s a fast and efficient system that provides concentrated heat for superior penetration of the panels but is less precise than tungsten inert gas (TIG) welding. The bulkier joins with
MIG welding are also not as visually appealing. For this reason, if the welds are in a places where they will be seen, such as a stainless-steel exhaust system, or require lower heat because they’re made from thinner metal, then TIG is ideal, even if it’s more time consuming and requires greater skill to complete.’ Steve is keen to point out that, to retain maximum originality, he tries to replicate the welds how they were carried out from the factory, although there are also known weak spots he will strengthen with additional welding to ensure a stronger result.
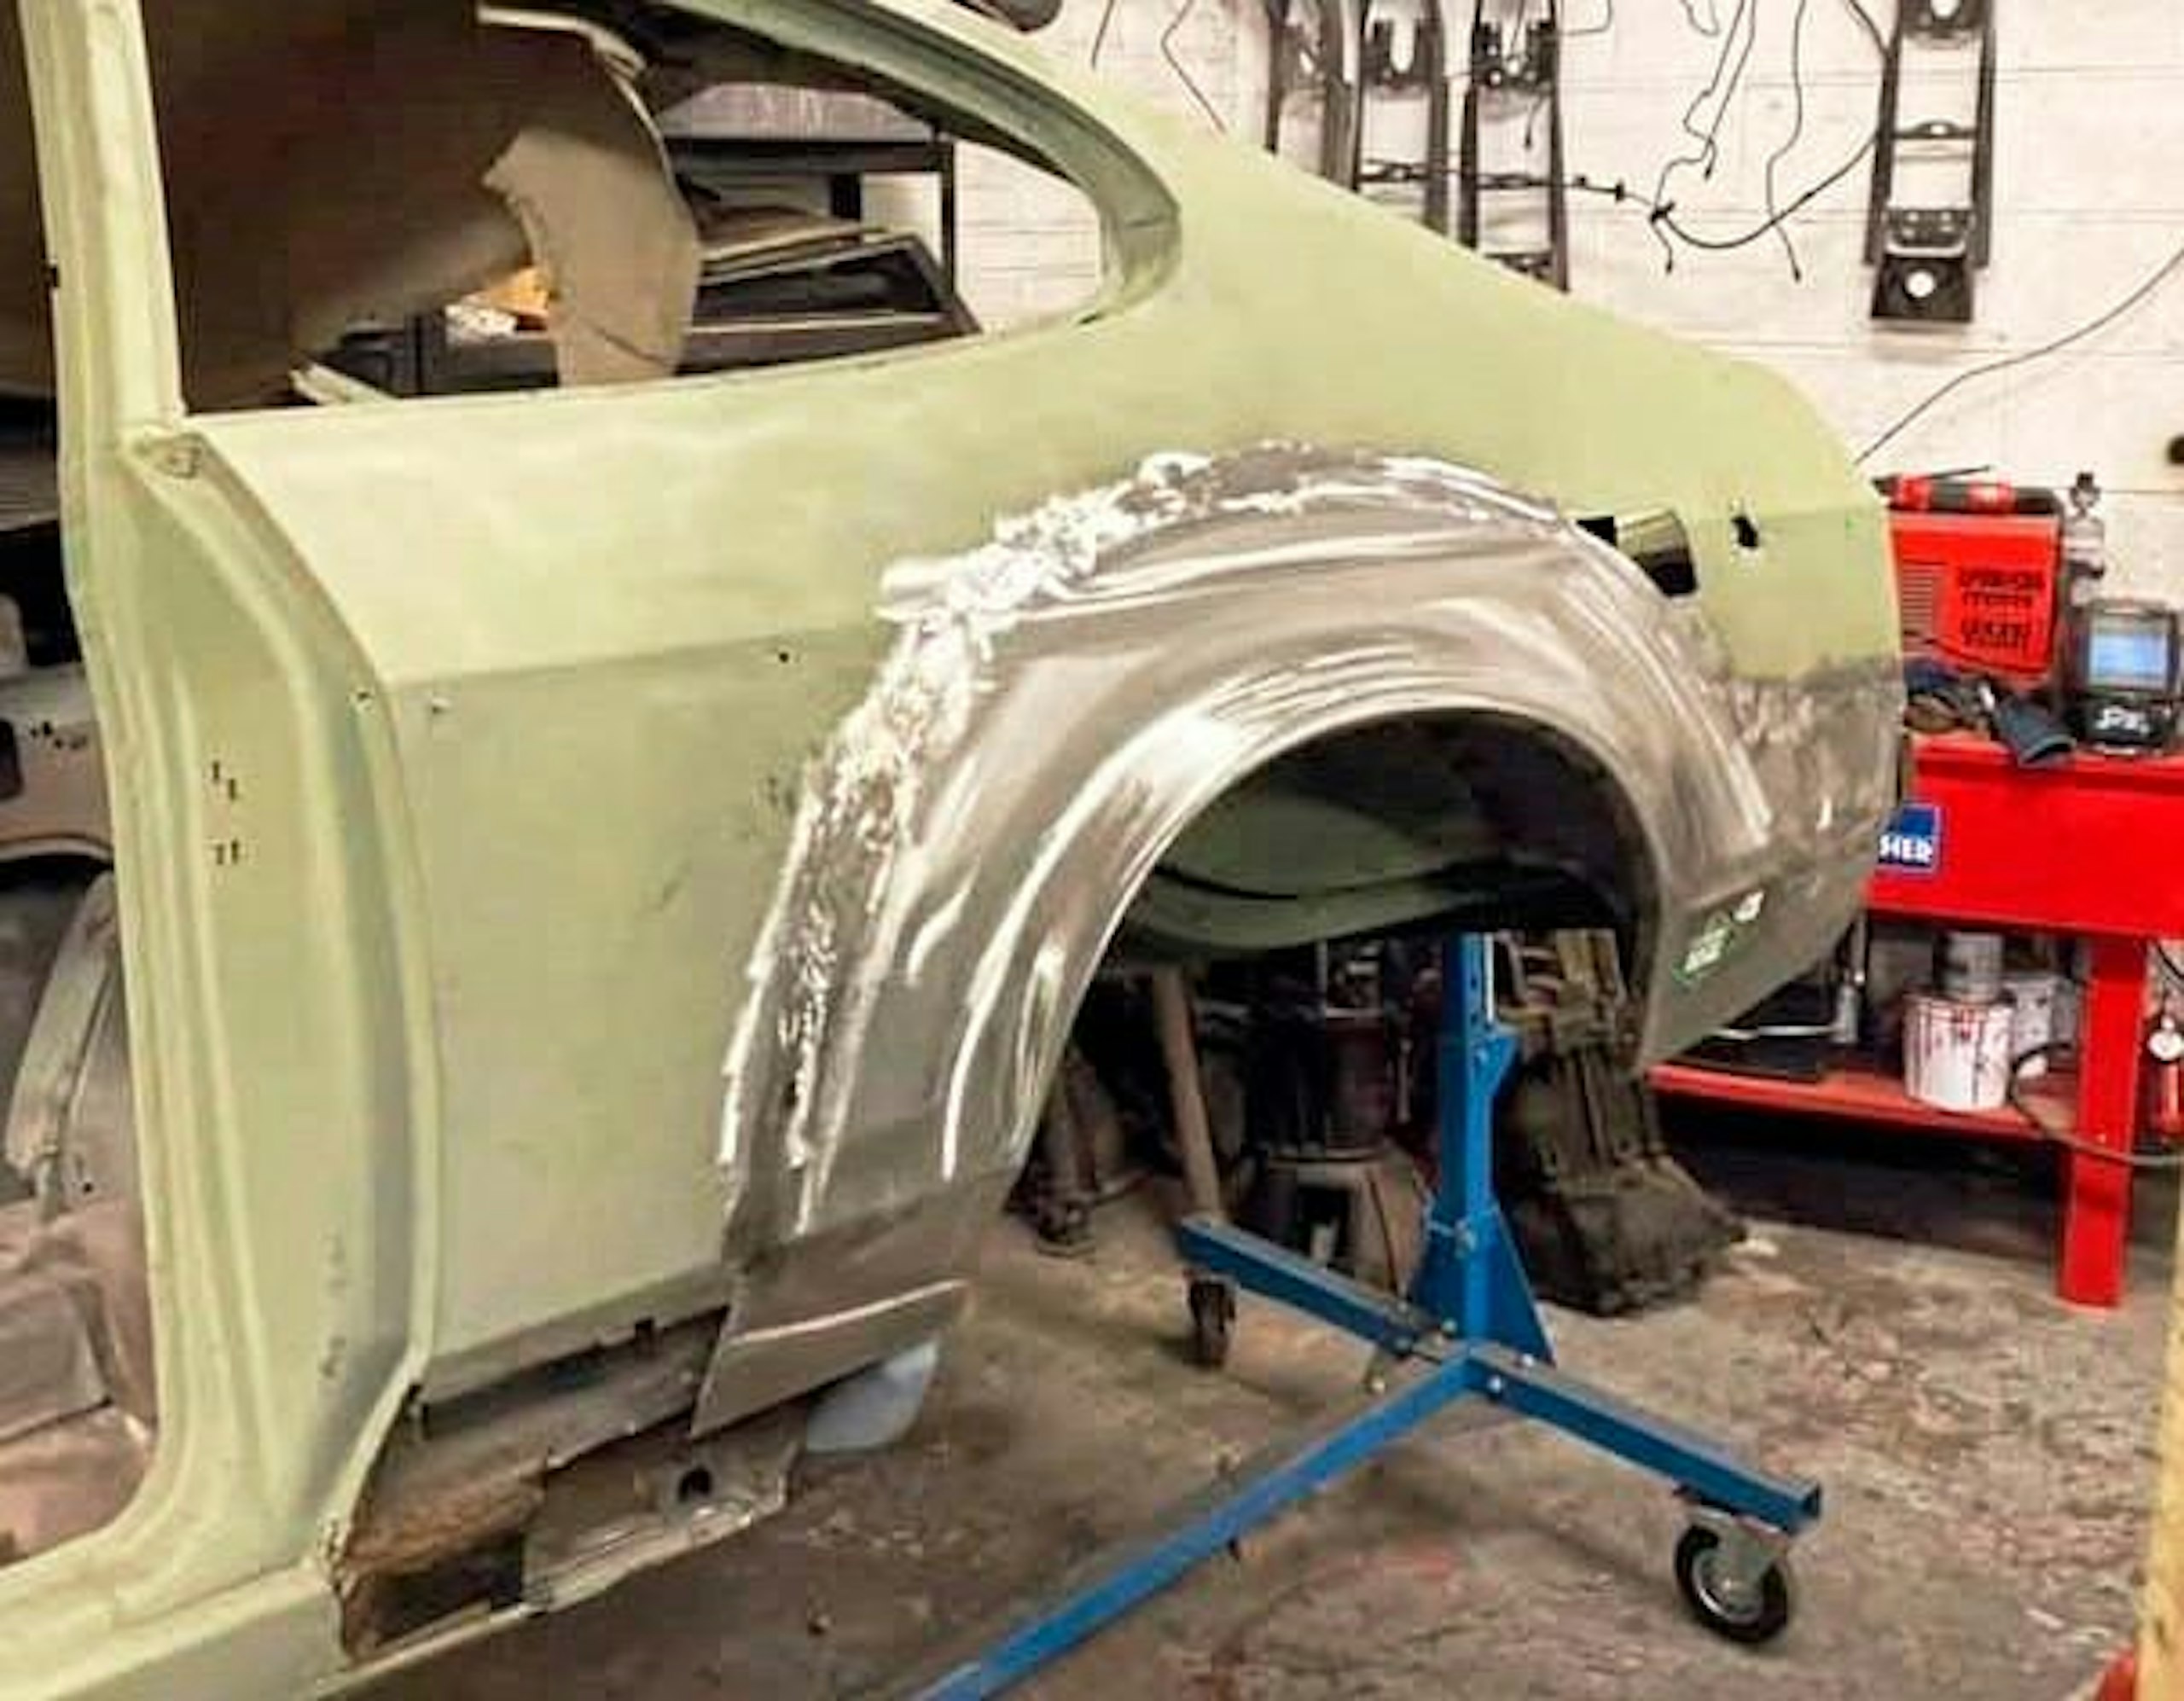
More than 200 hours of welding needed to repair bodywork inadequacies
‘With the ’shell mounted securely on the jig, panels can be removed without altering the car’s dimensions,’ Steve says. ‘This is crucial to ensuring everything remains square and is double-checked at regular intervals by comparing dimensions and structural positions to a digital data sheet, which lists all the measurements as they should be from the factory.’
This belt and braces approach not only safeguards critical measurements for items such as suspension pick-up points, door shuts and engine mounts, but also means the car’s finished panel gaps remain consistent across the bodyshell.
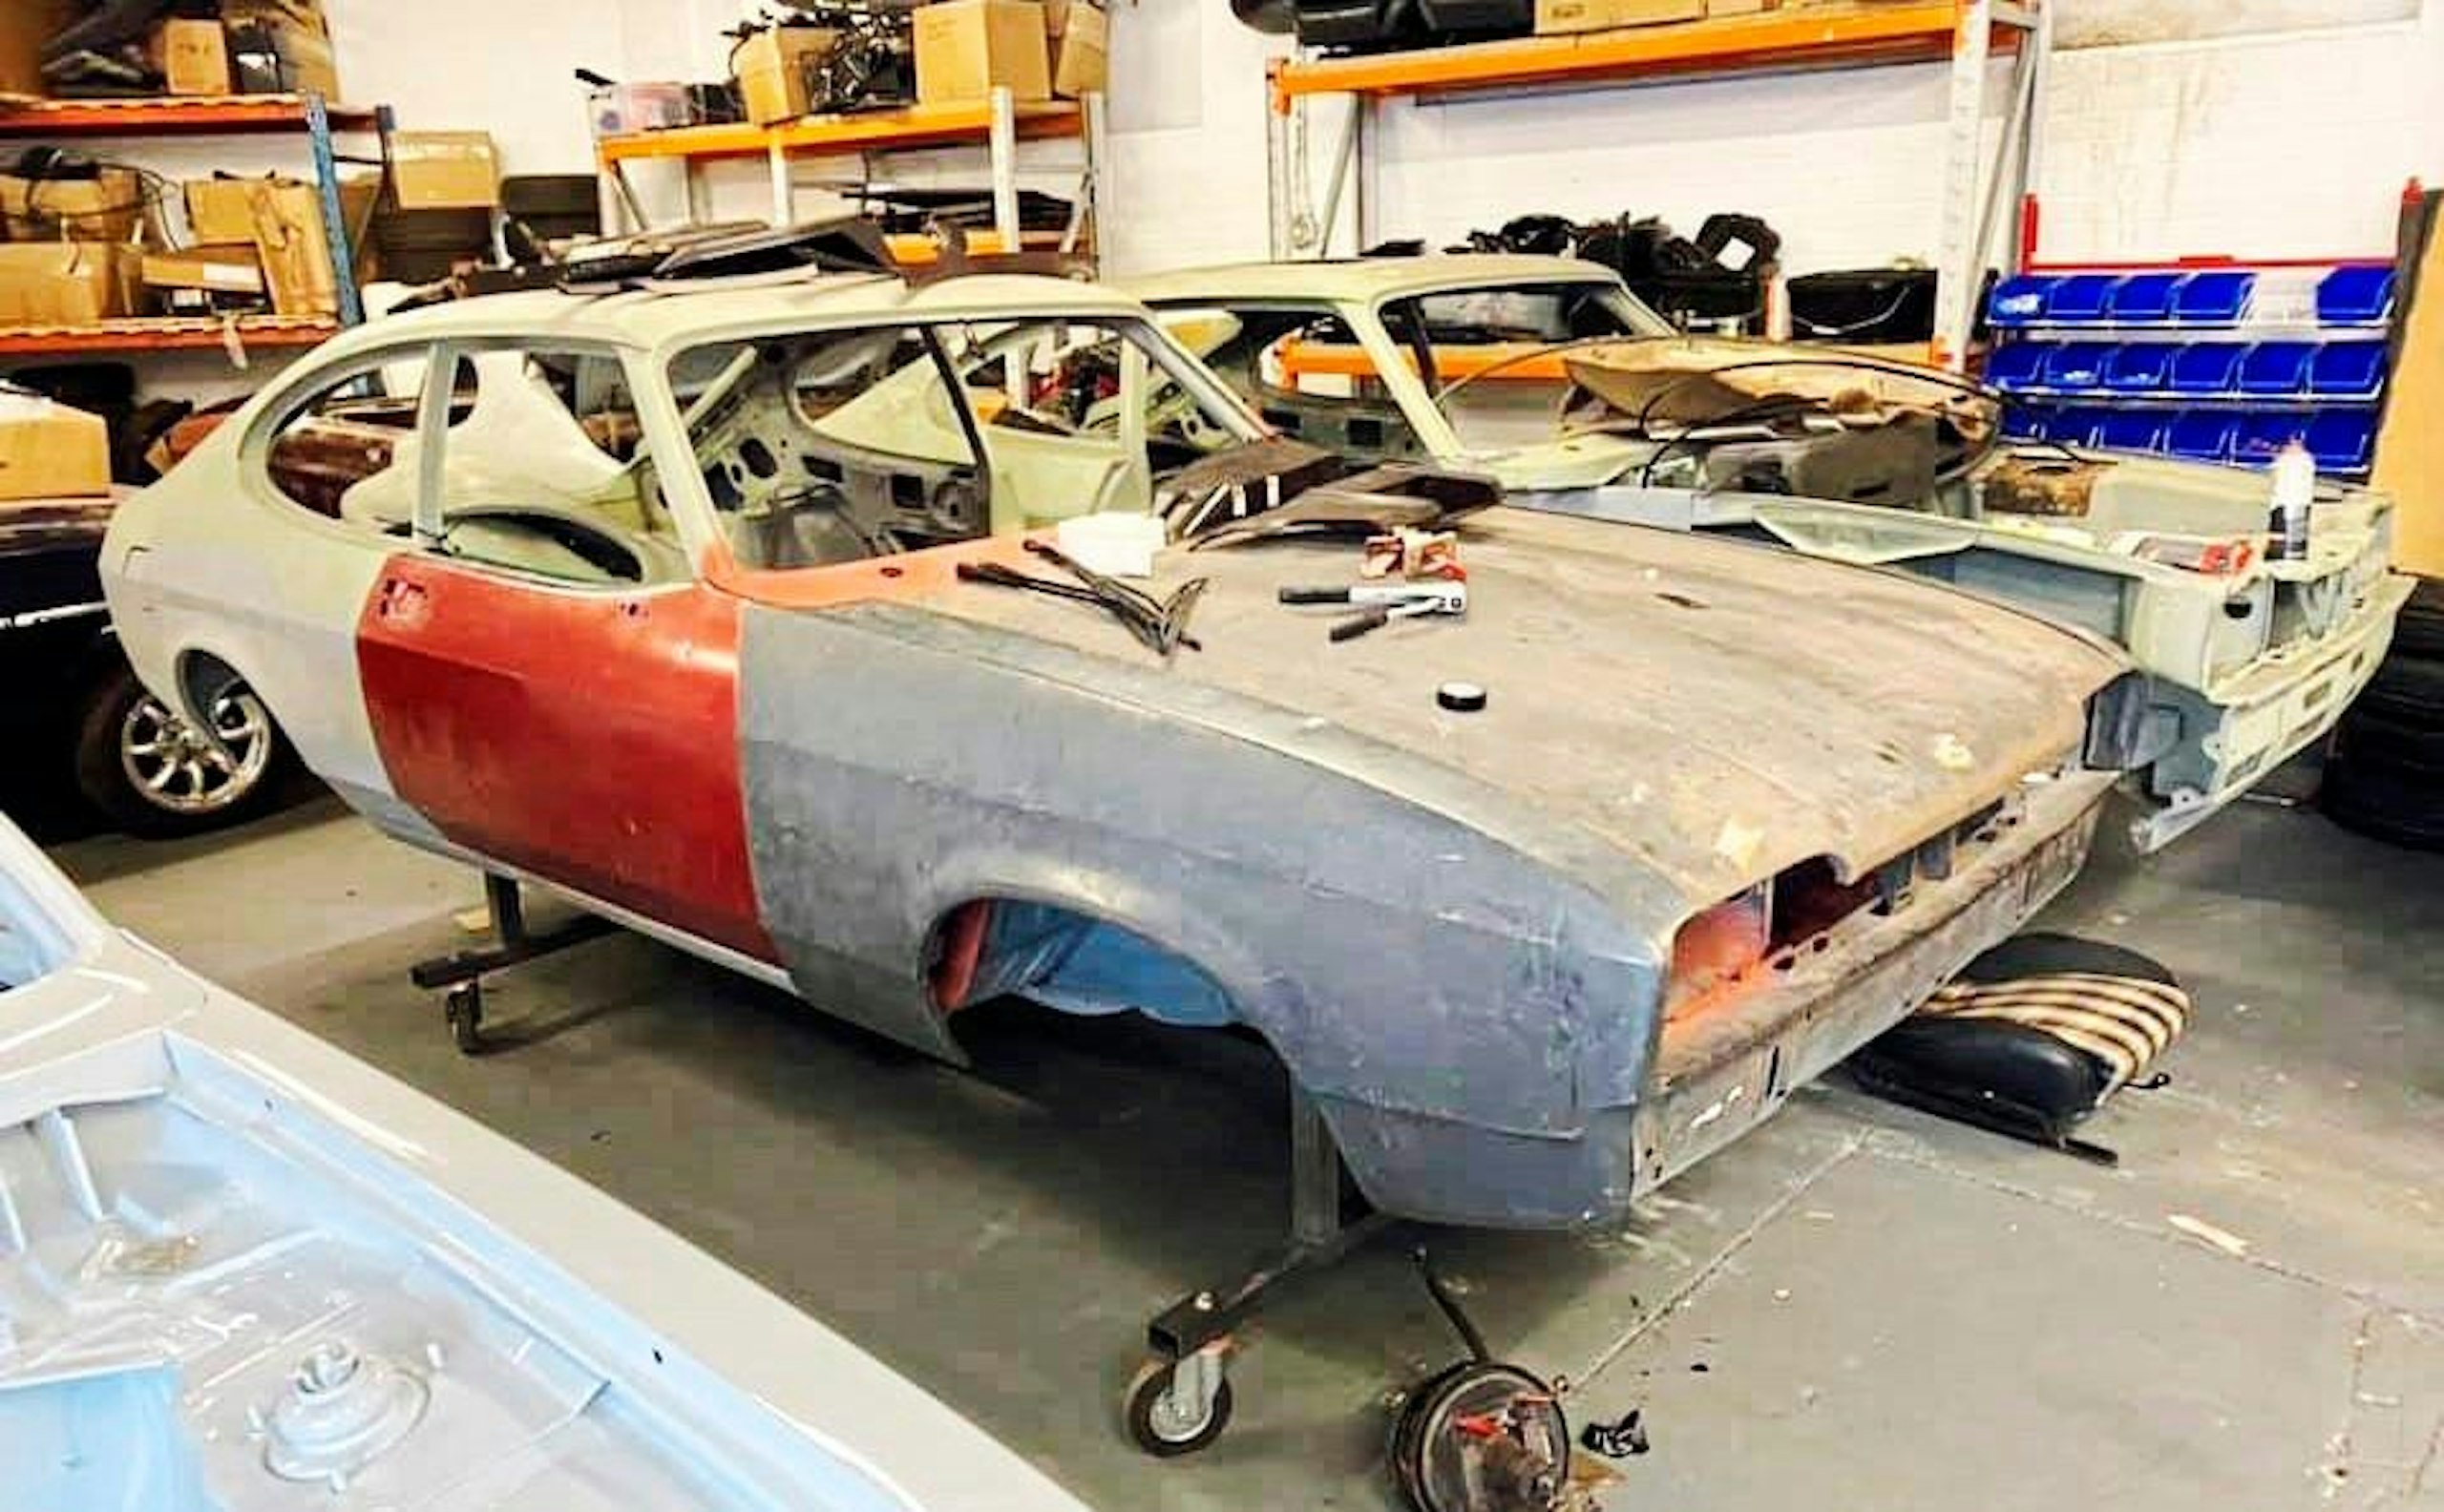
Almost every body panel damaged; Ford in Cologne was a source of new parts
Starting with the new inner wing panels and front footwell sections, panel by panel, the Capri’s perforated body was replaced with new parts, welded into place before being coated in Novel zinc etch primer. ‘When working with fresh metal, we have to coat the new panels in etch primer to stop the onset of corrosion prior to the cars going to the paint shop,’ Steve says. ‘This is then stripped off before epoxy primer is applied to seal and protect the metal.’
In total, in excess of 200 hours of welding went into making the tired Capri’s bodywork structurally sound and straight once again, and when complete, the whole car was given a coat of etch primer before being sent to Sandall Car Care in Doncaster for painting.
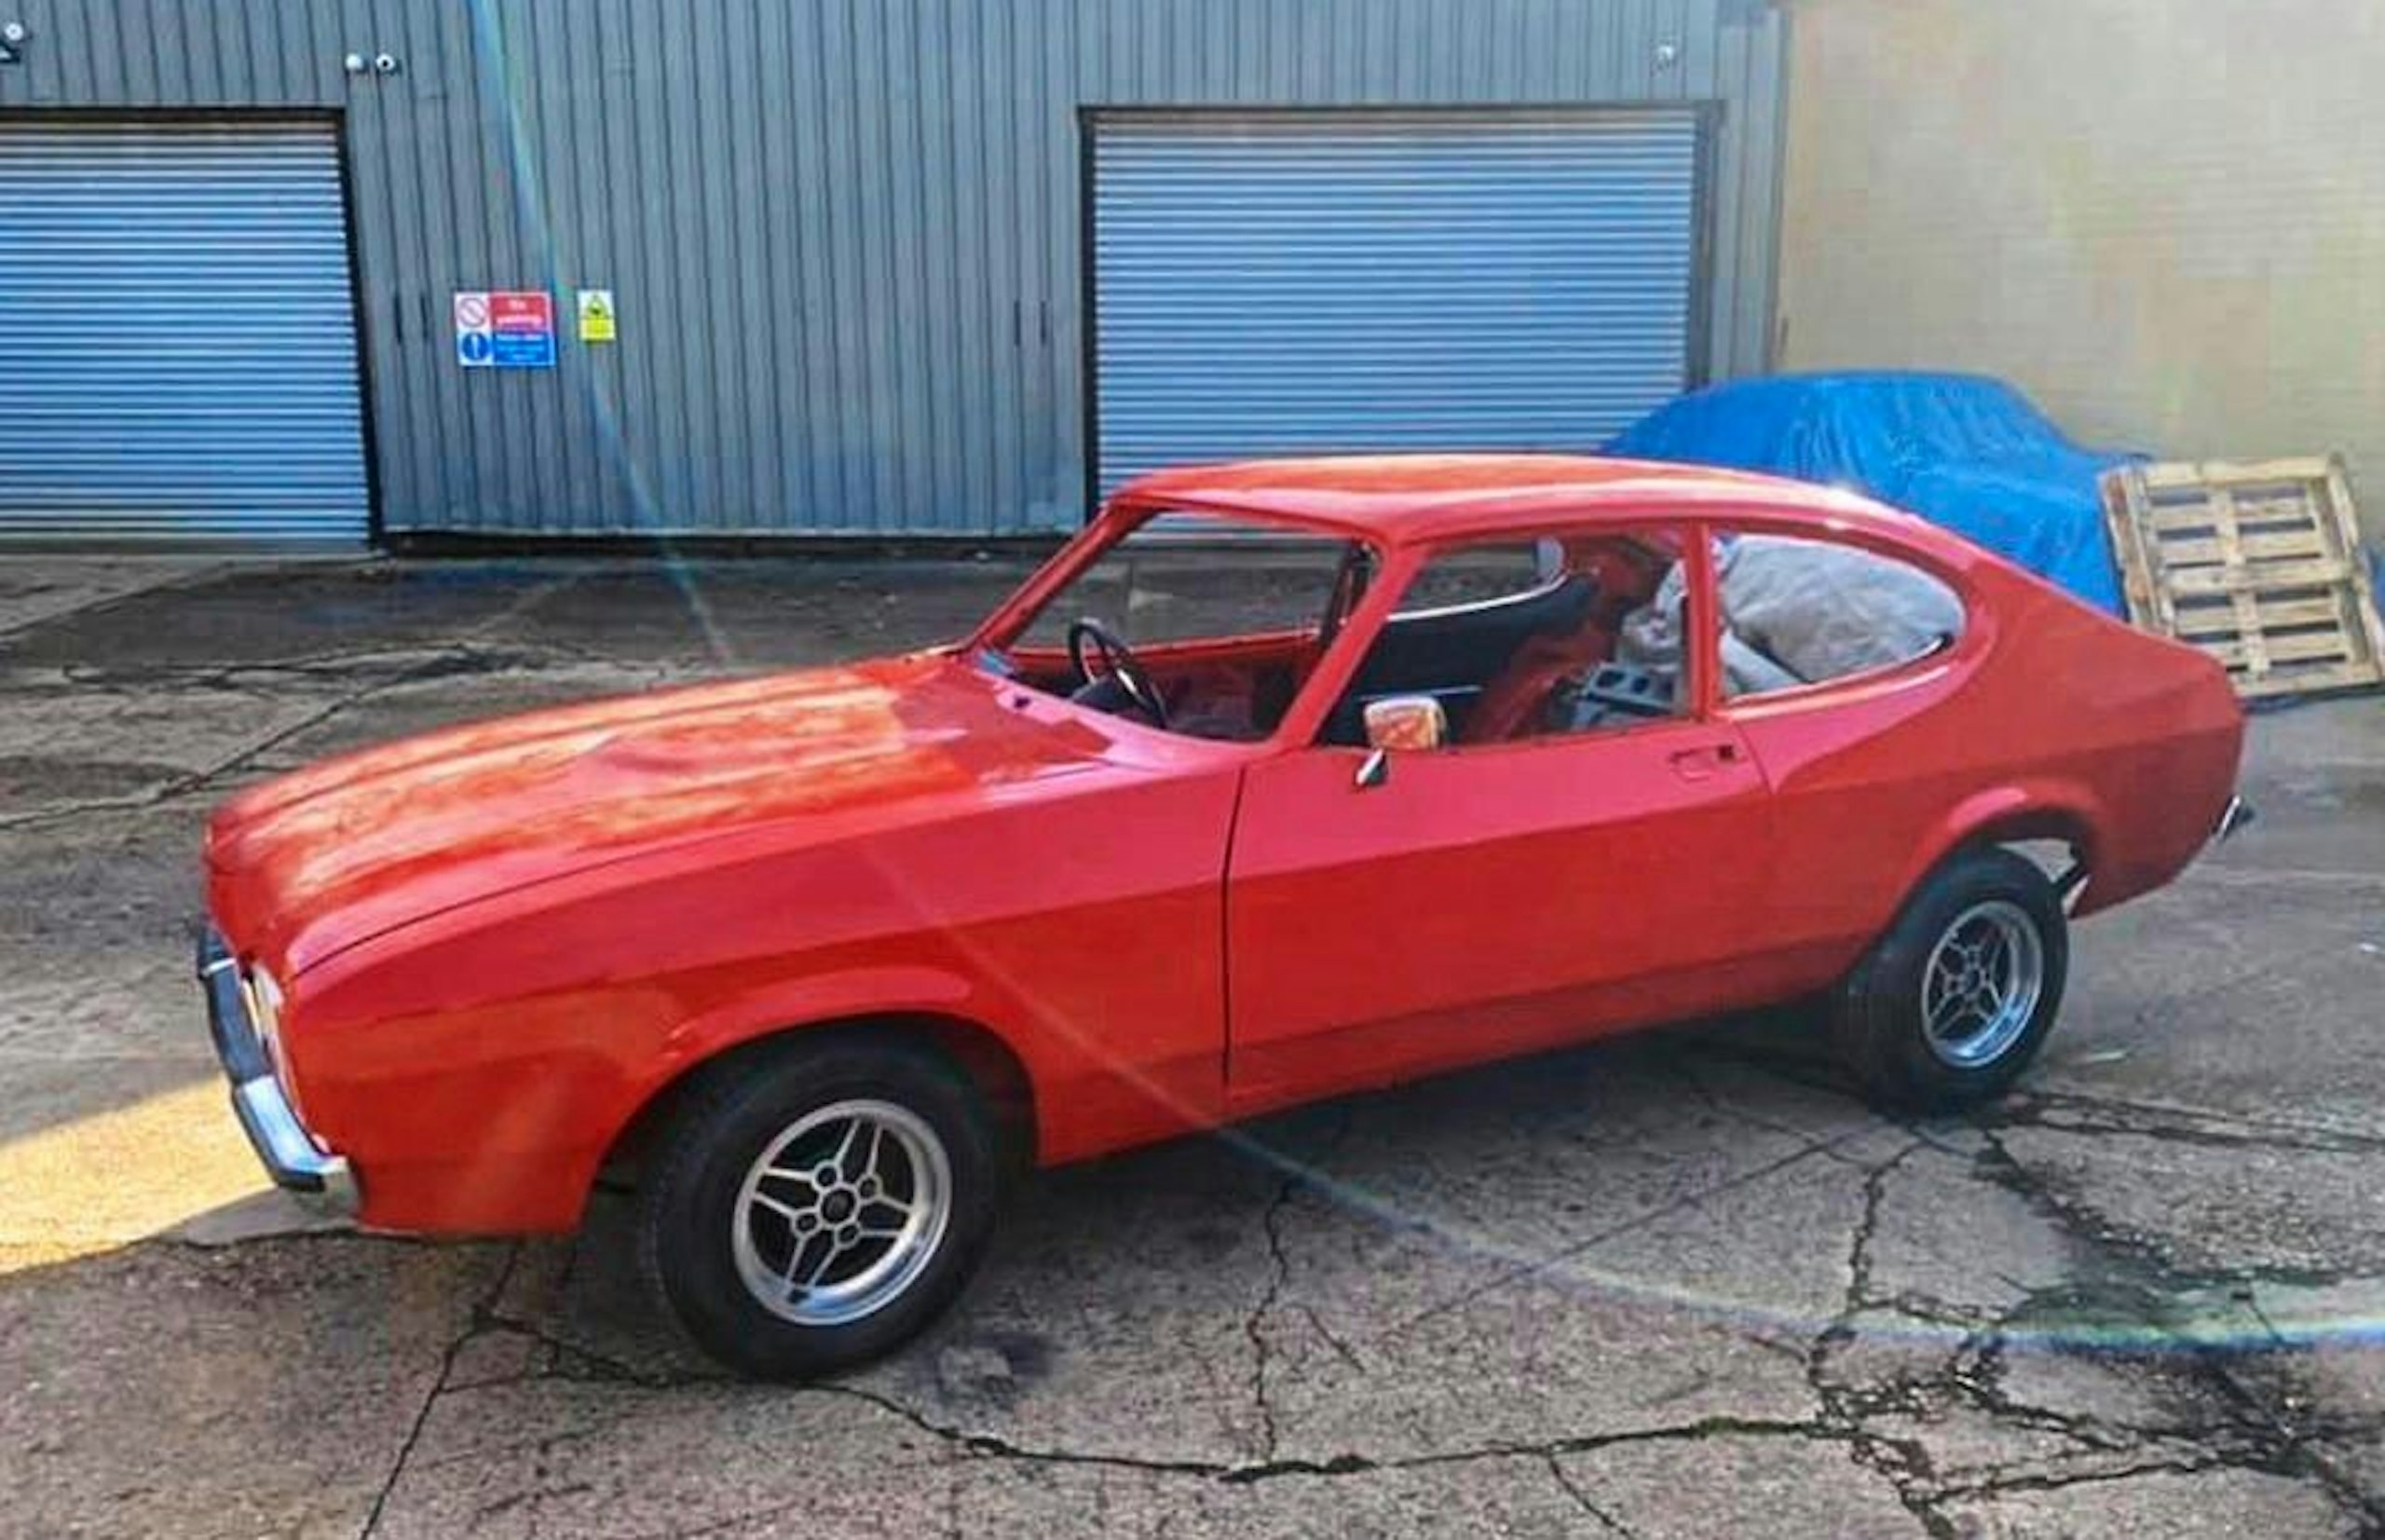
Novol paint system chosen for period correct colours and finishes
Paint
Because the Capri was mostly brand-new panels at this point, it meant there was minimal preparation needed to achieve a good finish with the final topcoat. ‘After carefully removing the etch primer with a DA sander, the body shop sprayed the ’shell in an epoxy primer,’ Steve says. ‘This seals in any raw metal, stopping oxidisation and corrosion, and providing a base for the high-build primer to be applied to. This is a thicker layer that can be block-sanded to achieve a perfectly smooth finish before the Venetian Red topcoat and three coats of clear lacquer are added.’
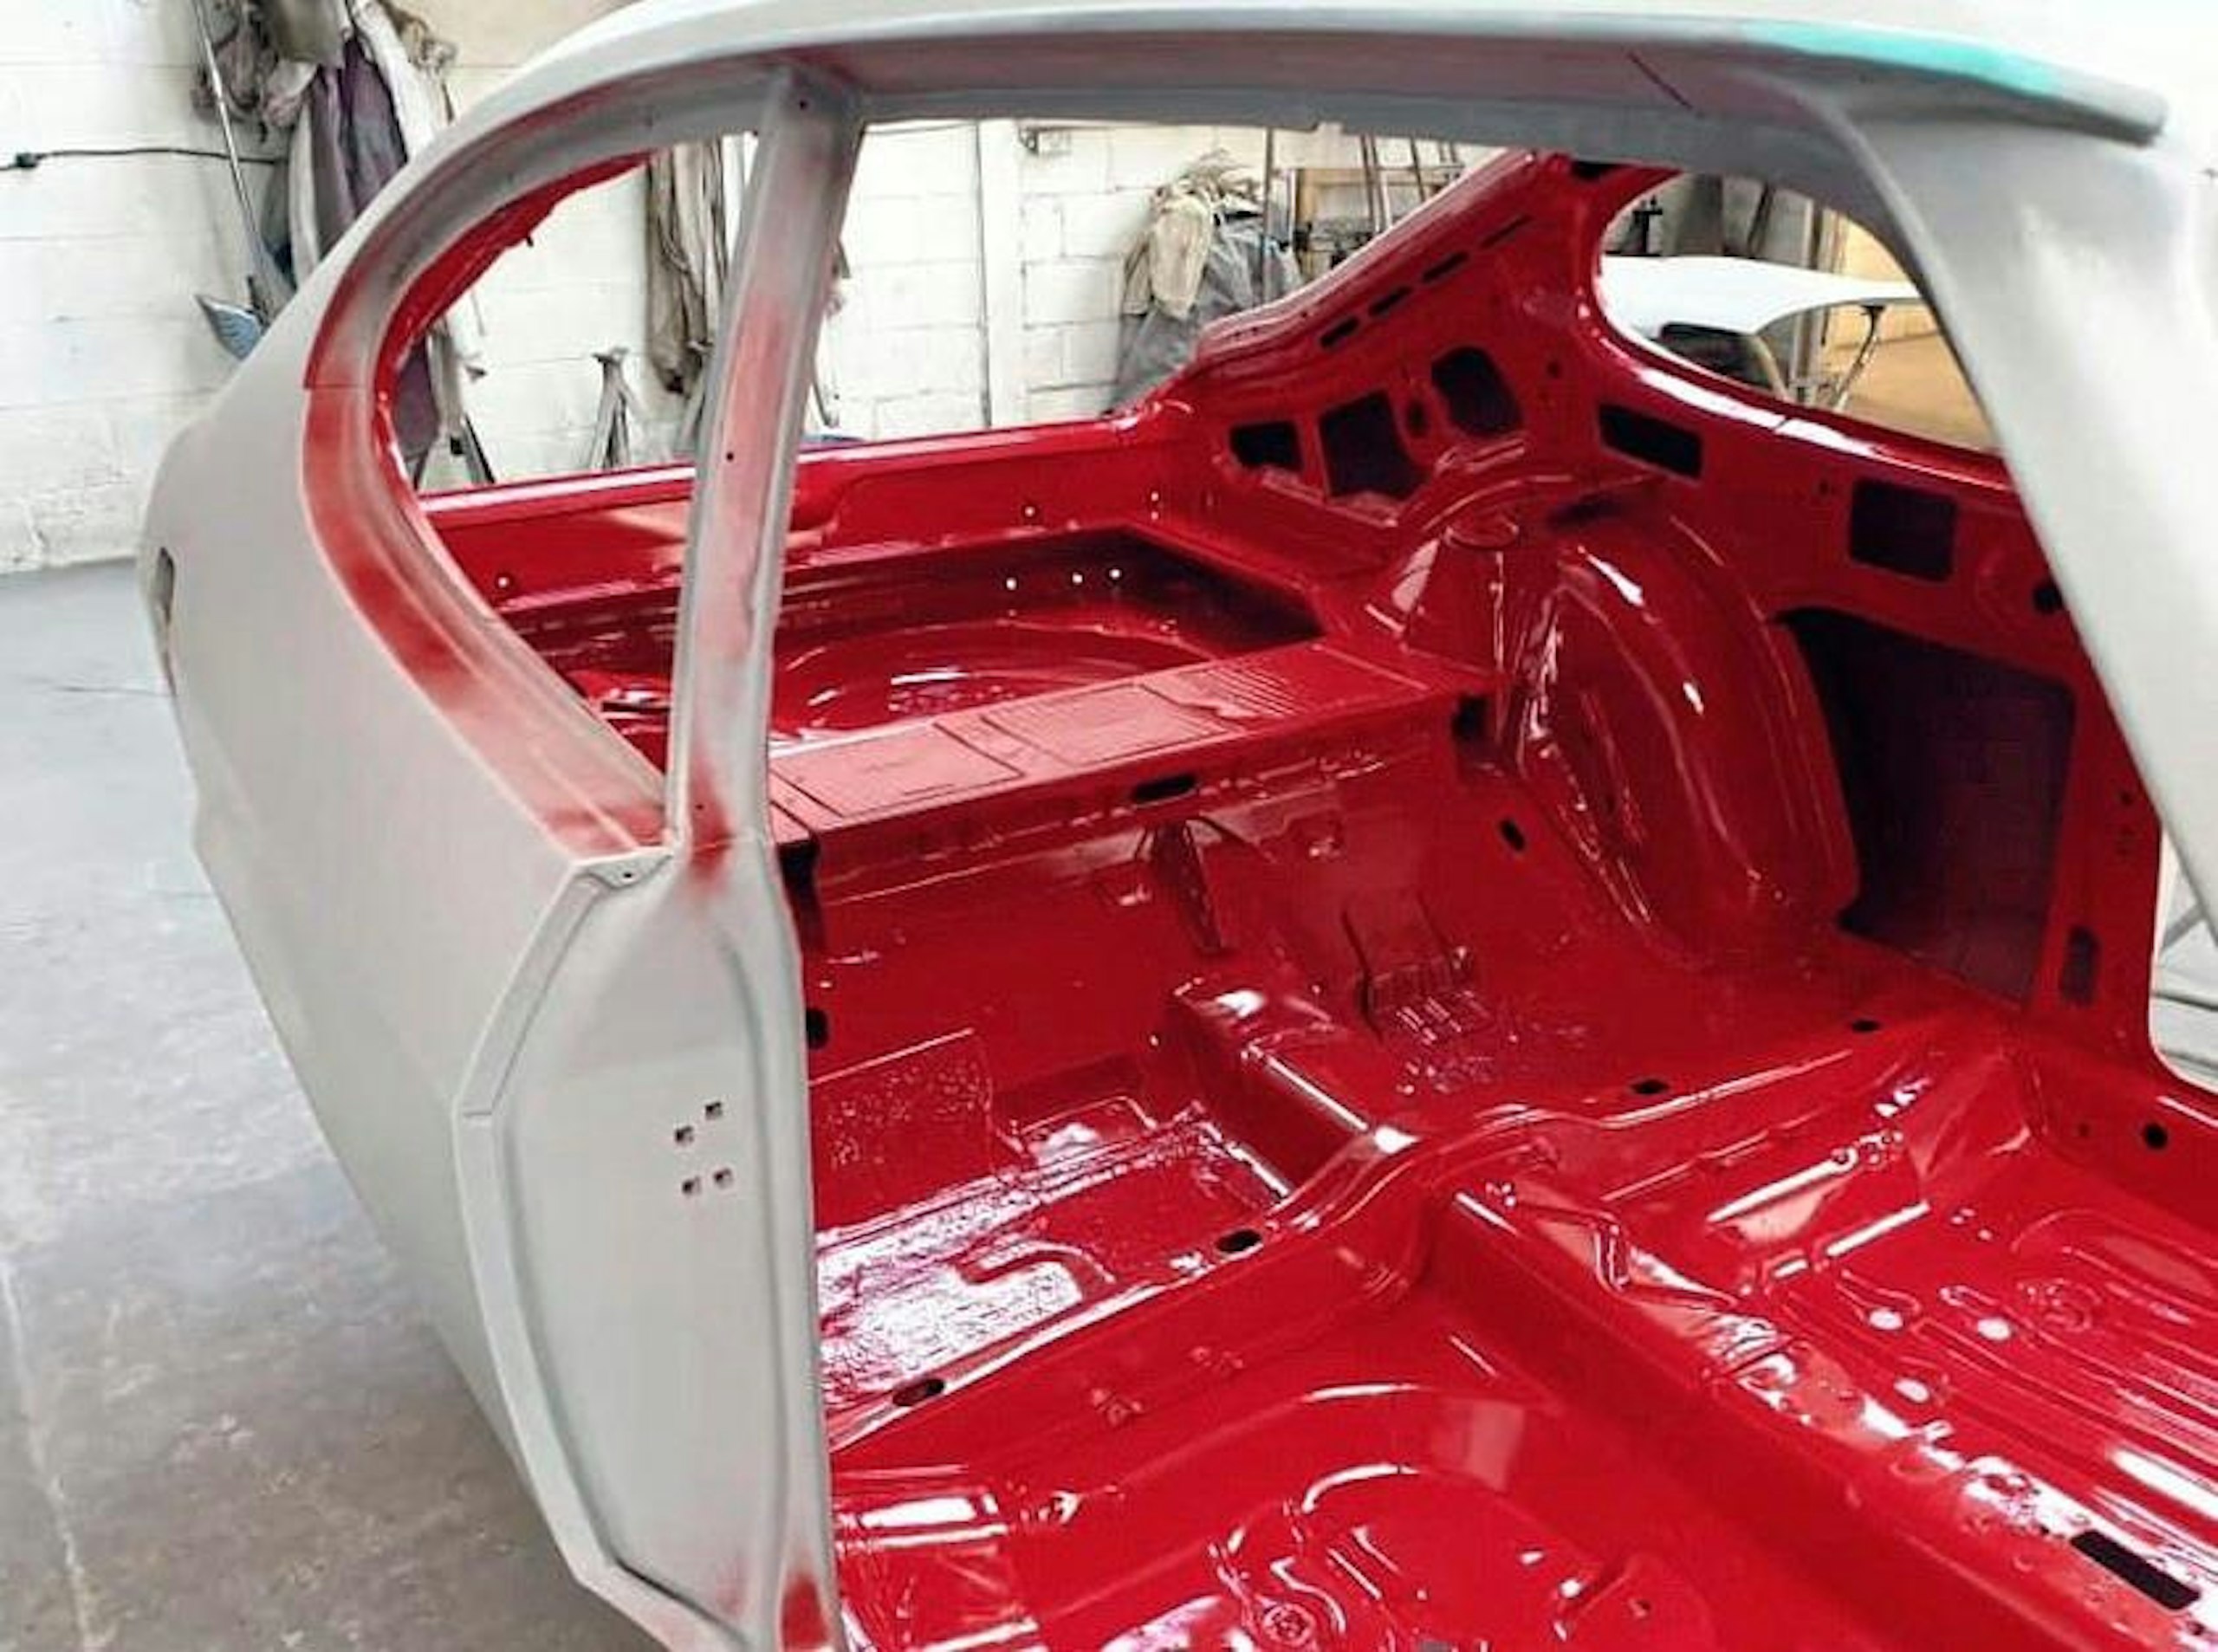
Venetian Red topcoat follows epoxy and high-build primer paint layers
Sandall Car Care use the Novol paint system, specifically formulated for classic vehicle restoration. ‘The secret to getting that deep gloss and correct colour tone is selecting the right paint materials and getting a professional to work their magic,’ Steve says. ‘In our opinion, the Novol range is one of the best, with an excellent range of period correct colours and finishes.’
Steve opted to extend the high-gloss paintwork to the engine bay and underside of the car, so these look just as good as the outer bodywork. The topcoat was machine-polished for around eight hours to give it that glass-like shine, a finish that was protected and enhanced with an application of ceramic coating.
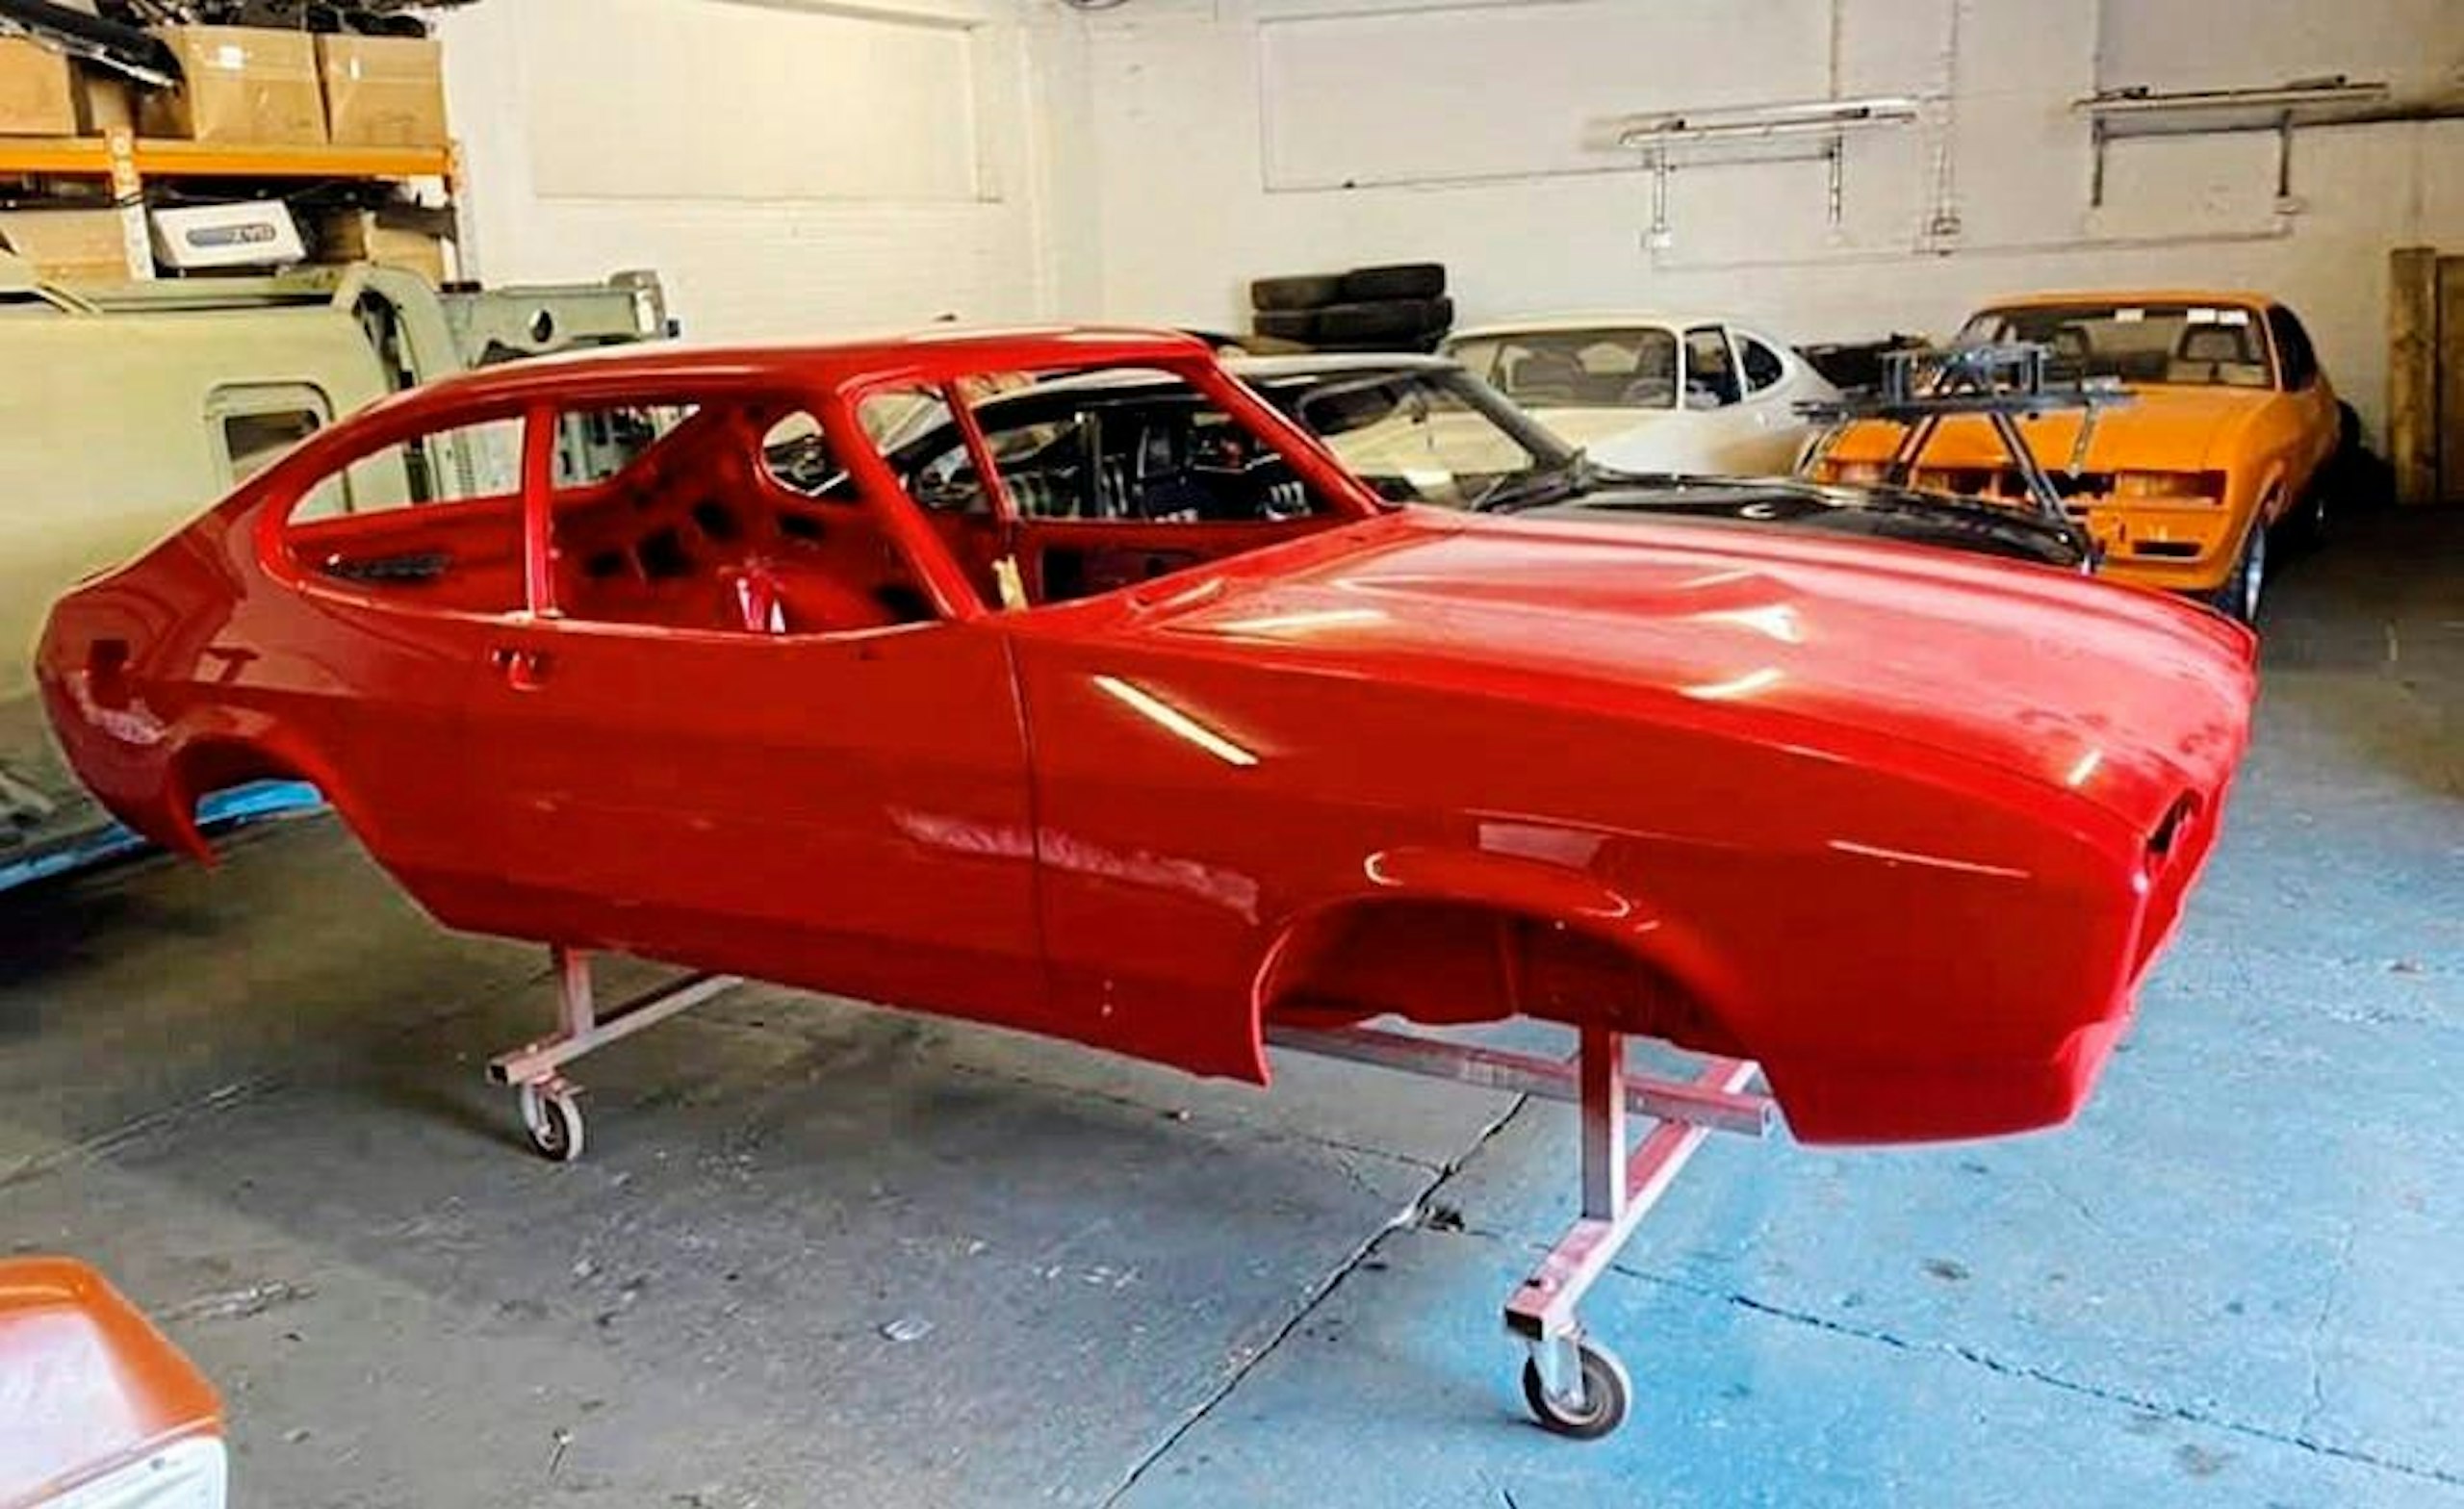
Topcoat and three coats of lacquer, machine polished for eight hours
‘This adds a hard sacrificial layer to the paintwork that, while invisible, adds extra depth, clarity and hydrophobicity to ensure the bodywork looks its best for as long as possible,’ Steve explains. ‘It also makes cleaning easier and can also protect the finish from environmental contaminants and minor abrasions.’
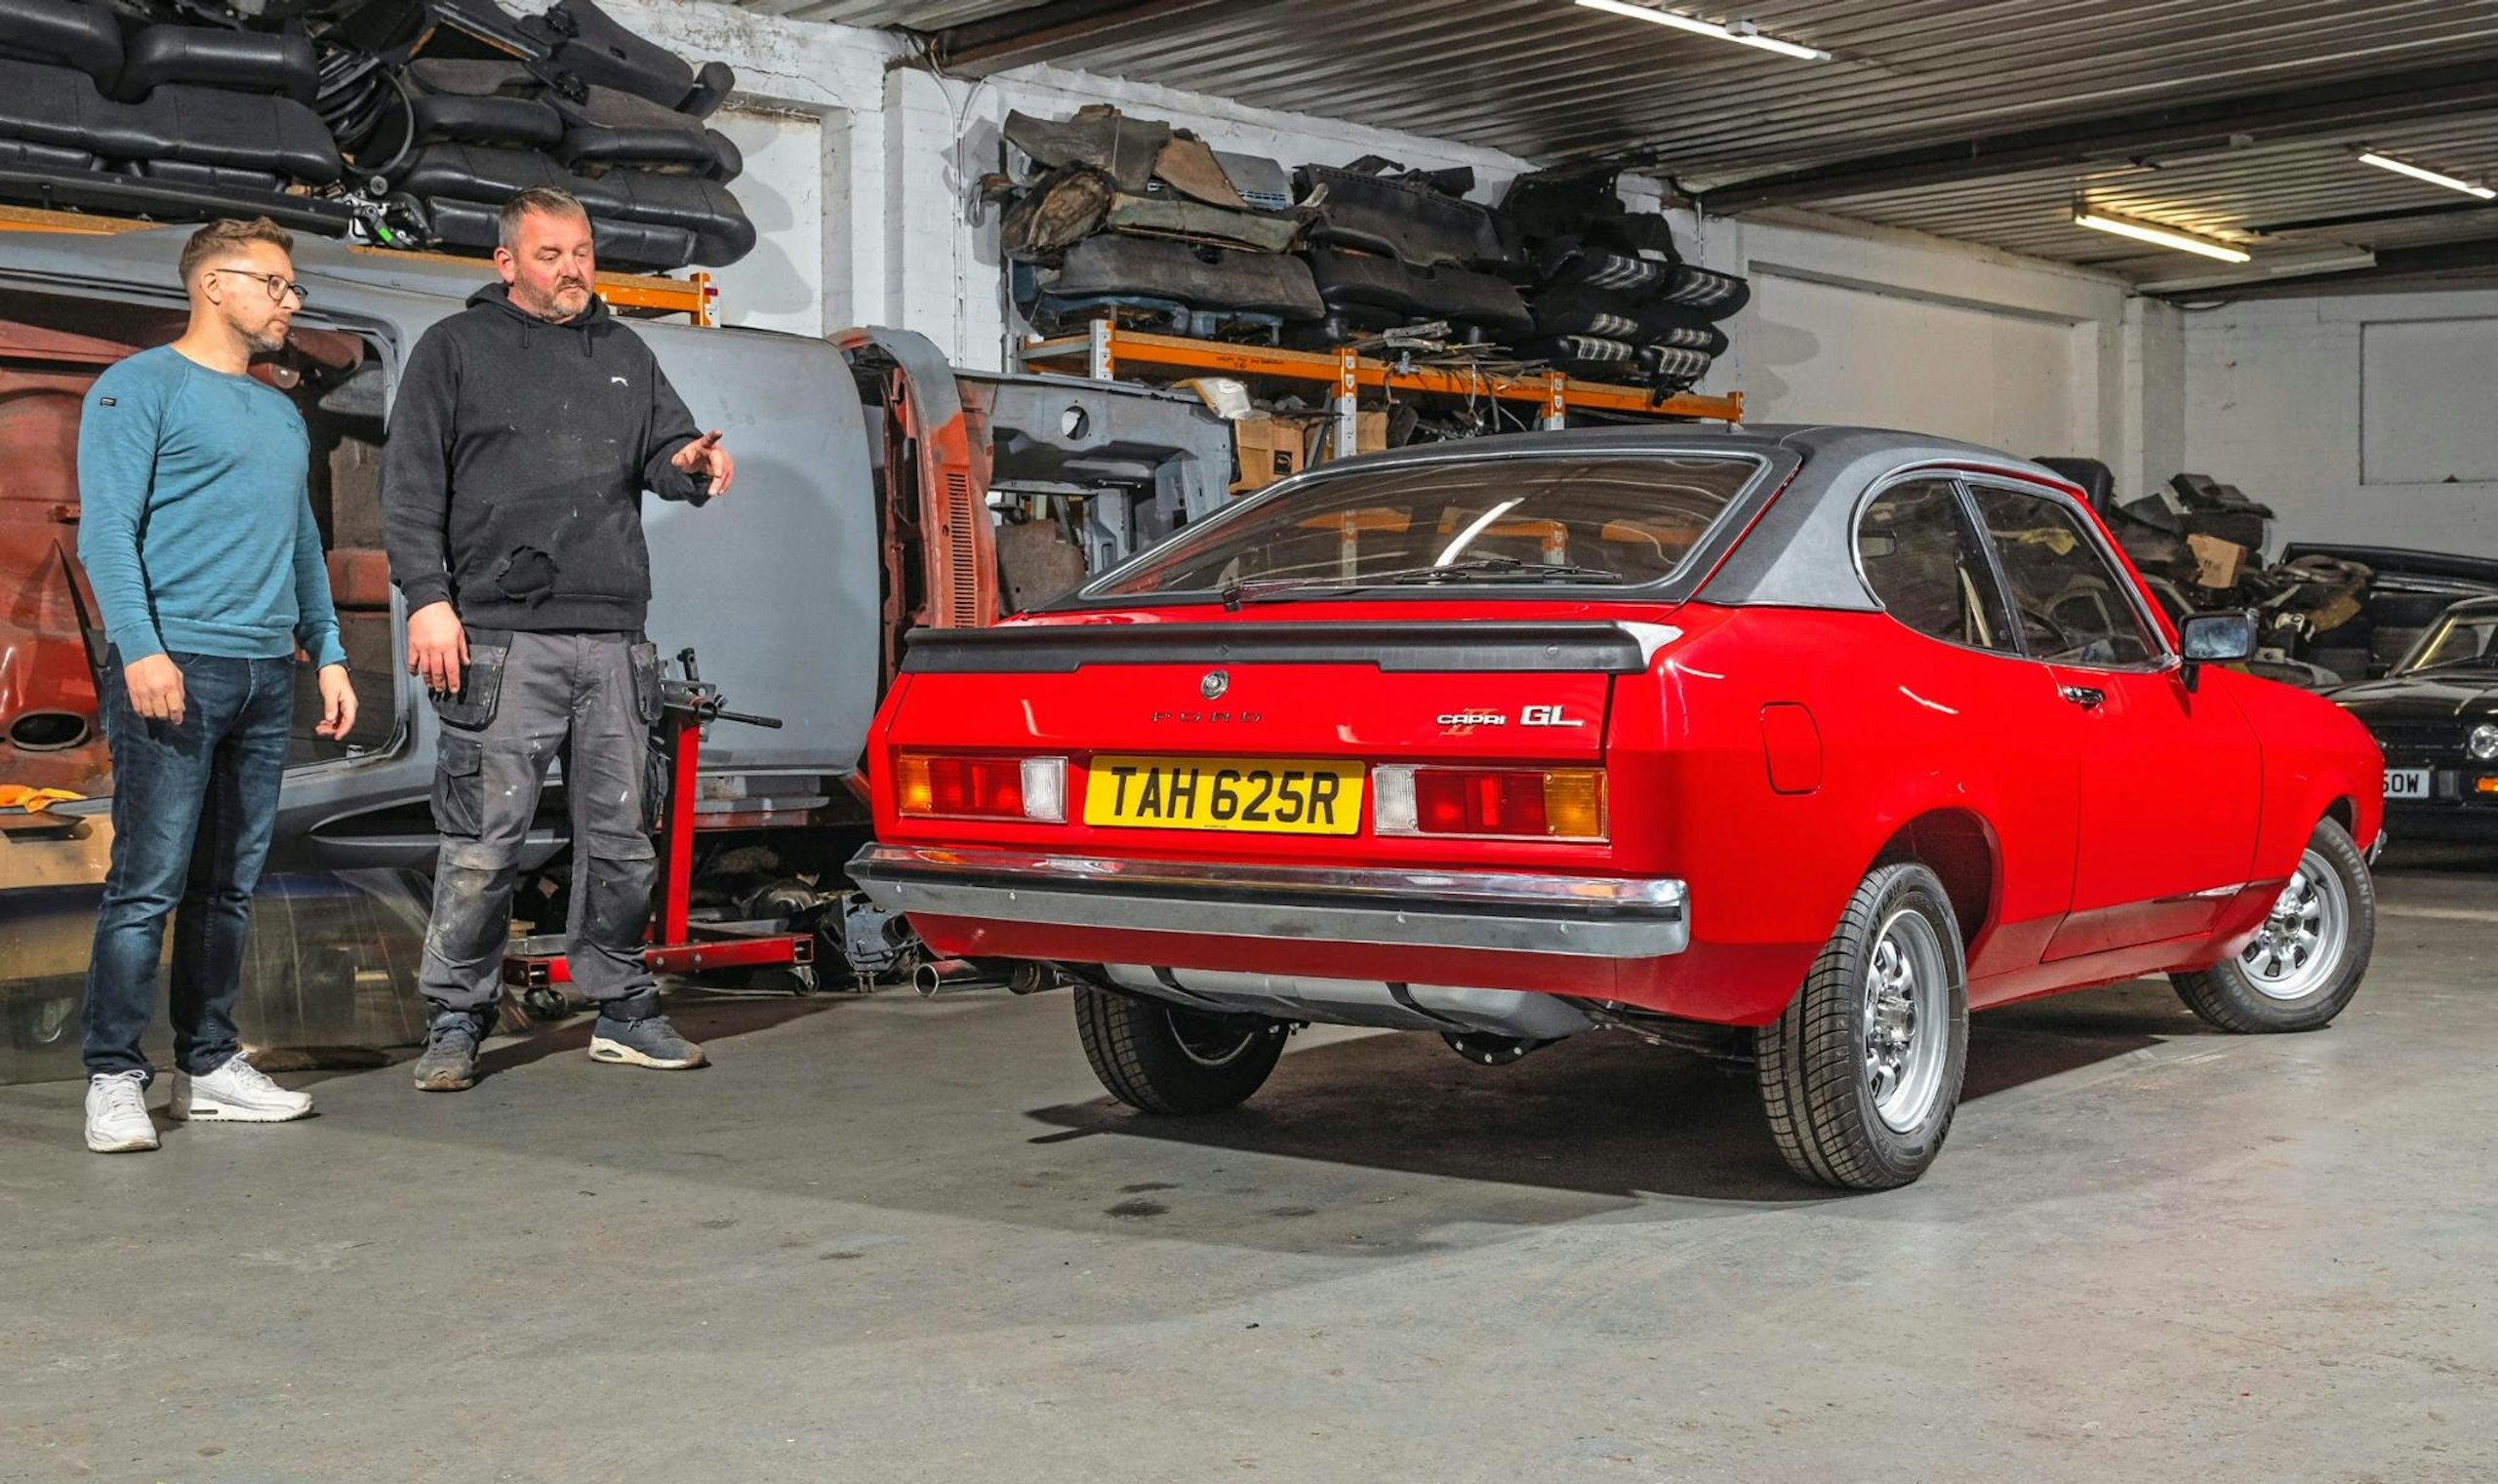
Venetian Red Capri couldn’t be found; car chosen was originally Roman Bronze
Engine
‘When the Capri arrived, the engine was missing, so we sourced a new old stock crate unit from Germany,’ Steve recalls. ‘Although it was essentially brand new, it hadn’t run for over 30 years while it languished on a shelf, so we sent it to Jamie Bryant at JB Racing in Radstock, near Bath, to be rebuilt with new gaskets and seals so it was as fresh as the day it was assembled.’
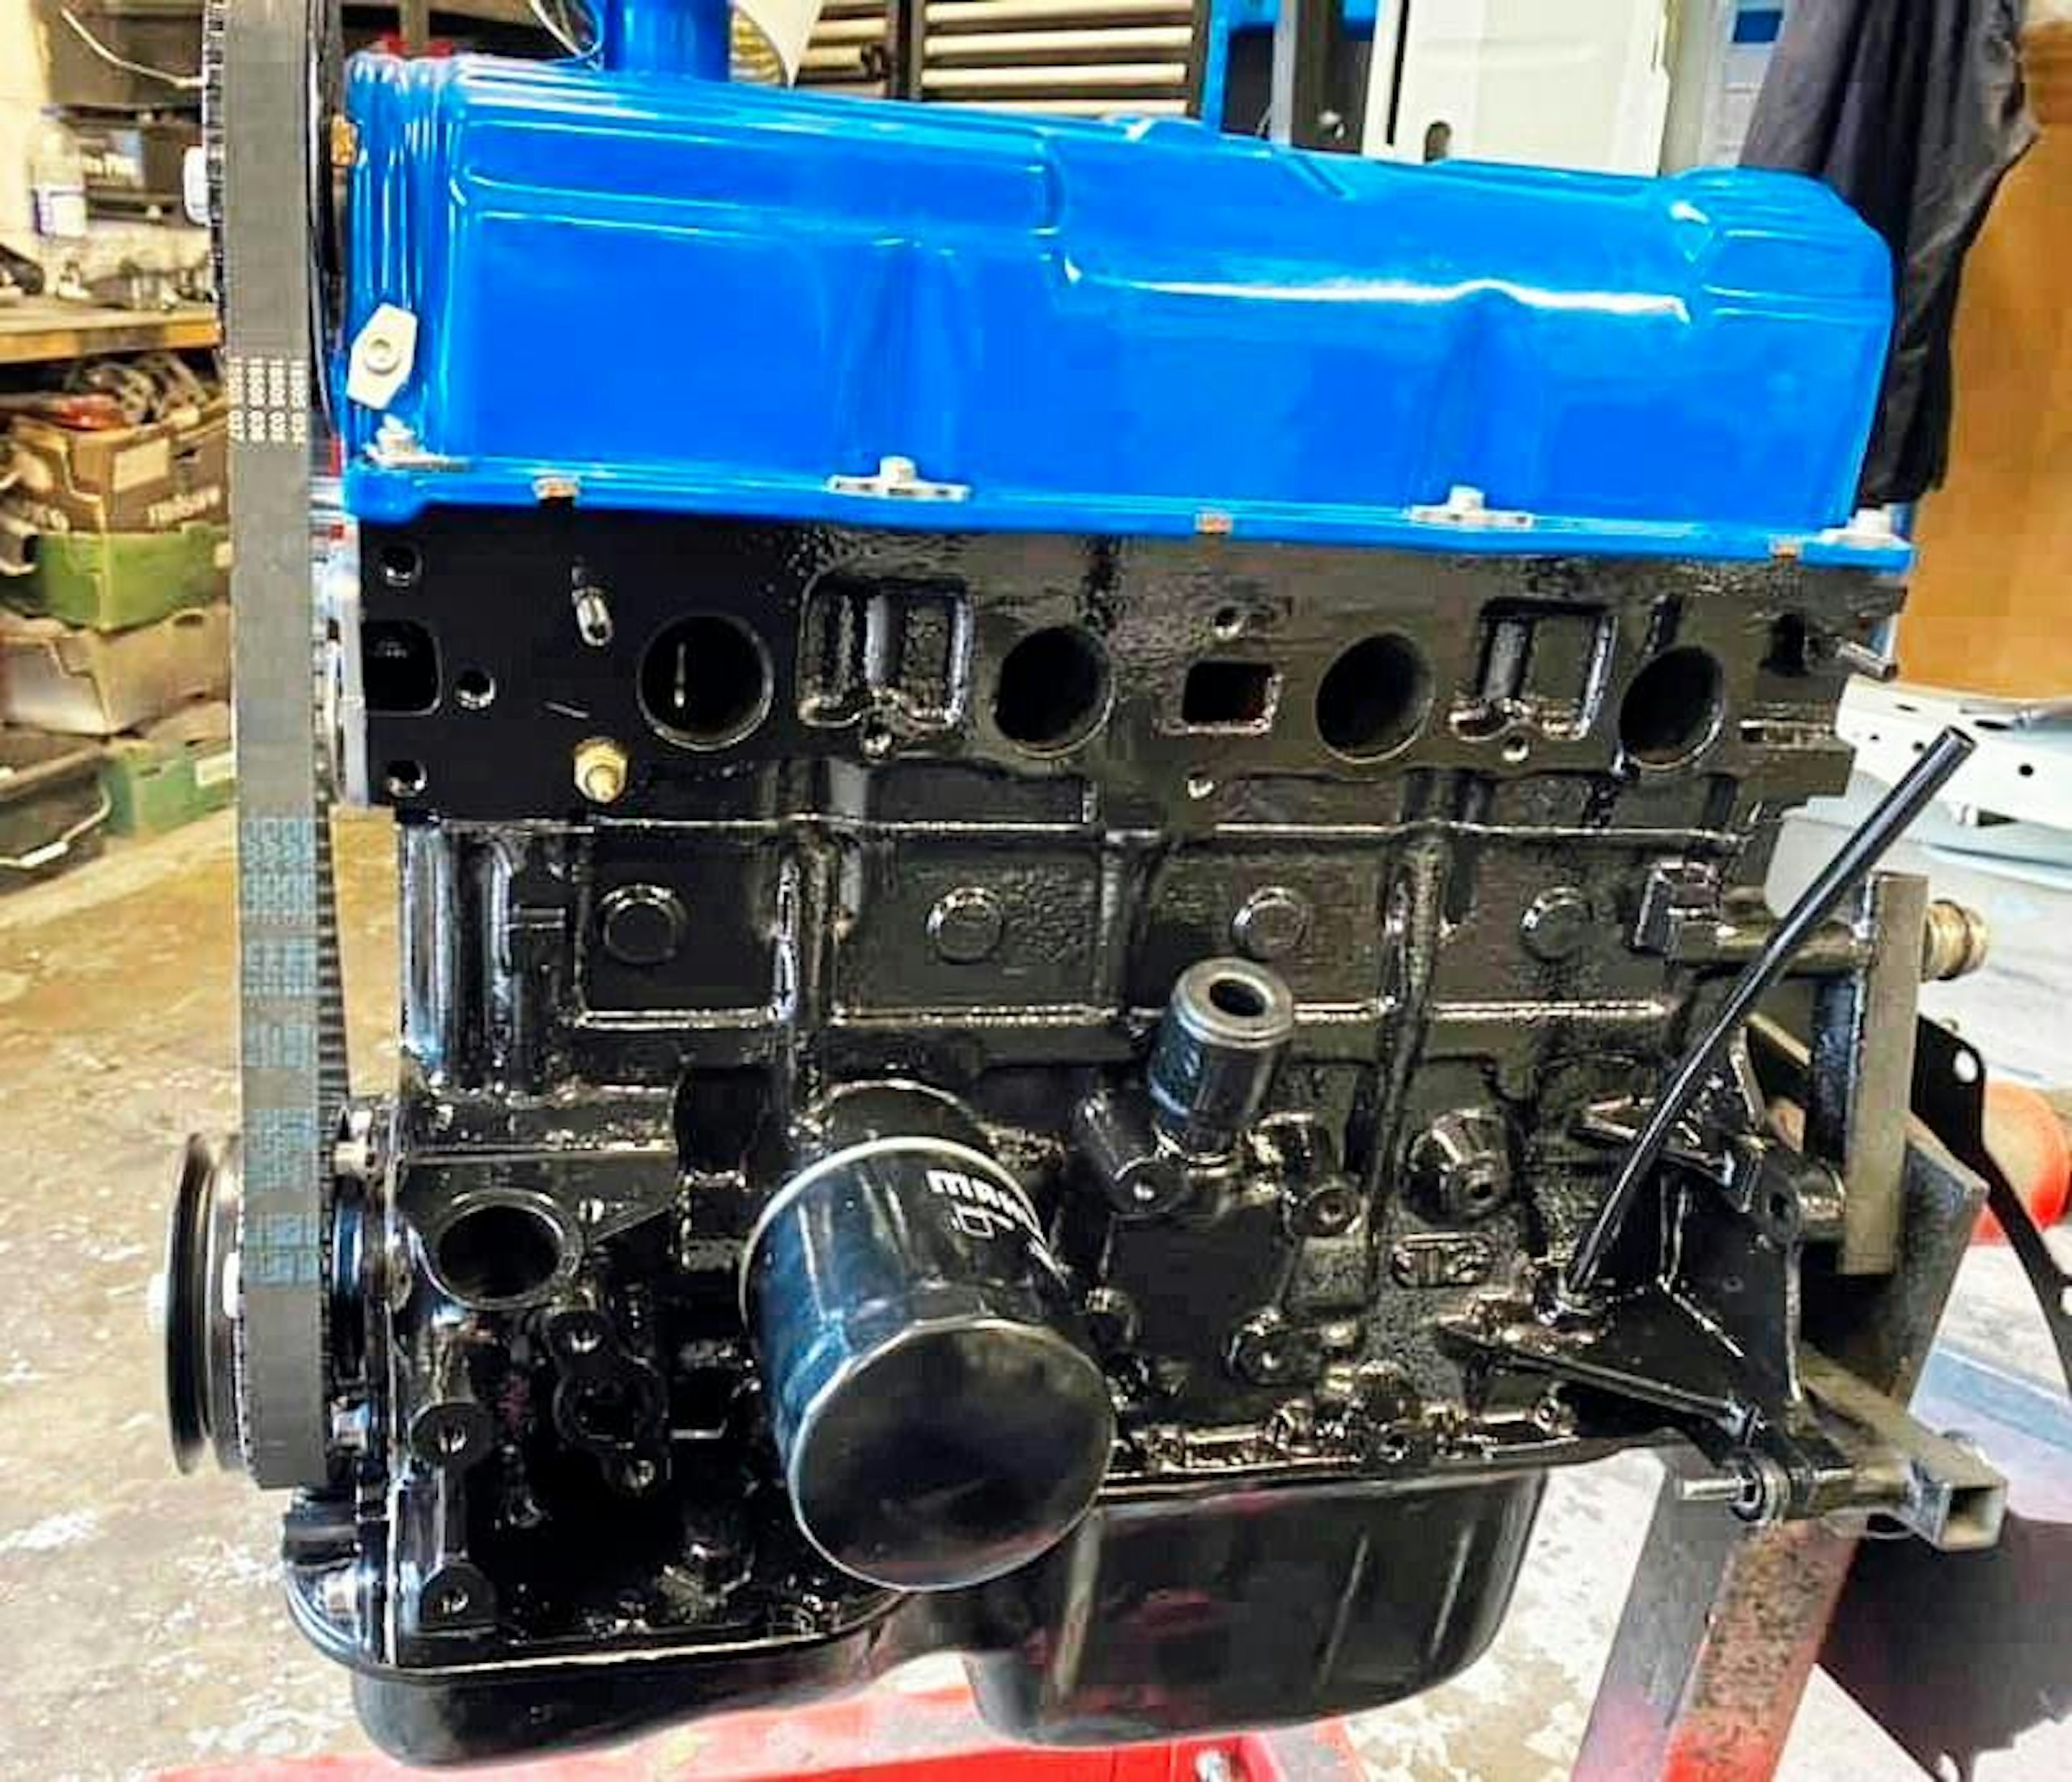
NOS crate unit sourced from Germany
While there, the 2.0-litre, four-cylinder Pinto engine received a new camshaft with a slightly more aggressive profile to add some extra power, while the cylinder head was ported and polished to maximise air flow. ‘To improve reliability, we ditched the old points and condenser ignition system and upgraded to a electronic setup supplied by H&H Ignition Solutions,’ Steve says.
The refreshed engine was then mated to a rare four-speed rod-change gearbox with external linkage Steve bought secondhand from an online Capri forum. This was only used for around a year into the MkII Capri producton run and matched the car’s original transmission. Just like the motor, it was sent to JB Racing, where it was rebuilt with a new bearing kit, with the casing cleaned and powdercoated to return it to an as-new look.
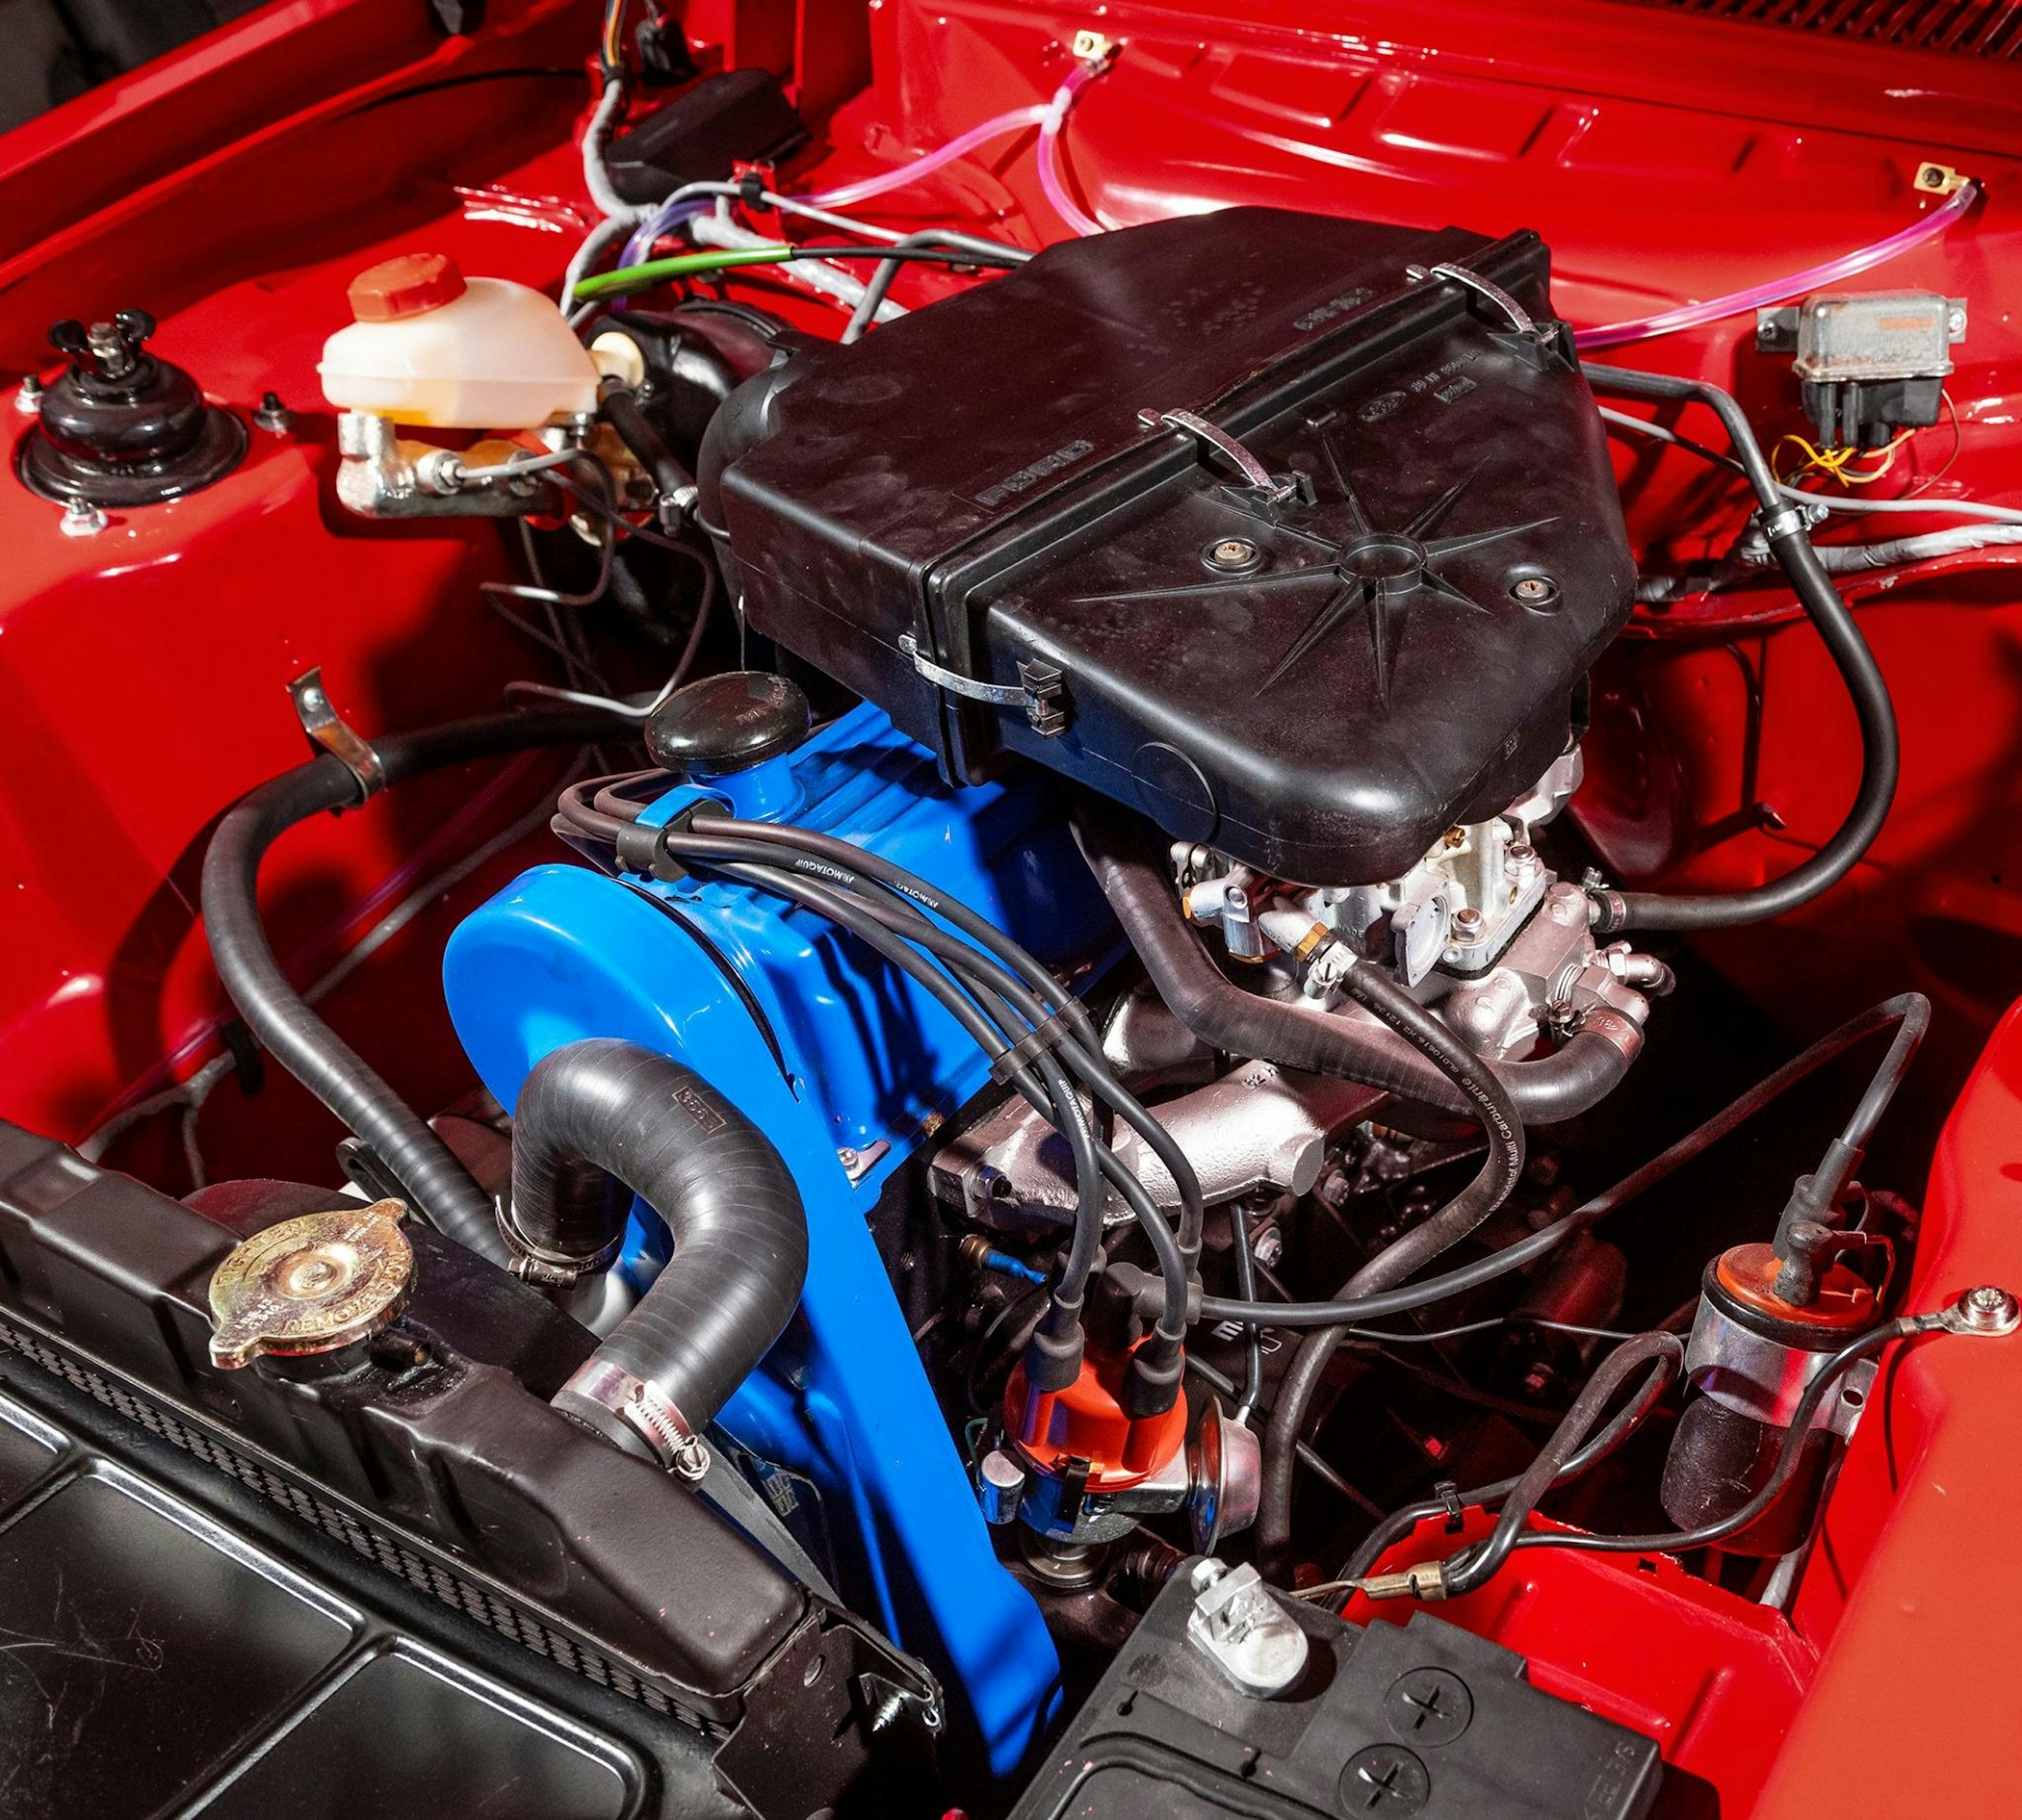
New cam, ported and polished ’head and electronic ignition add power and reliability
Engine and transmission in place, Steve could begin the reassembly of the car’s undercarriage. This was completed with brand-new items supplied by Dartford-based Capri specialist Tickover. ‘Everything from the springs and dampers, brakes, brake and fuel lines, suspension arms, bushes and steering rack, came from Tickover. It was then a case of bolting them on with new fasteners.’
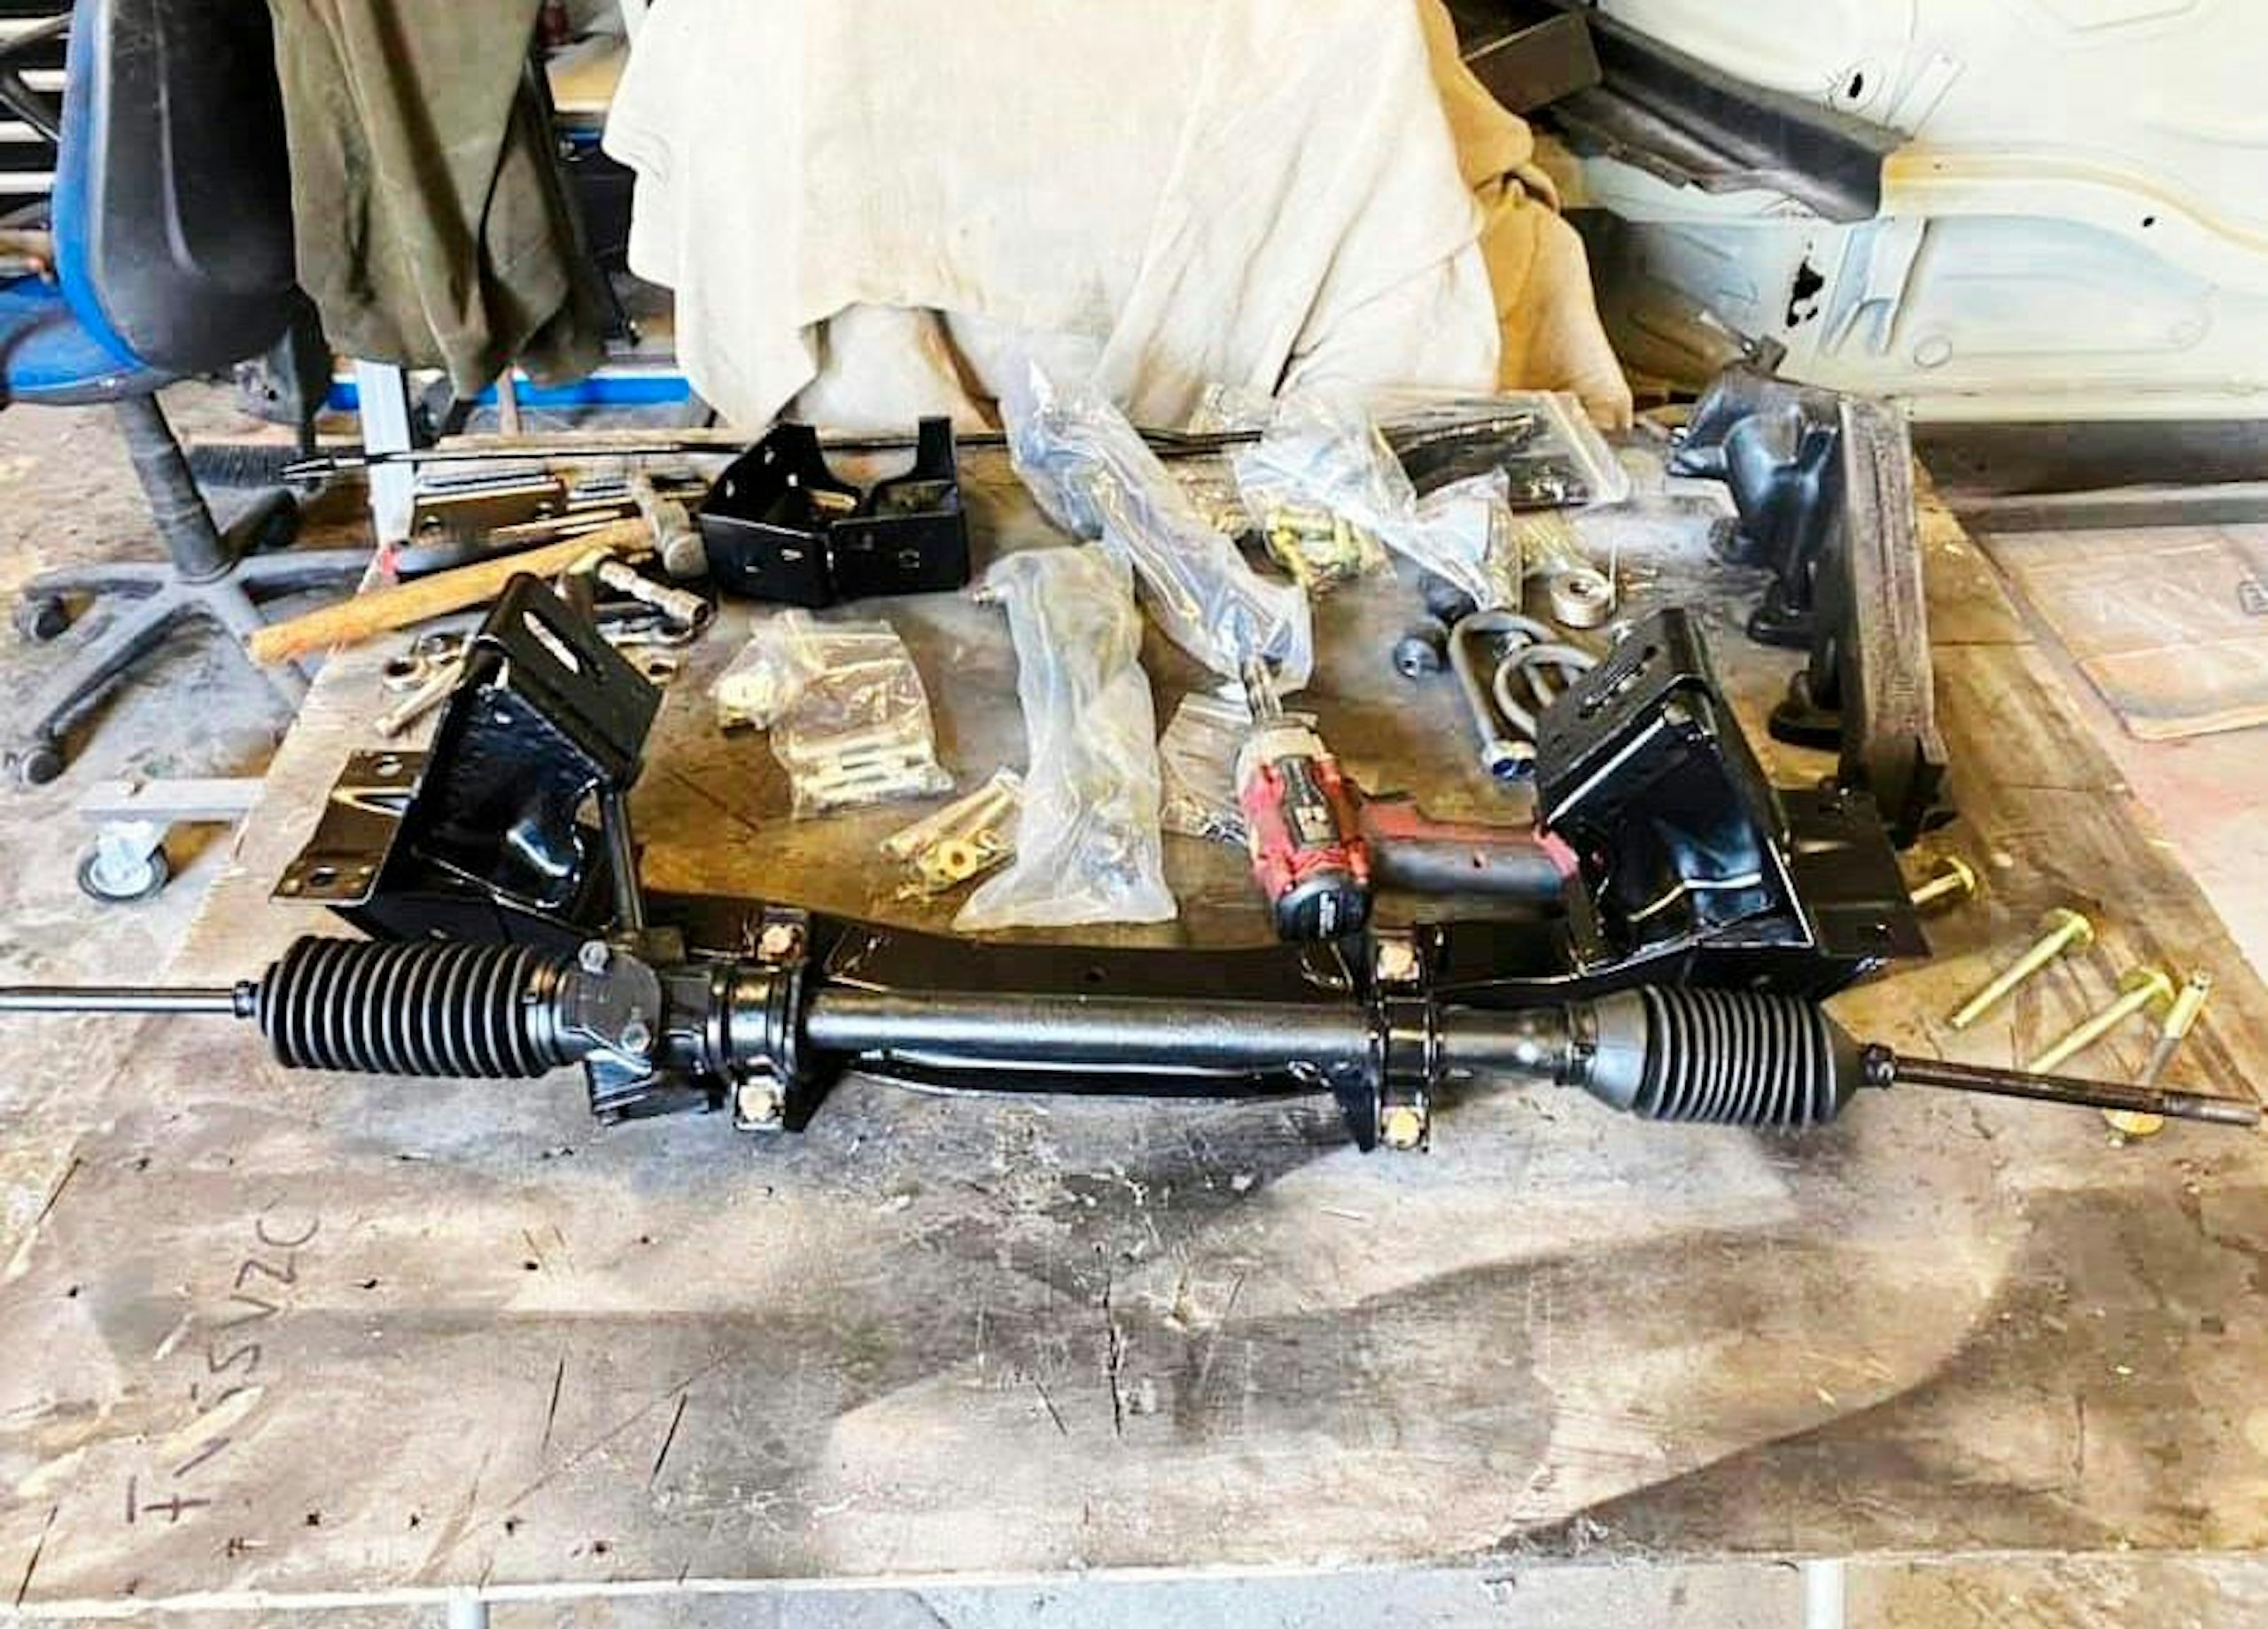
Drivetrain ancillaries sourced new from specialist Tickover
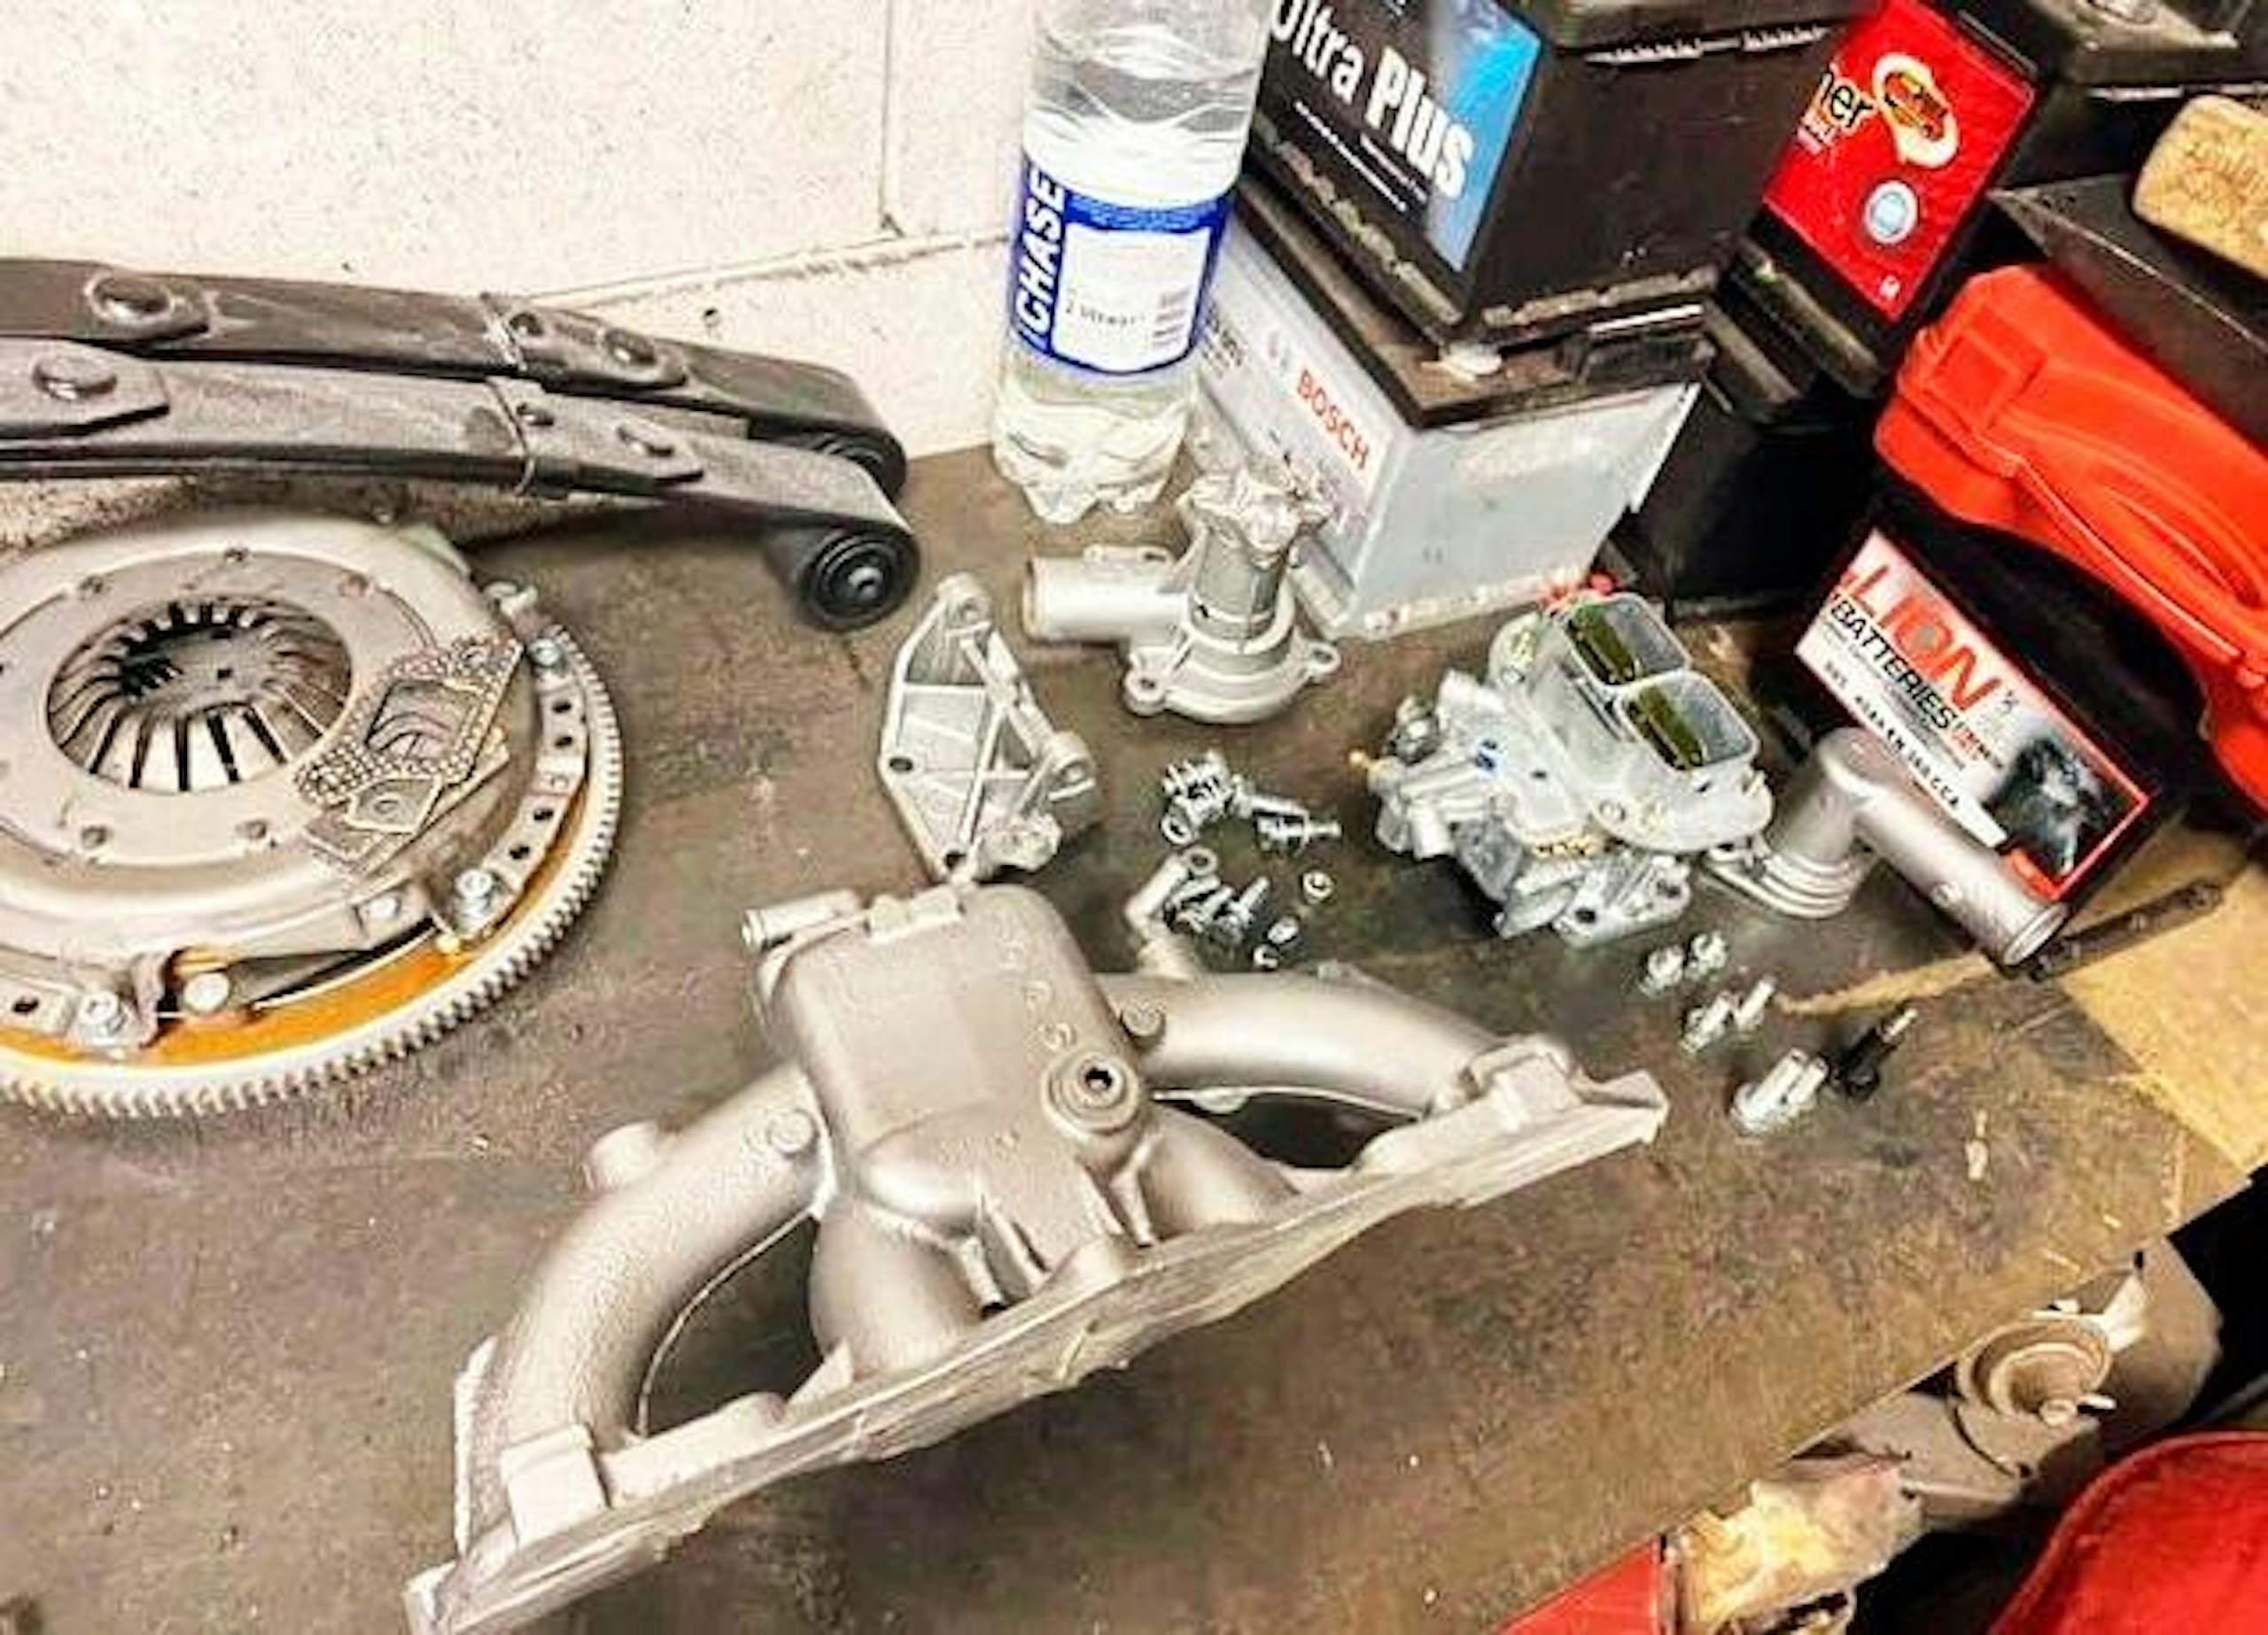
Project parts were a mix of secondhand and brand new
Tragic news
‘However, shortly after completing the undercarriage, I had the shock phone call that Chris had passed away suddenly from a heart attack,’ Steve says solemnly. Devastated about the news of his best friend, Steve couldn’t face working on the Capri and simply stored the semi-completed ’shell out of sight in his lockup while he came to terms with the situation and worked through his grief. ‘I just couldn’t look at it. It was just too painful,’ he remembers.
It wasn’t until around a year later Steve could finally bring himself to get back to the project, because it felt sacrilegious to leave the car unfinished. But now, the project would serve to honour the memory of his friend, a car Chris would’ve been truly proud of.
Interior
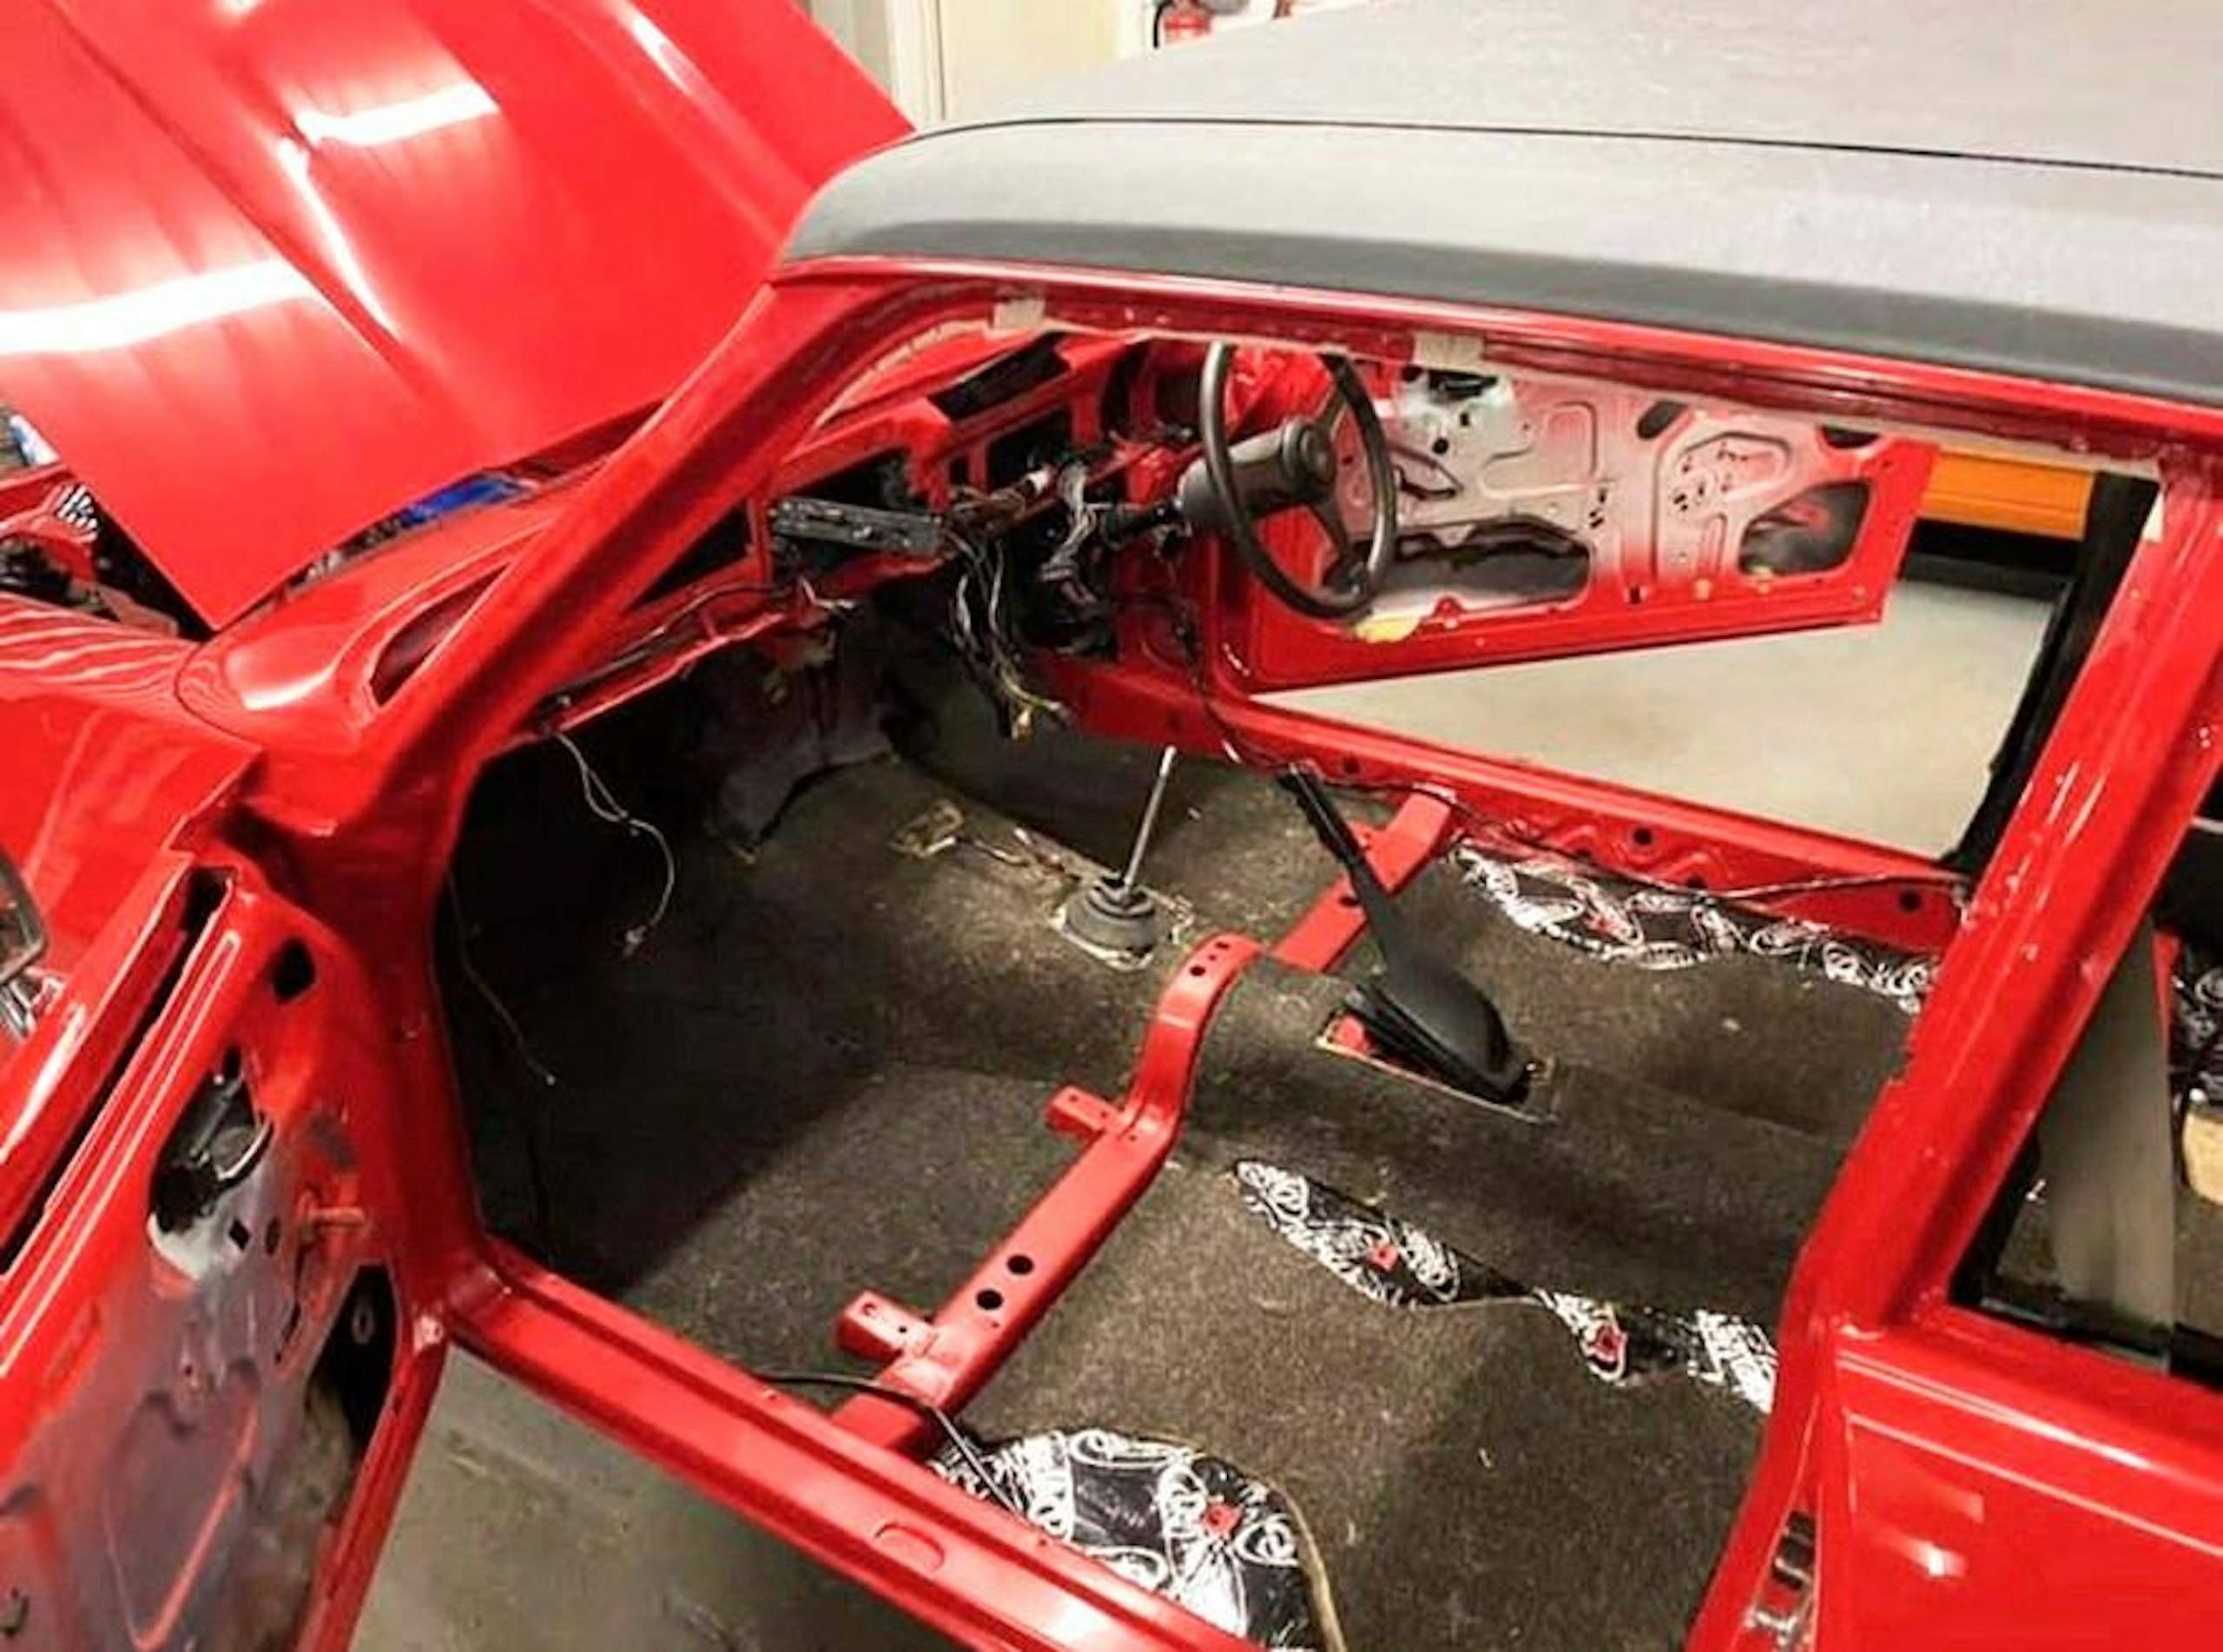
Looks good now, but floorpan one of project’s rustiest areas
With no interior parts to reuse from the donor car, Steve looked online to find the items he needed. After an extensive search, he found a secondhand interior on eBay including seats and trim panels that matched the original and came from another 2.0-litre GL residing in a Somerset breaker’s yard. ‘It was in pretty good condition,’ Steve remembers. ‘The foam bases and bolsters of the seats were still intact, and the steel frames were solid; it was only the exterior fabric which had seen better days.’
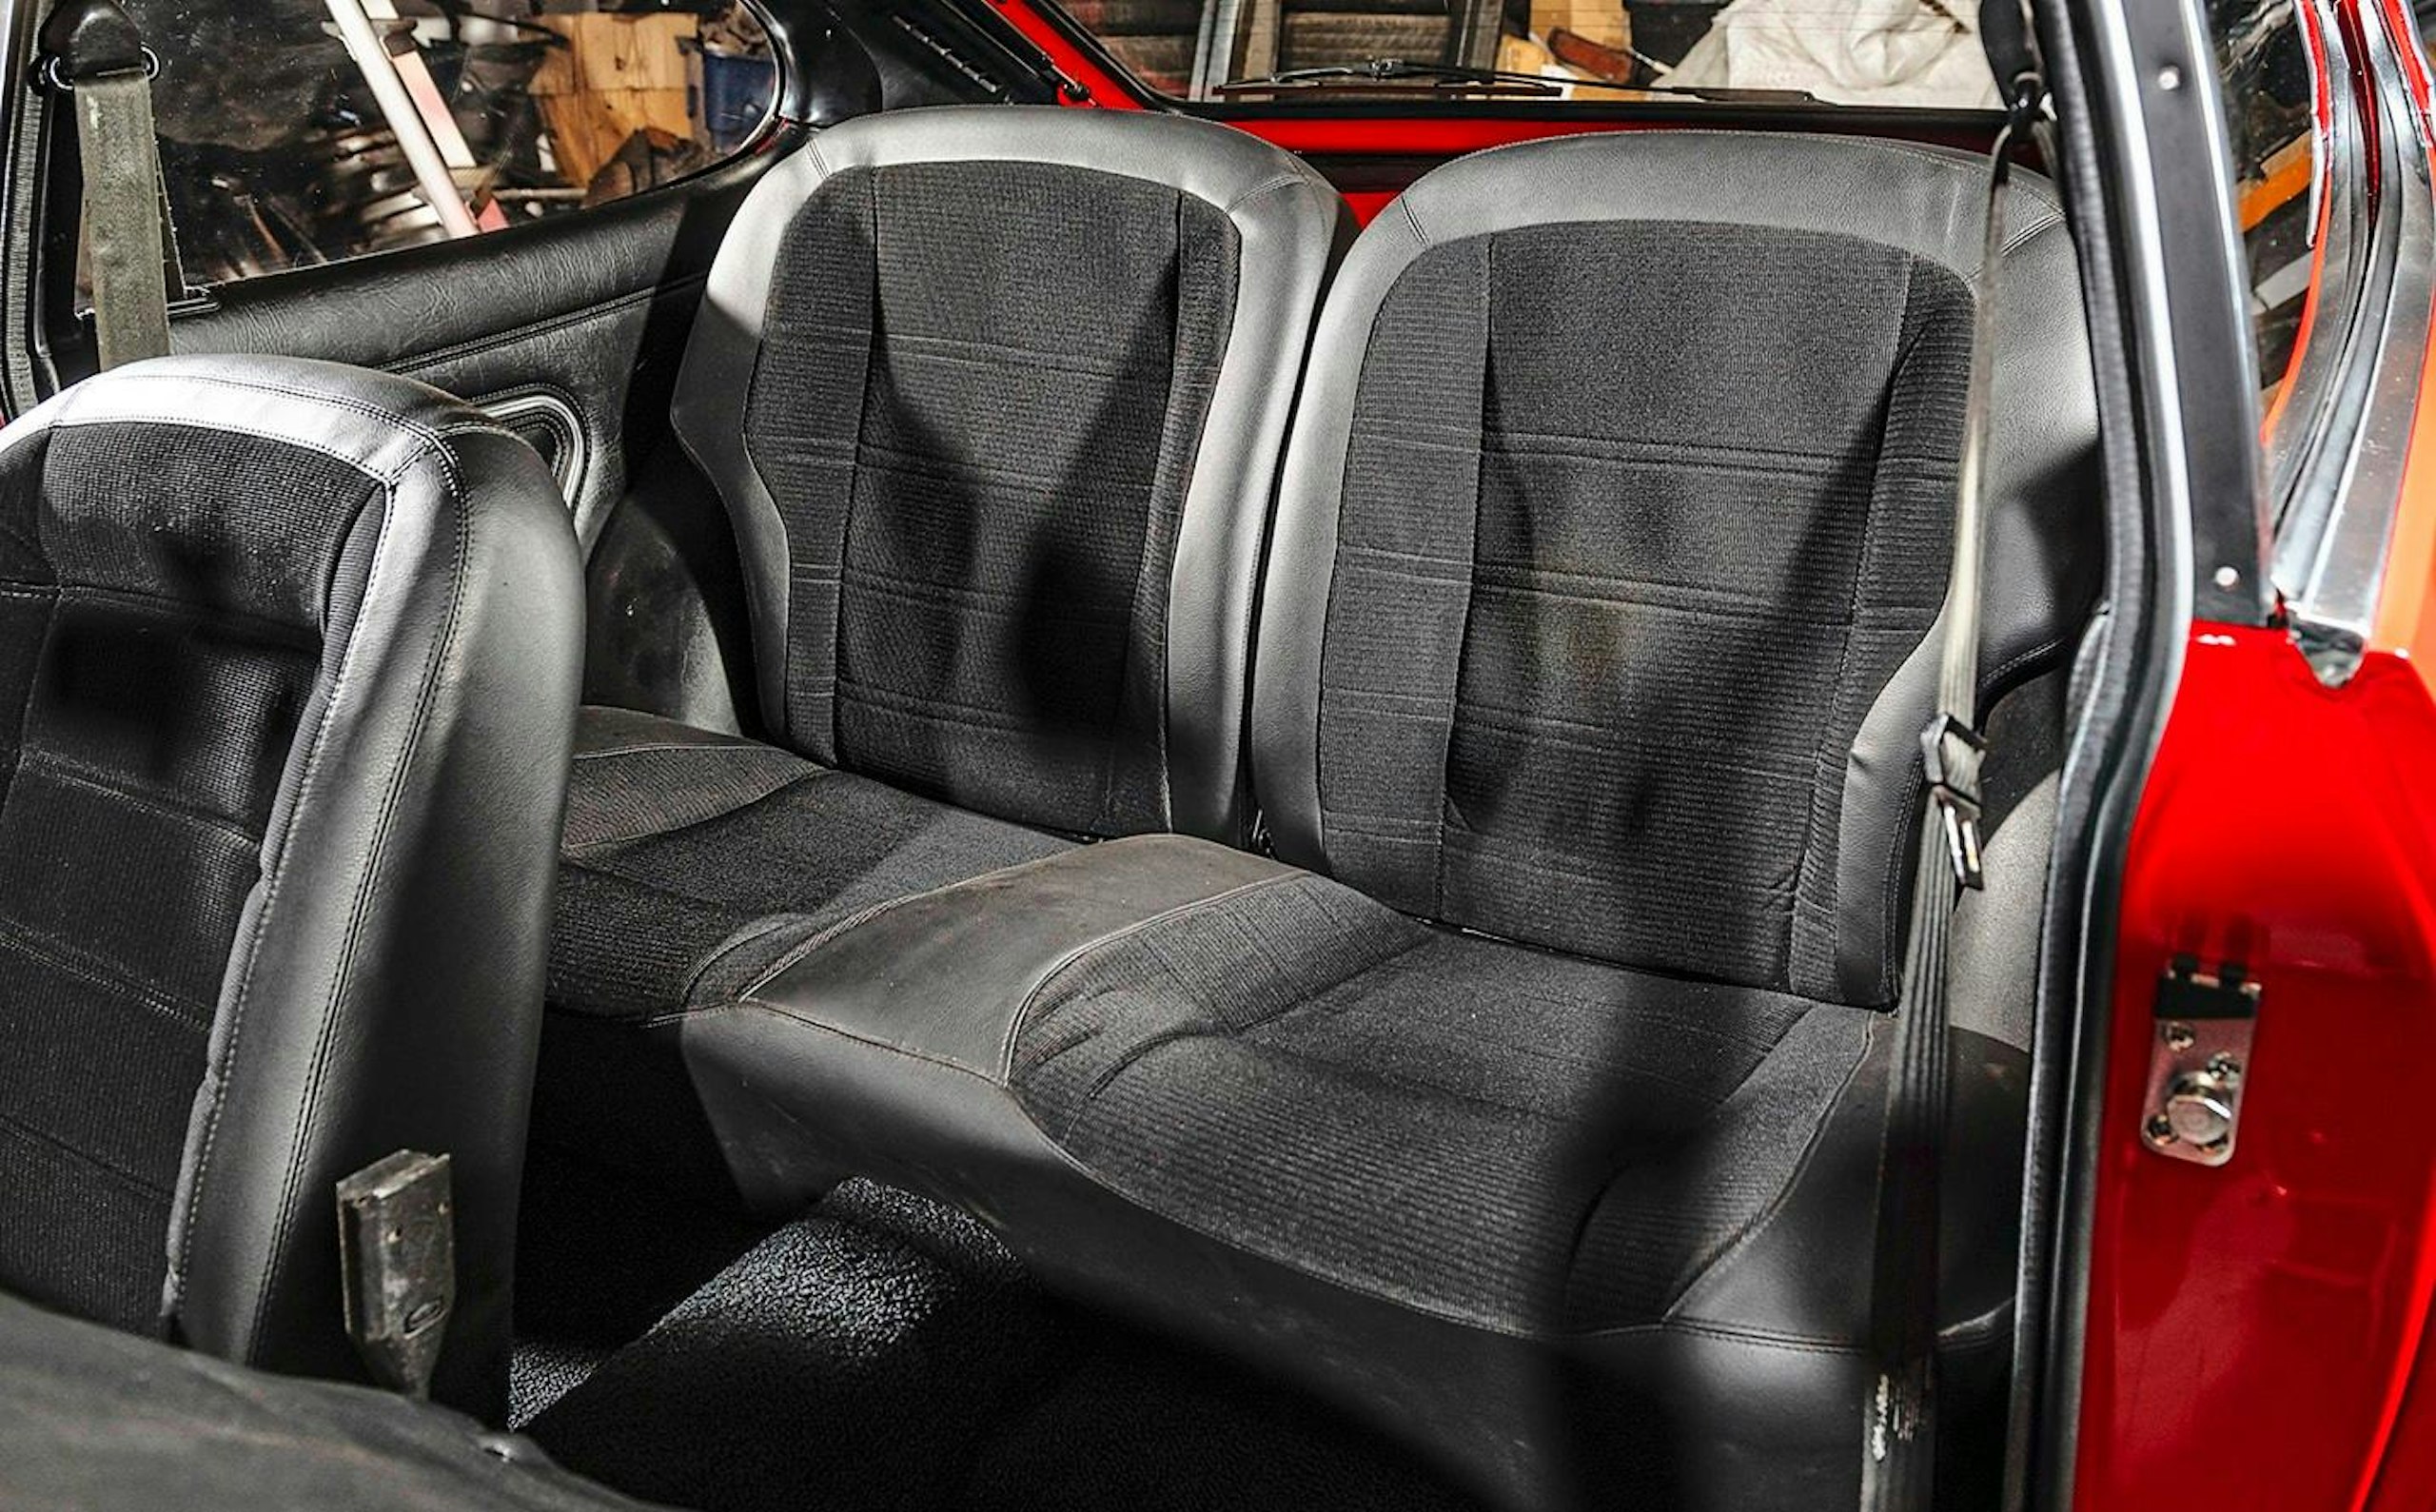
Secondhand seats retrimmed in period-correct vinyl and fabric
This was of little consequence because Steve planned to have the seats fully retrimmed, by upholstery specialist Cherry Upholstery in Sheffield. ‘Both front and rear seats were trimmed in period-correct black vinyl with Beta cloth fabric centres,’ Steve says. ‘This complemented the original black vinyl trim on the door and rear quarter cards as well as the dashboard, which was sourced from new old stock, with an original steering wheel.’
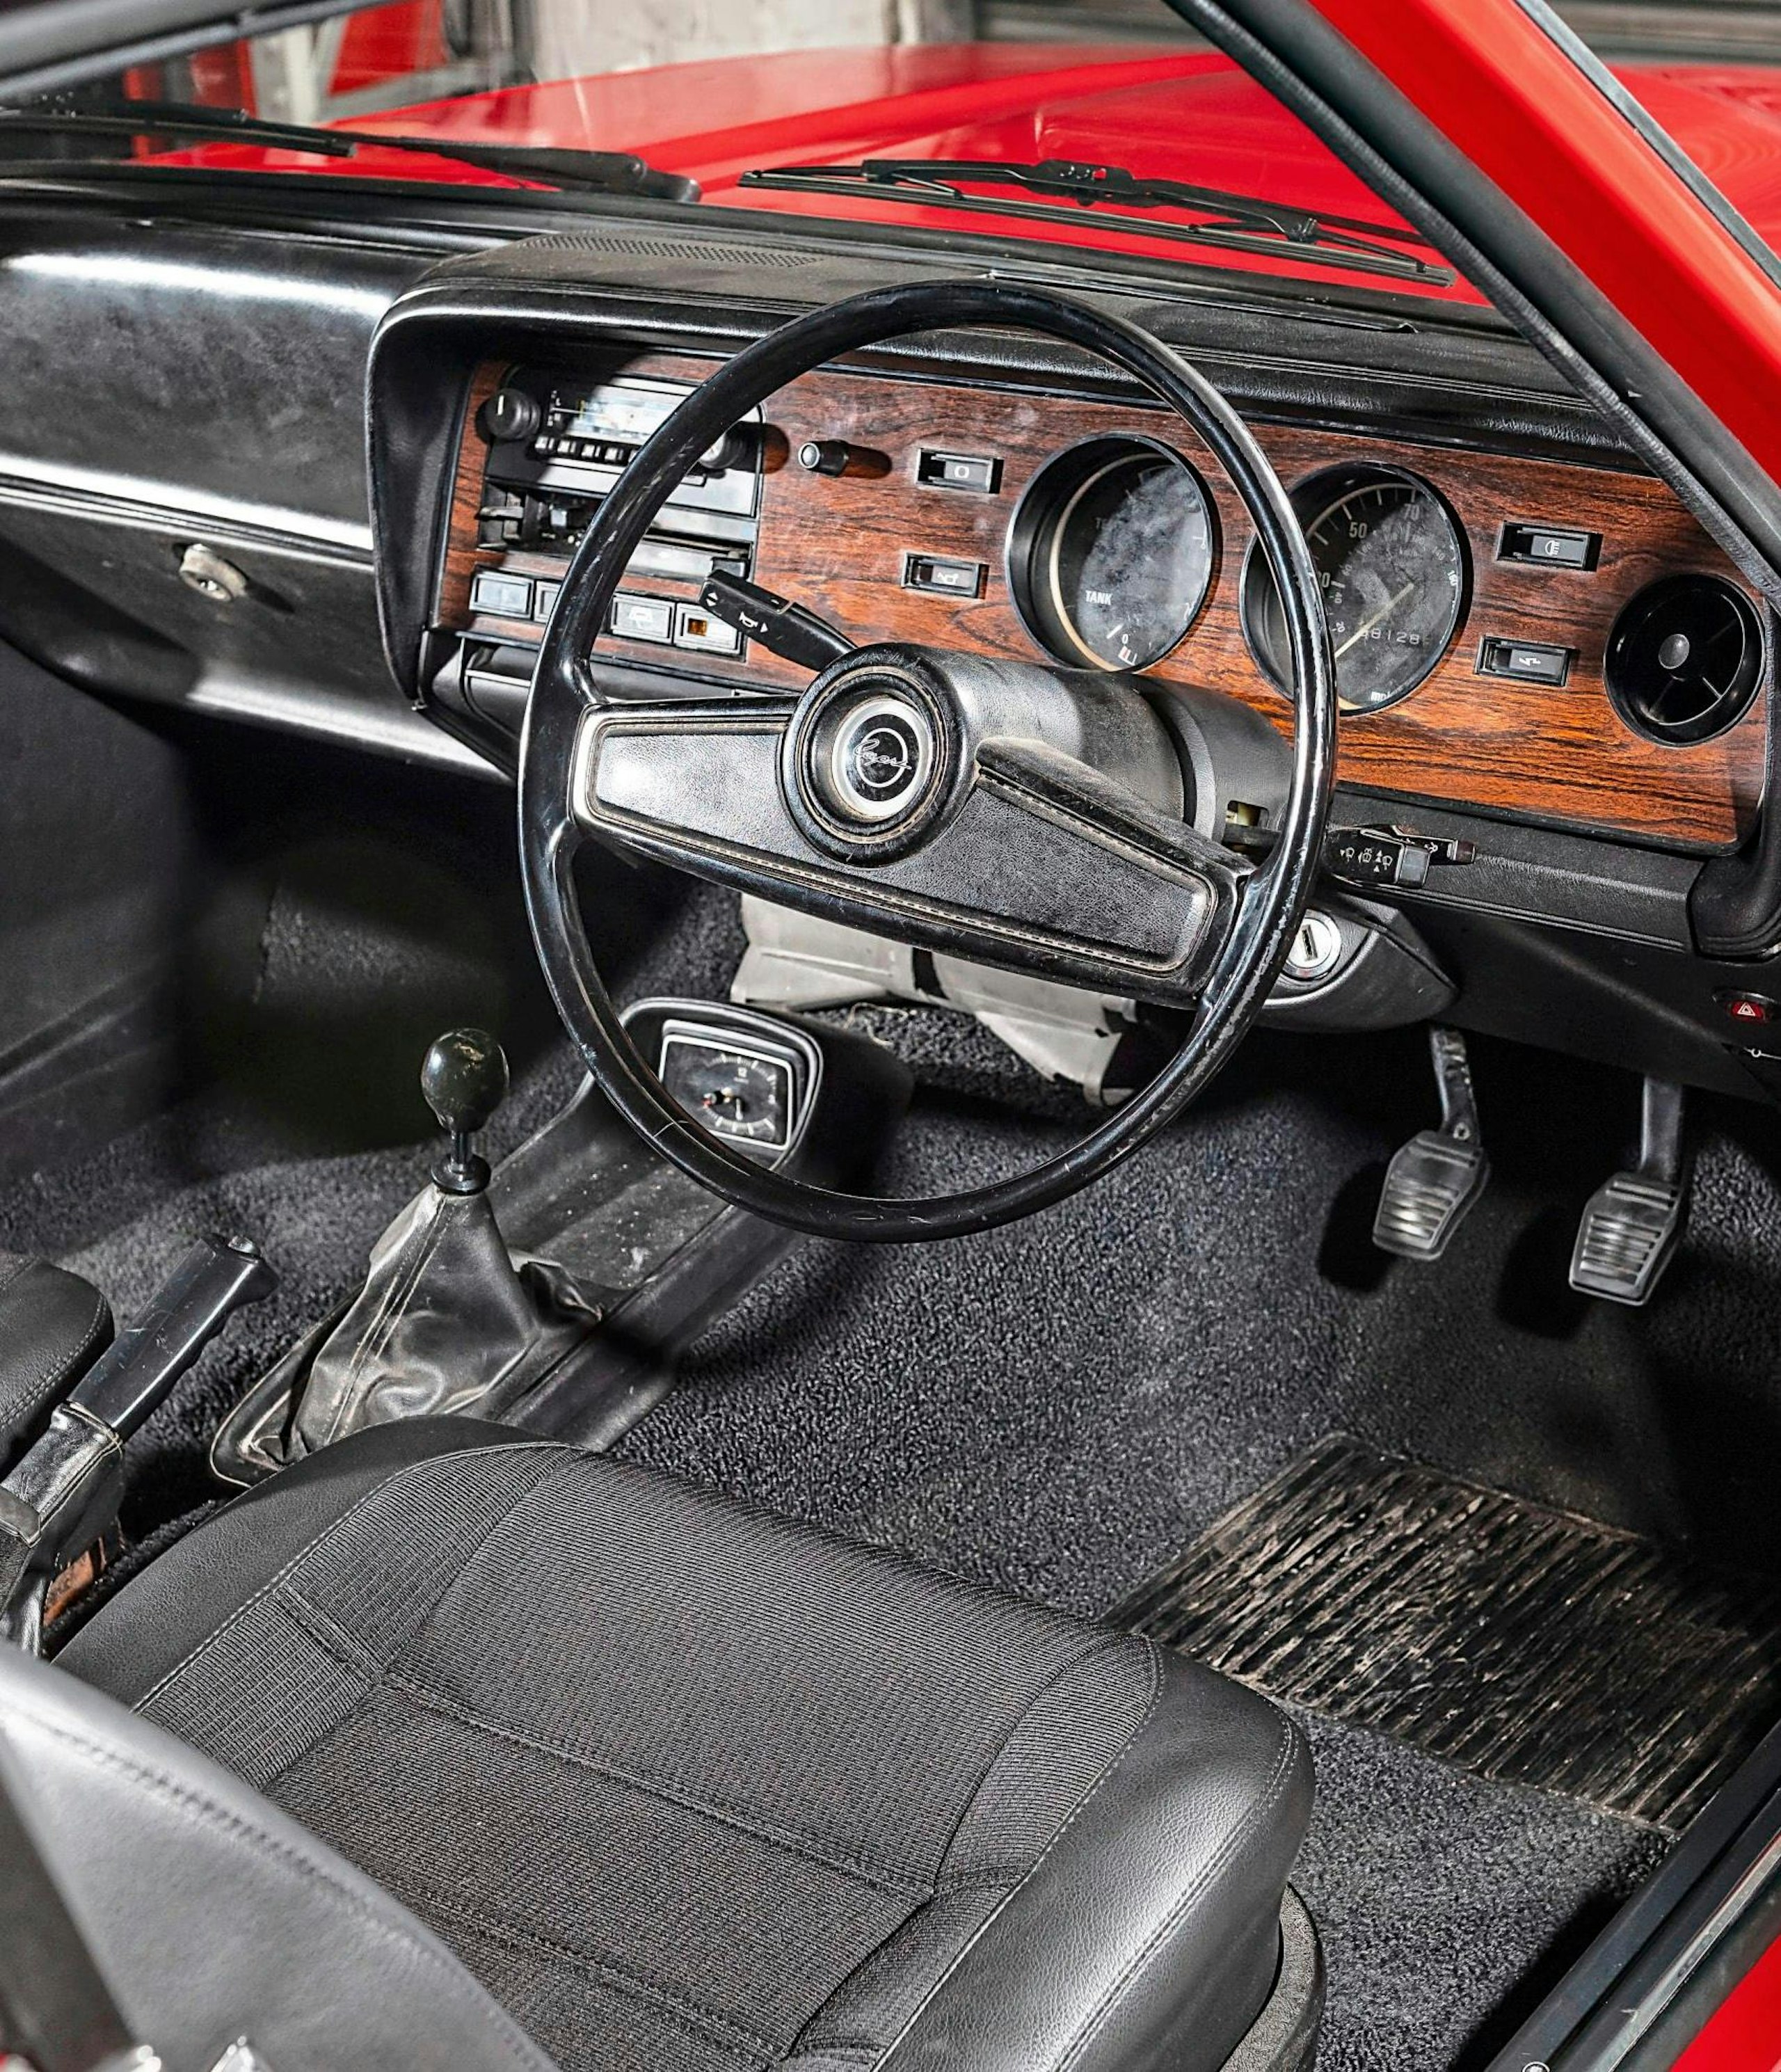
Dash and steering wheel sourced from new old stock
The dashboard was in particularly good condition, with the original imitation walnut trim panel that can sometimes warp or split remaining perfectly flat and crack-free. ‘This is the benefit of being able to work with new old stock parts rather than having to rely on secondhand parts or reproduction items,’ Steve says. ‘Essentially the parts are brand new, having never been fitted to a car before, so show none of the signs of wear you get from used parts. They also fit exactly they should, which is not something you can say for all reproduction parts.’ A brand-new black carpet from Aldridge Trimming in Wolverhampton finished off the interior revamp along with a new headlining.
High point
‘Being able to create a car from the vision Chris had in his head and get it absolutely 100 percent correct’
Steve Mangham
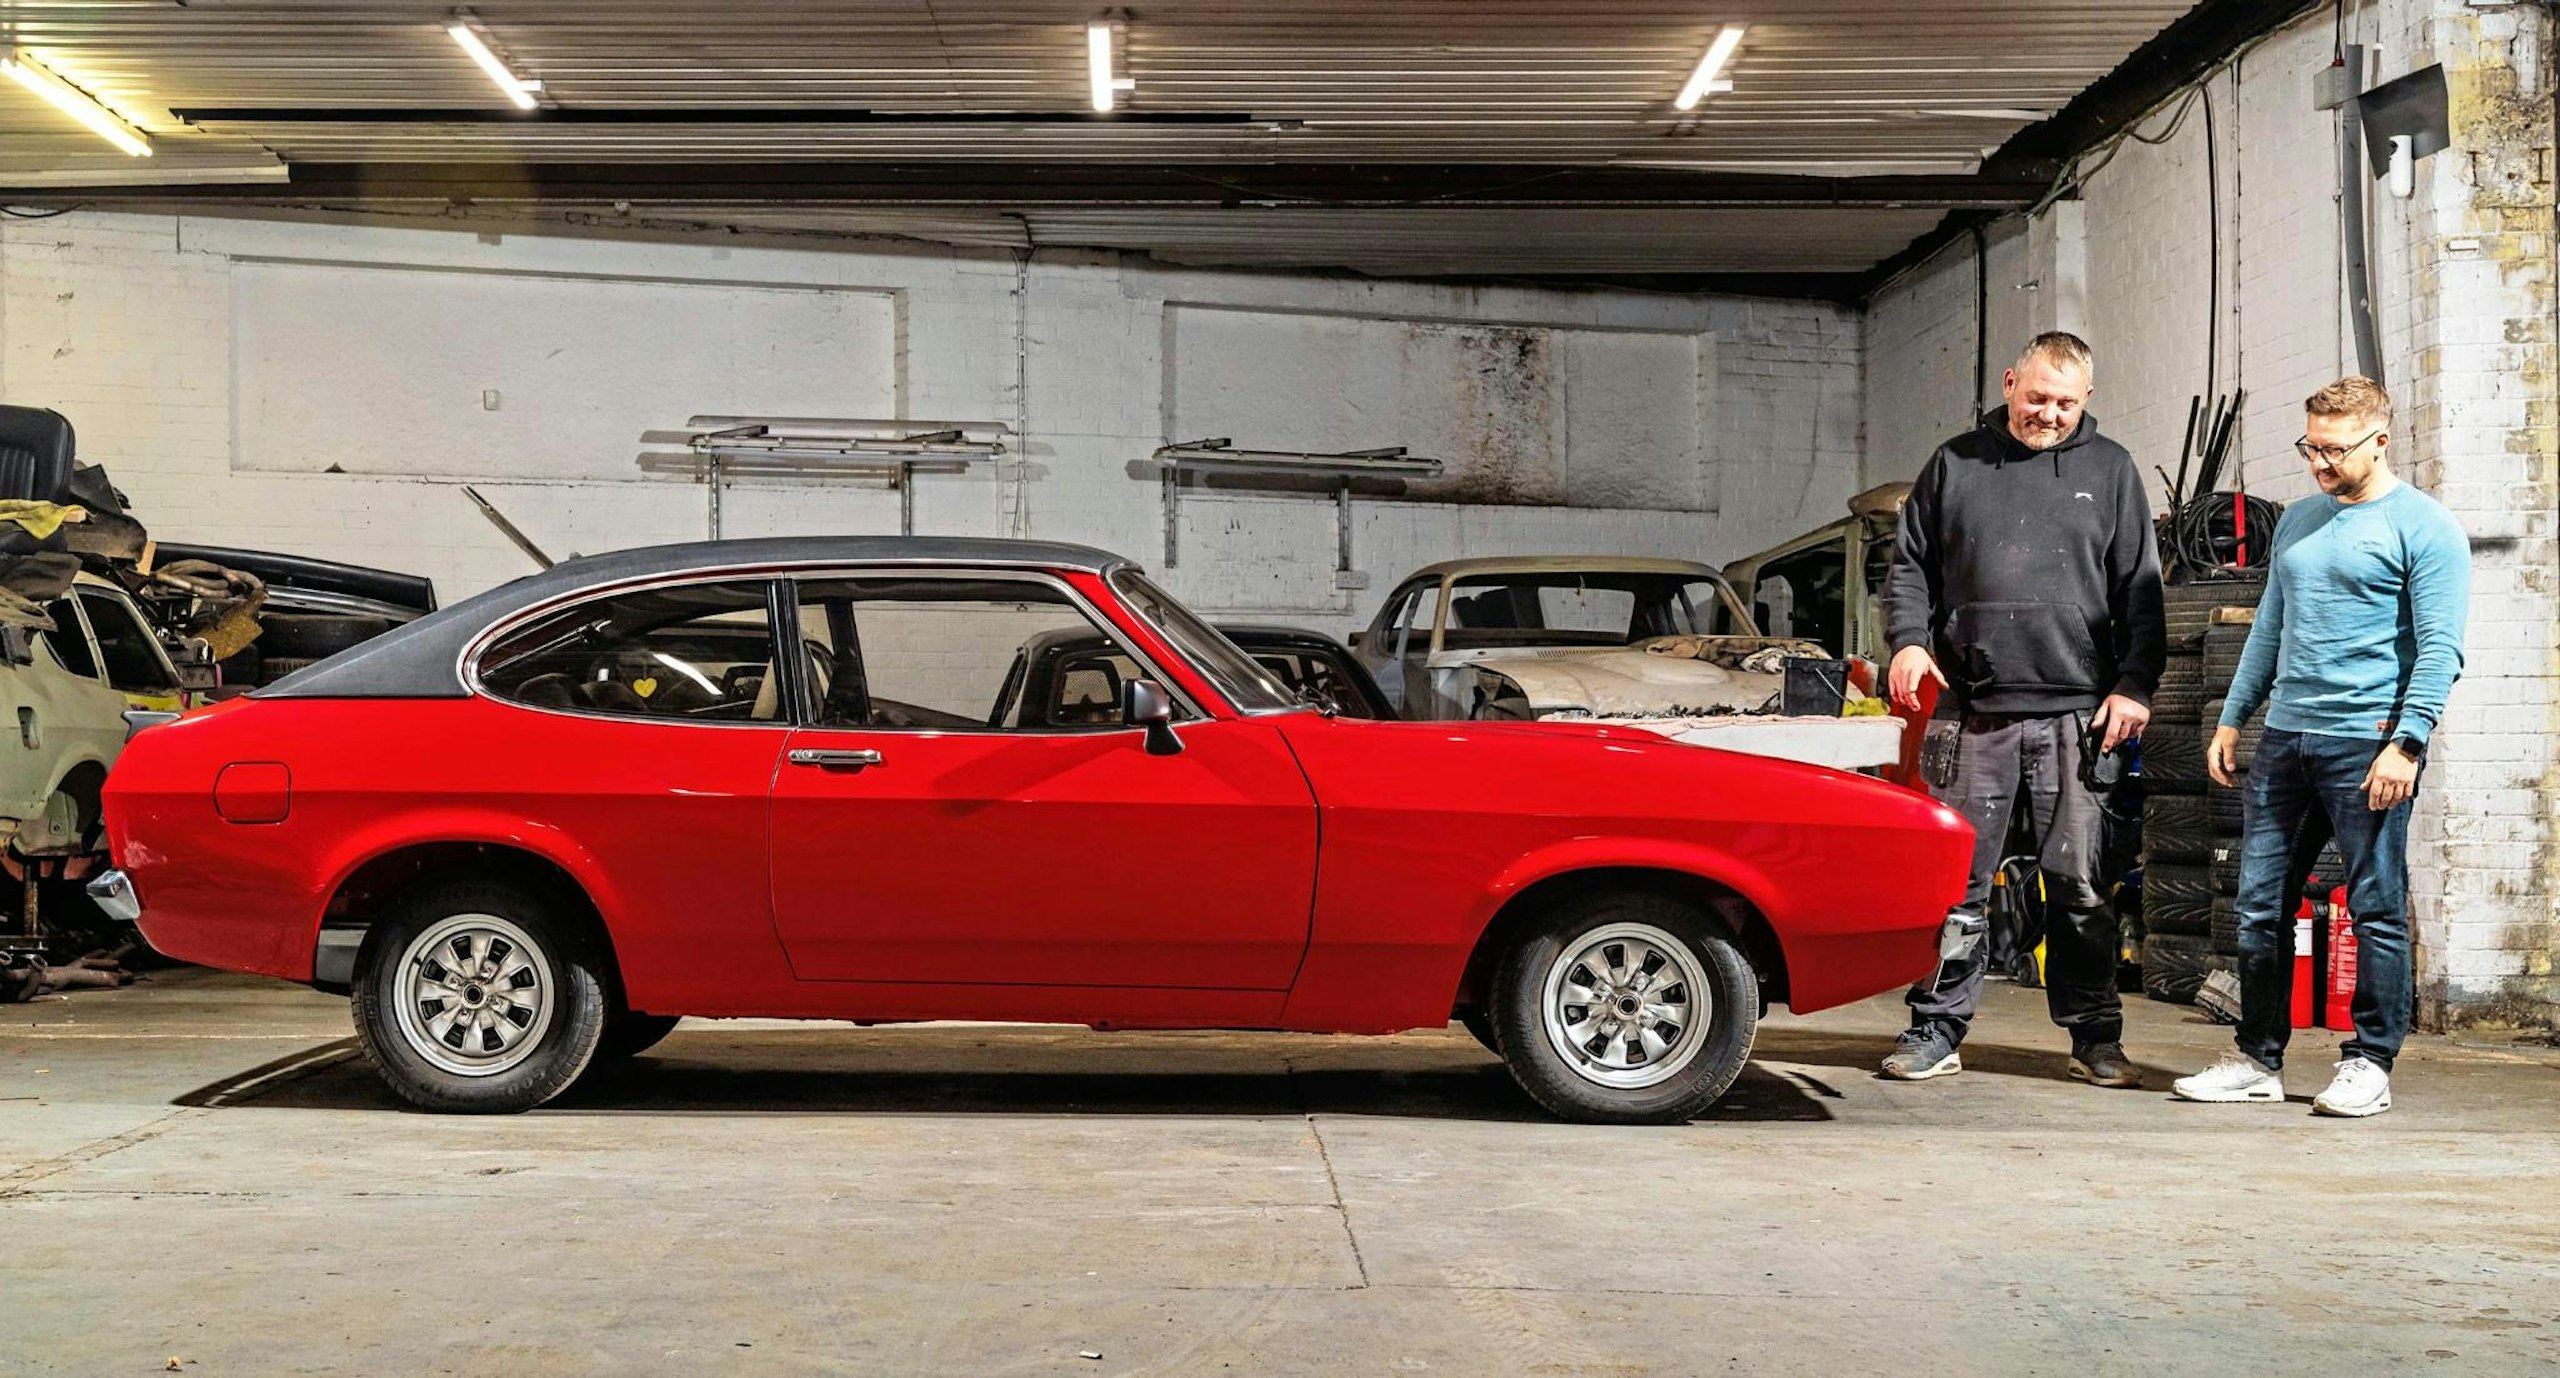
Steve Mangham (left) finished the Capri as a tribute to his friend Chris, the original owner
Exterior flourishes
‘Probably the hardest part of the build was the roof,’ Steve says. ‘The structure itself was fine, but finding the correct style of black exterior roof vinyl proved to be an issue, because the original is no longer in production.’ After searching the UK for a suitable substitute, Steve was forced to widen his horizons and stumbled upon a supplier from Belgium, that had one that was extremely similar in colour and texture. ‘I’d say it was around 98 percent accurate,’ Steve laughs. ‘We bought an extra-large roll of it to ensure we have some left over for future projects too!
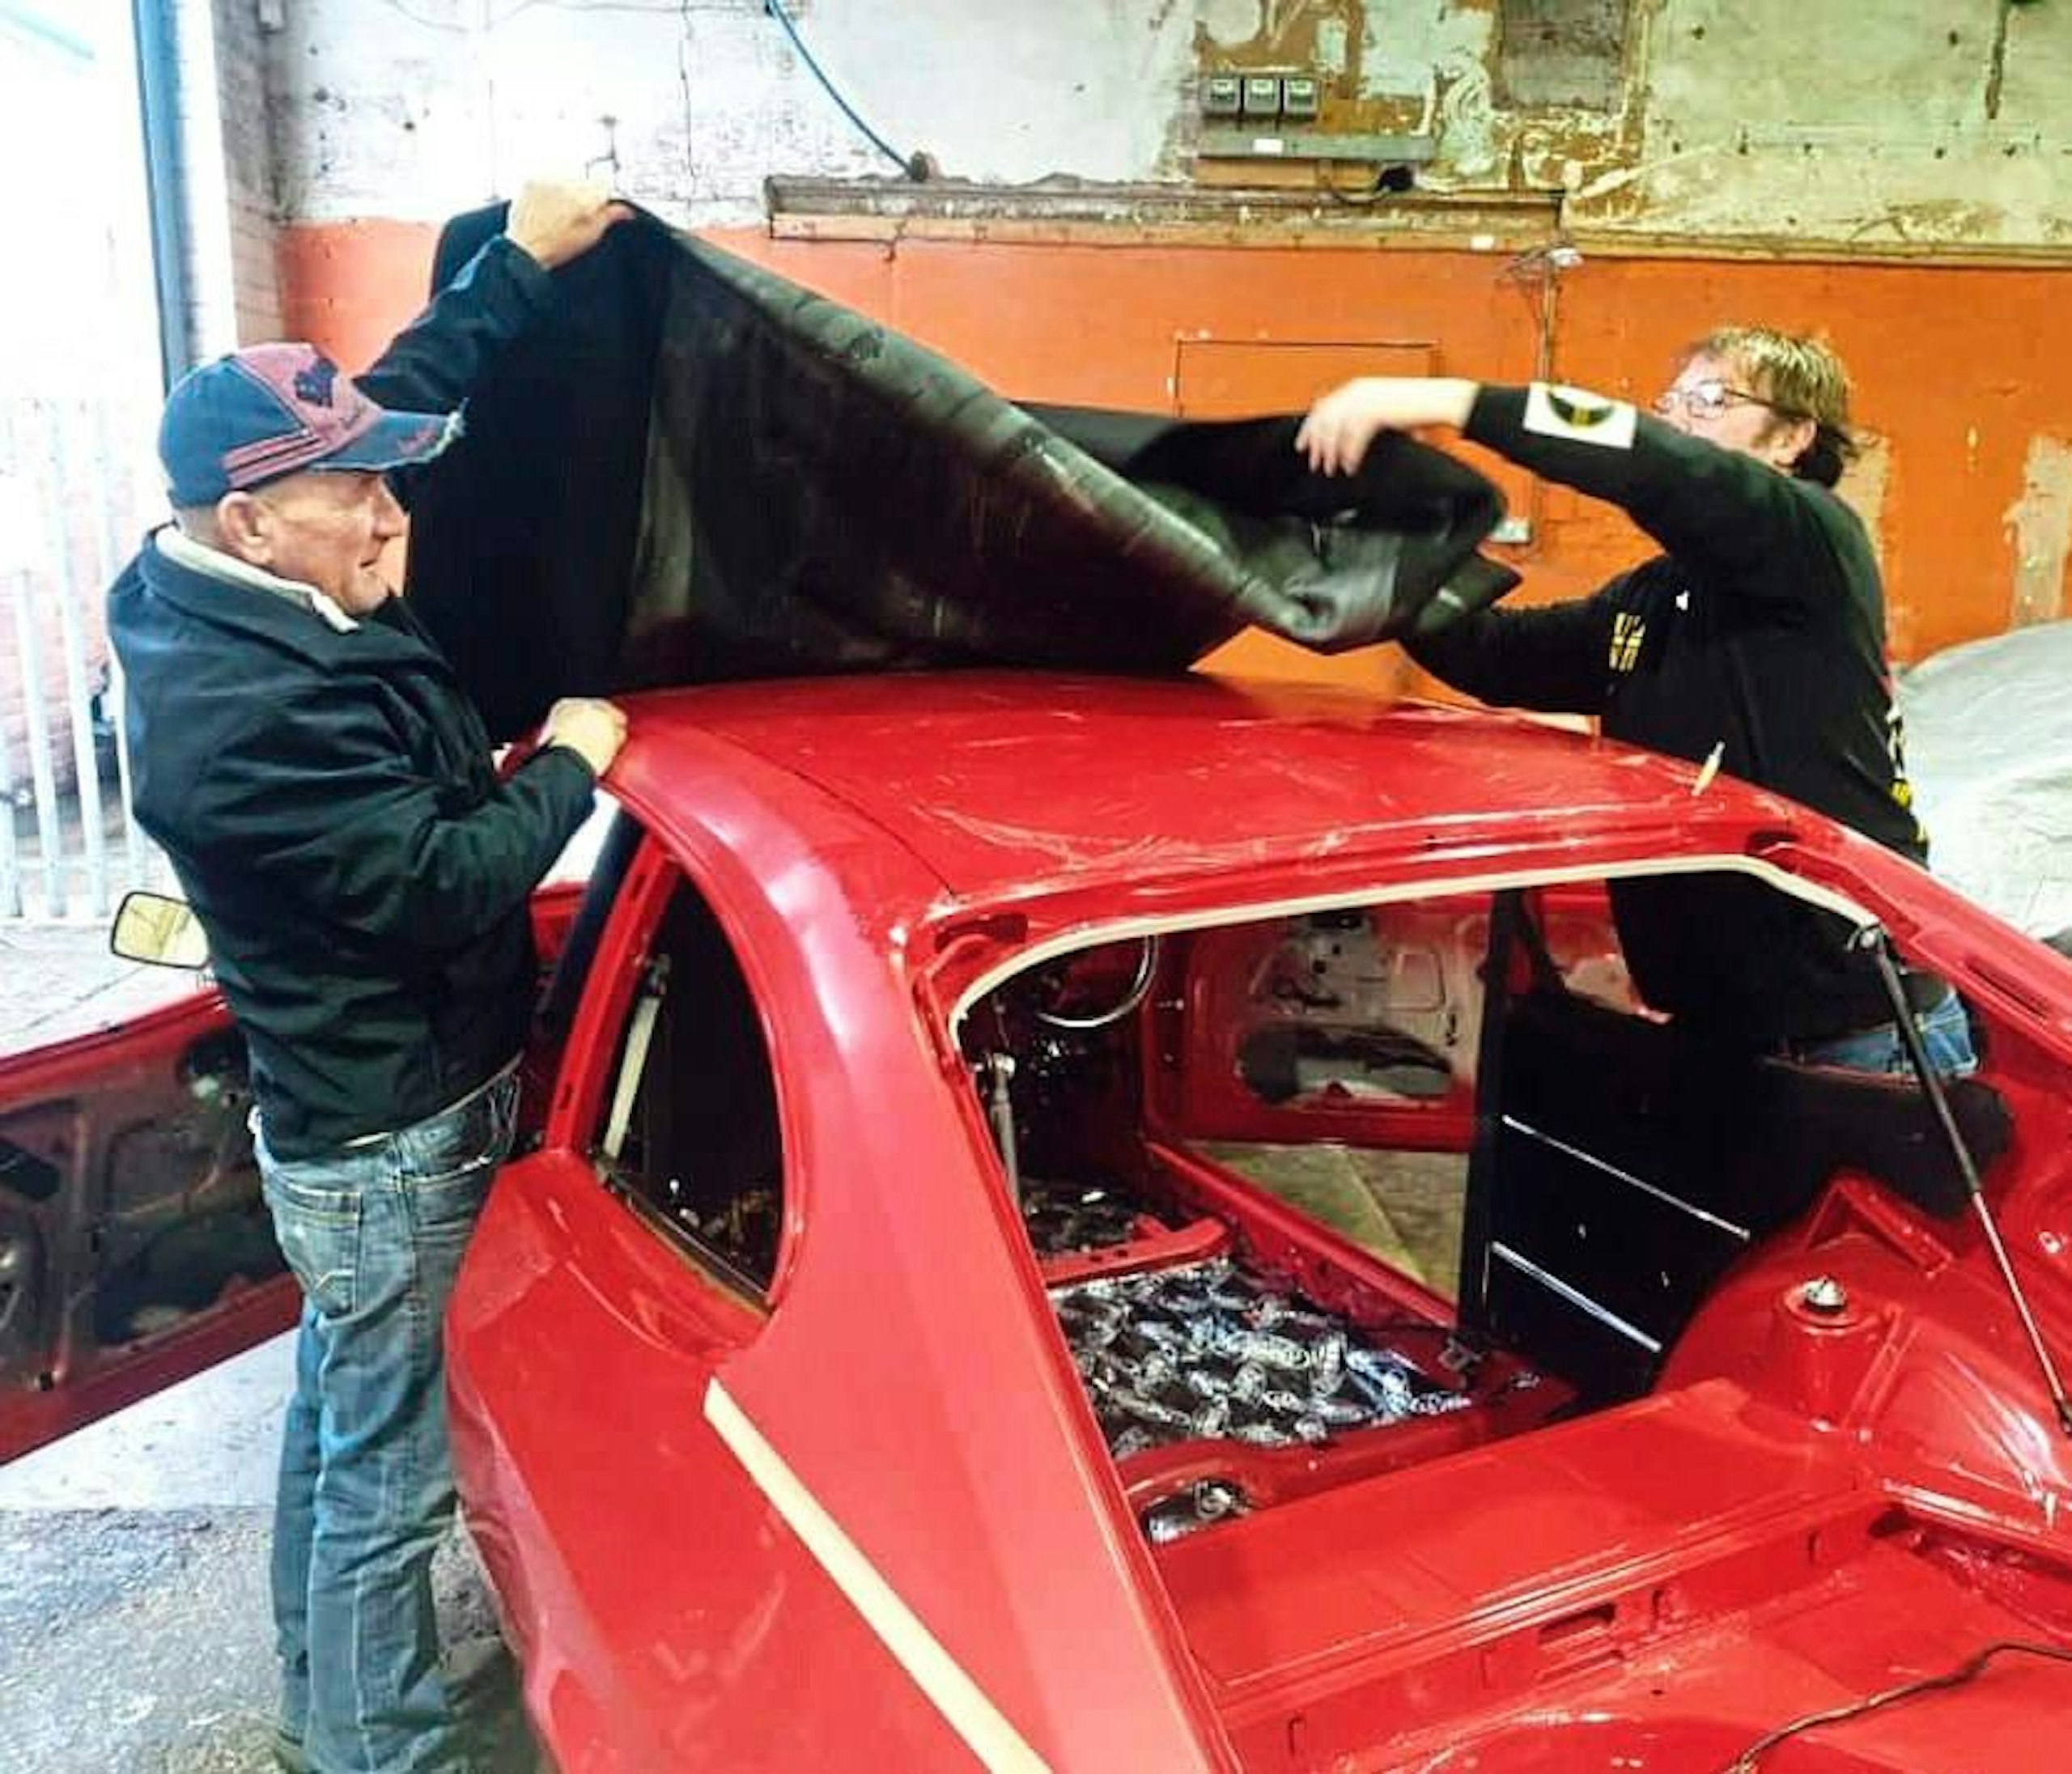
Vinyl roof trimming the hardest part of the project
The roof trimming – also handled by Cherry Upholstery – was a big issue in itself. ‘The vinyl roof trim comes pre-shaped and pre-stitched and is attached to the roof with glue and fasteners along the gutter rail’, Steve explains. ‘It’s a very tricky job, so I left it to the upholsterer to do, because it’s both very time-consuming and difficult to get right. Basically, you have to run a line down the centre of the car and take a lot of measurements before carefully positioning the fabric to get it to line up correctly, before making the final trimming to suit and carefully glueing with upholstery glue. This is a special glue that works like an impact adhesive which grabs fast and leaves absolutely no room for error, so you have to ensure you get it all right first-time.
‘Once in position, you have to stretch and smooth out any bubbles with heat to help activate the glue and make the vinyl more pliable. You need to be very careful not to overstretch the fabric, which can cause the vinyl to tear or distort the texture.
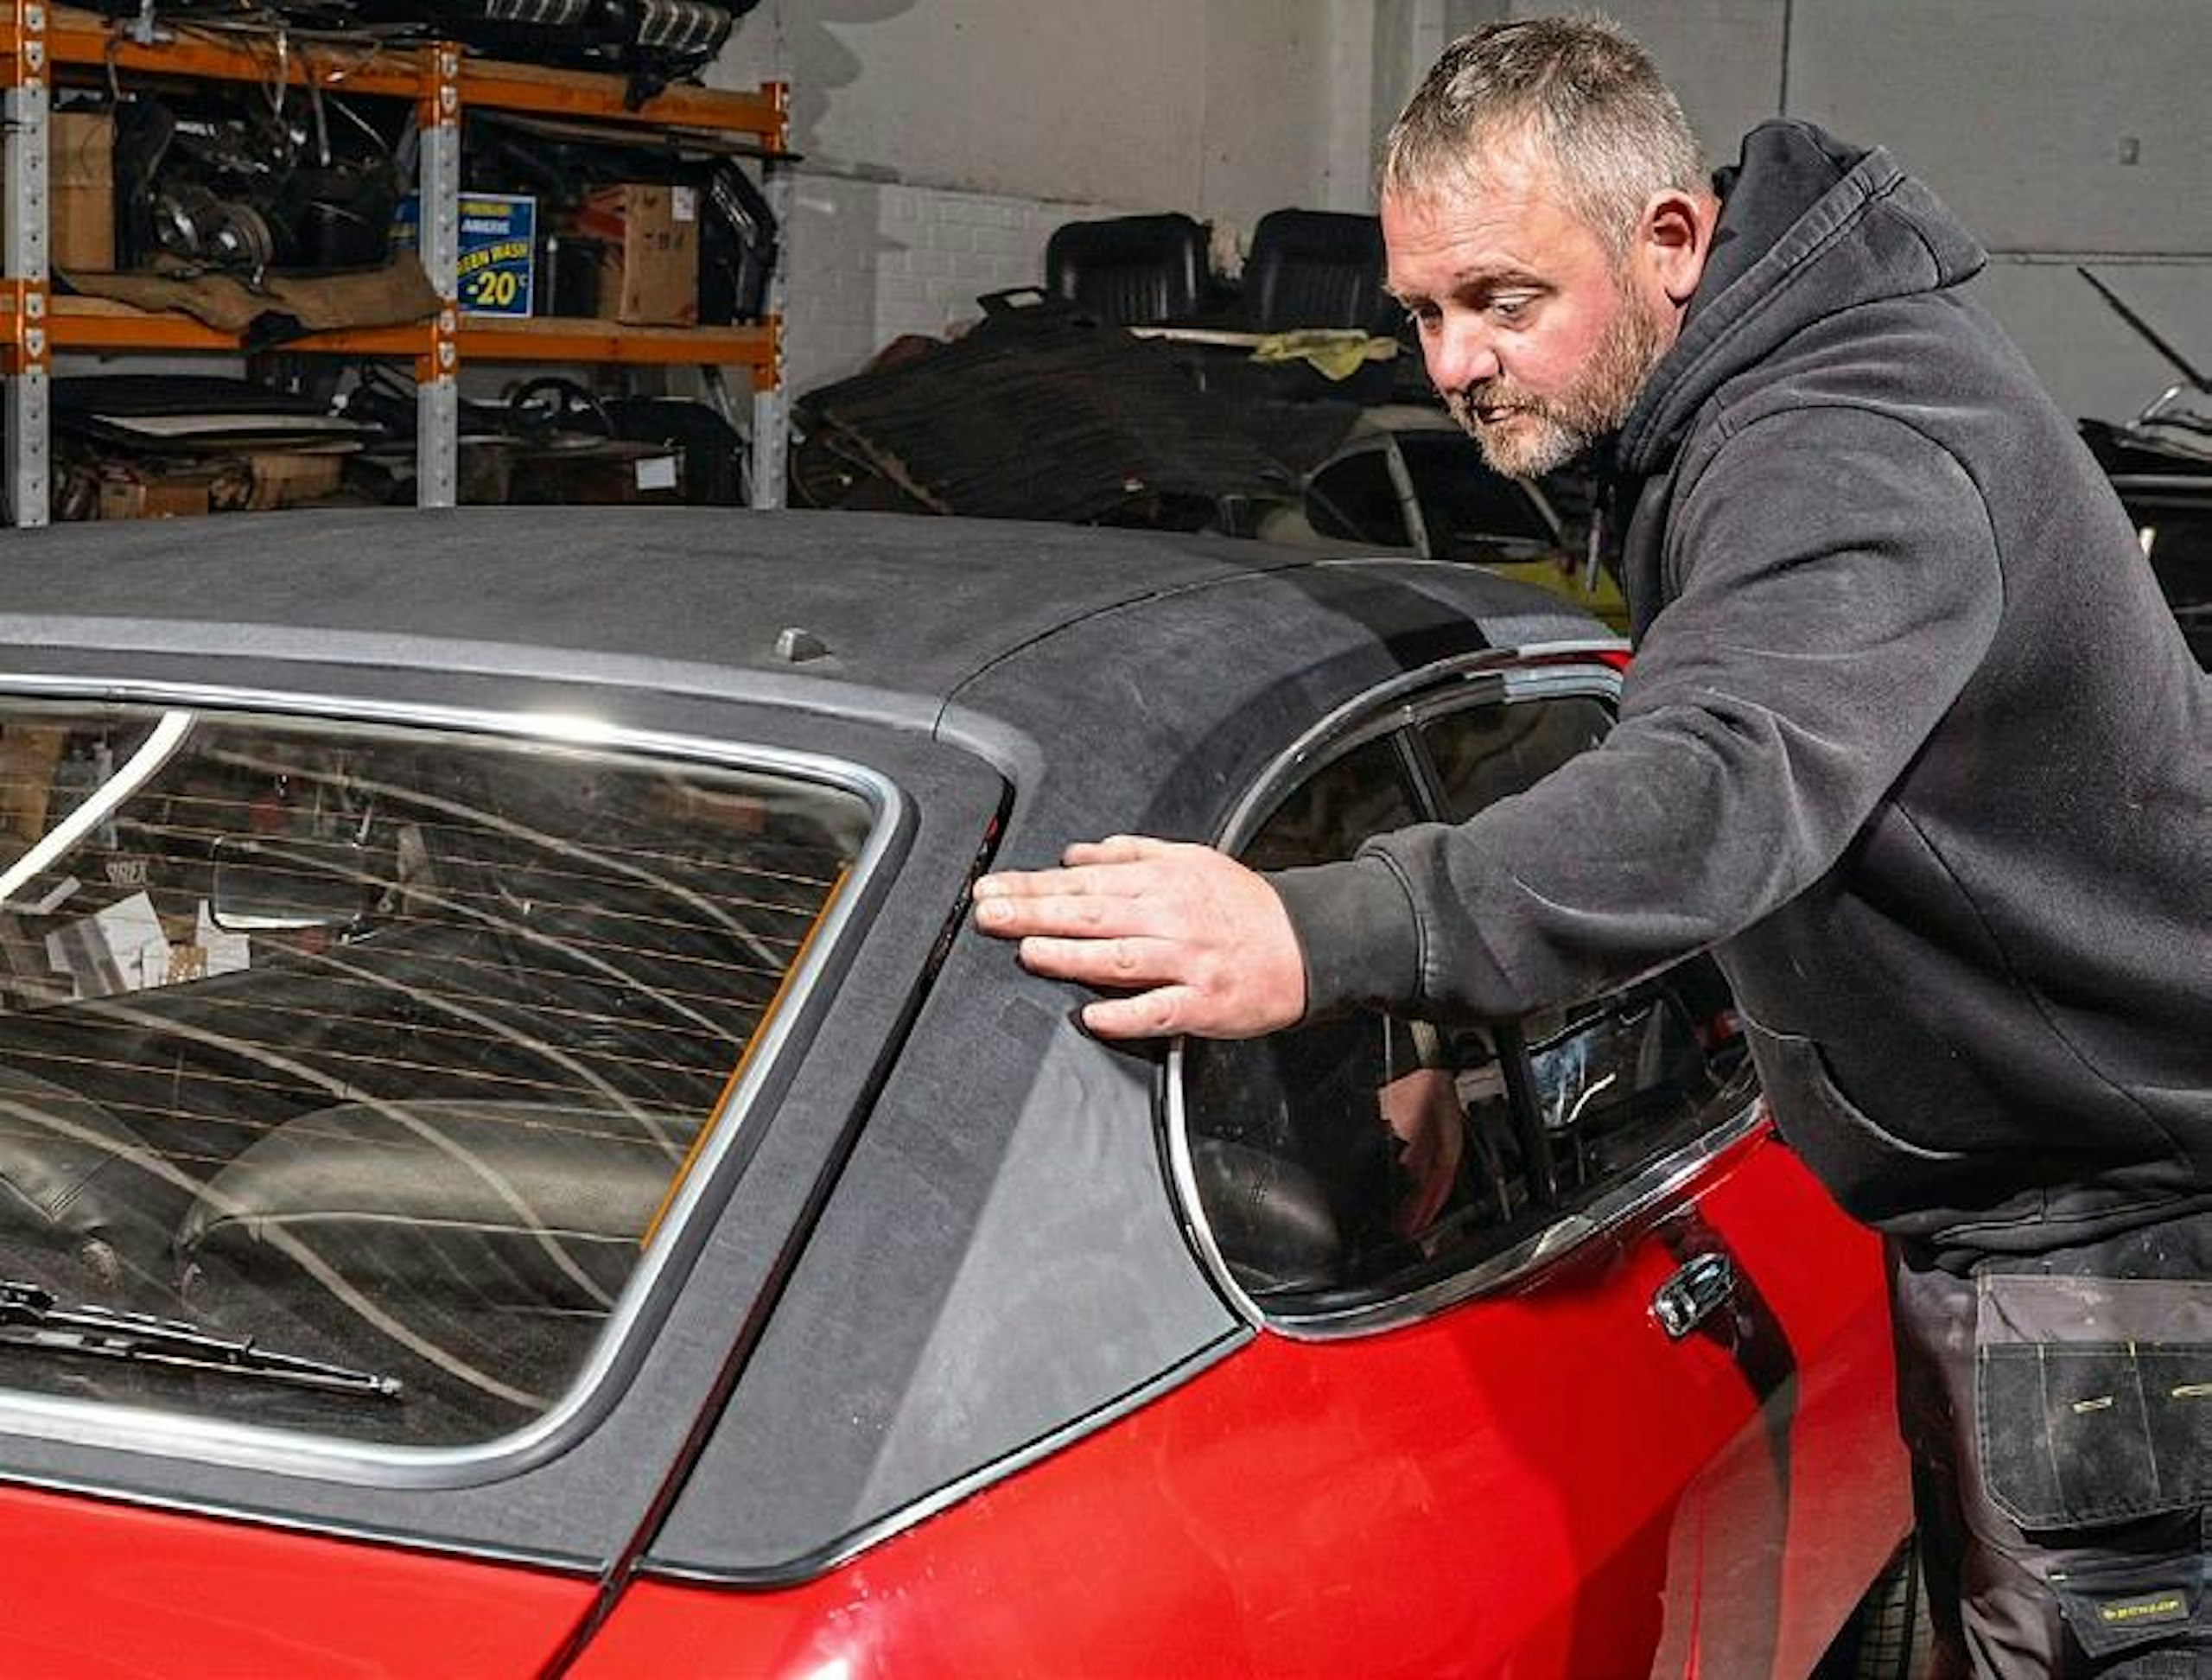
Steve sourced hard-to-find vinyl from Belgium
With the roof complete, all that was left was to do was fit the remaining exterior trim pieces, lights and wheels, all of which were sourced from new old stock. ‘It was exciting to finally see the car on the home straight,’ Steve says with a smile. ‘But you can’t rush it. A silly mistake at this stage can easily scratch the paintwork or damage a panel or trim piece, adding weeks and huge cost to the project, so you have to concentrate and protect any potential risk areas with masking tape or rubber matting.’
The period-correct 6.5x13in Rostyle wheels came from new old stock but the paint finish was looking lacklustre, so Steve repainted them in their original colour scheme of satin silver and black before wrapping them in fresh Goodyear rubber.
‘It was just an amazing feeling to finally see the car complete,’ Steve remembers. ‘It was just such a shame that Chris wasn’t around to see how it came out. But I’m really sure he’d be over the moon with it, just as I am.’
After pouring his heart and soul into this restoration over the past four years, this 1975 Venetian Red Capri has now become part of Steve’s own private collection, where it will be revered, not just as a successful client commission, but as a rolling, gleaming tribute to his best friend.
MY FAVOURITE TOOL
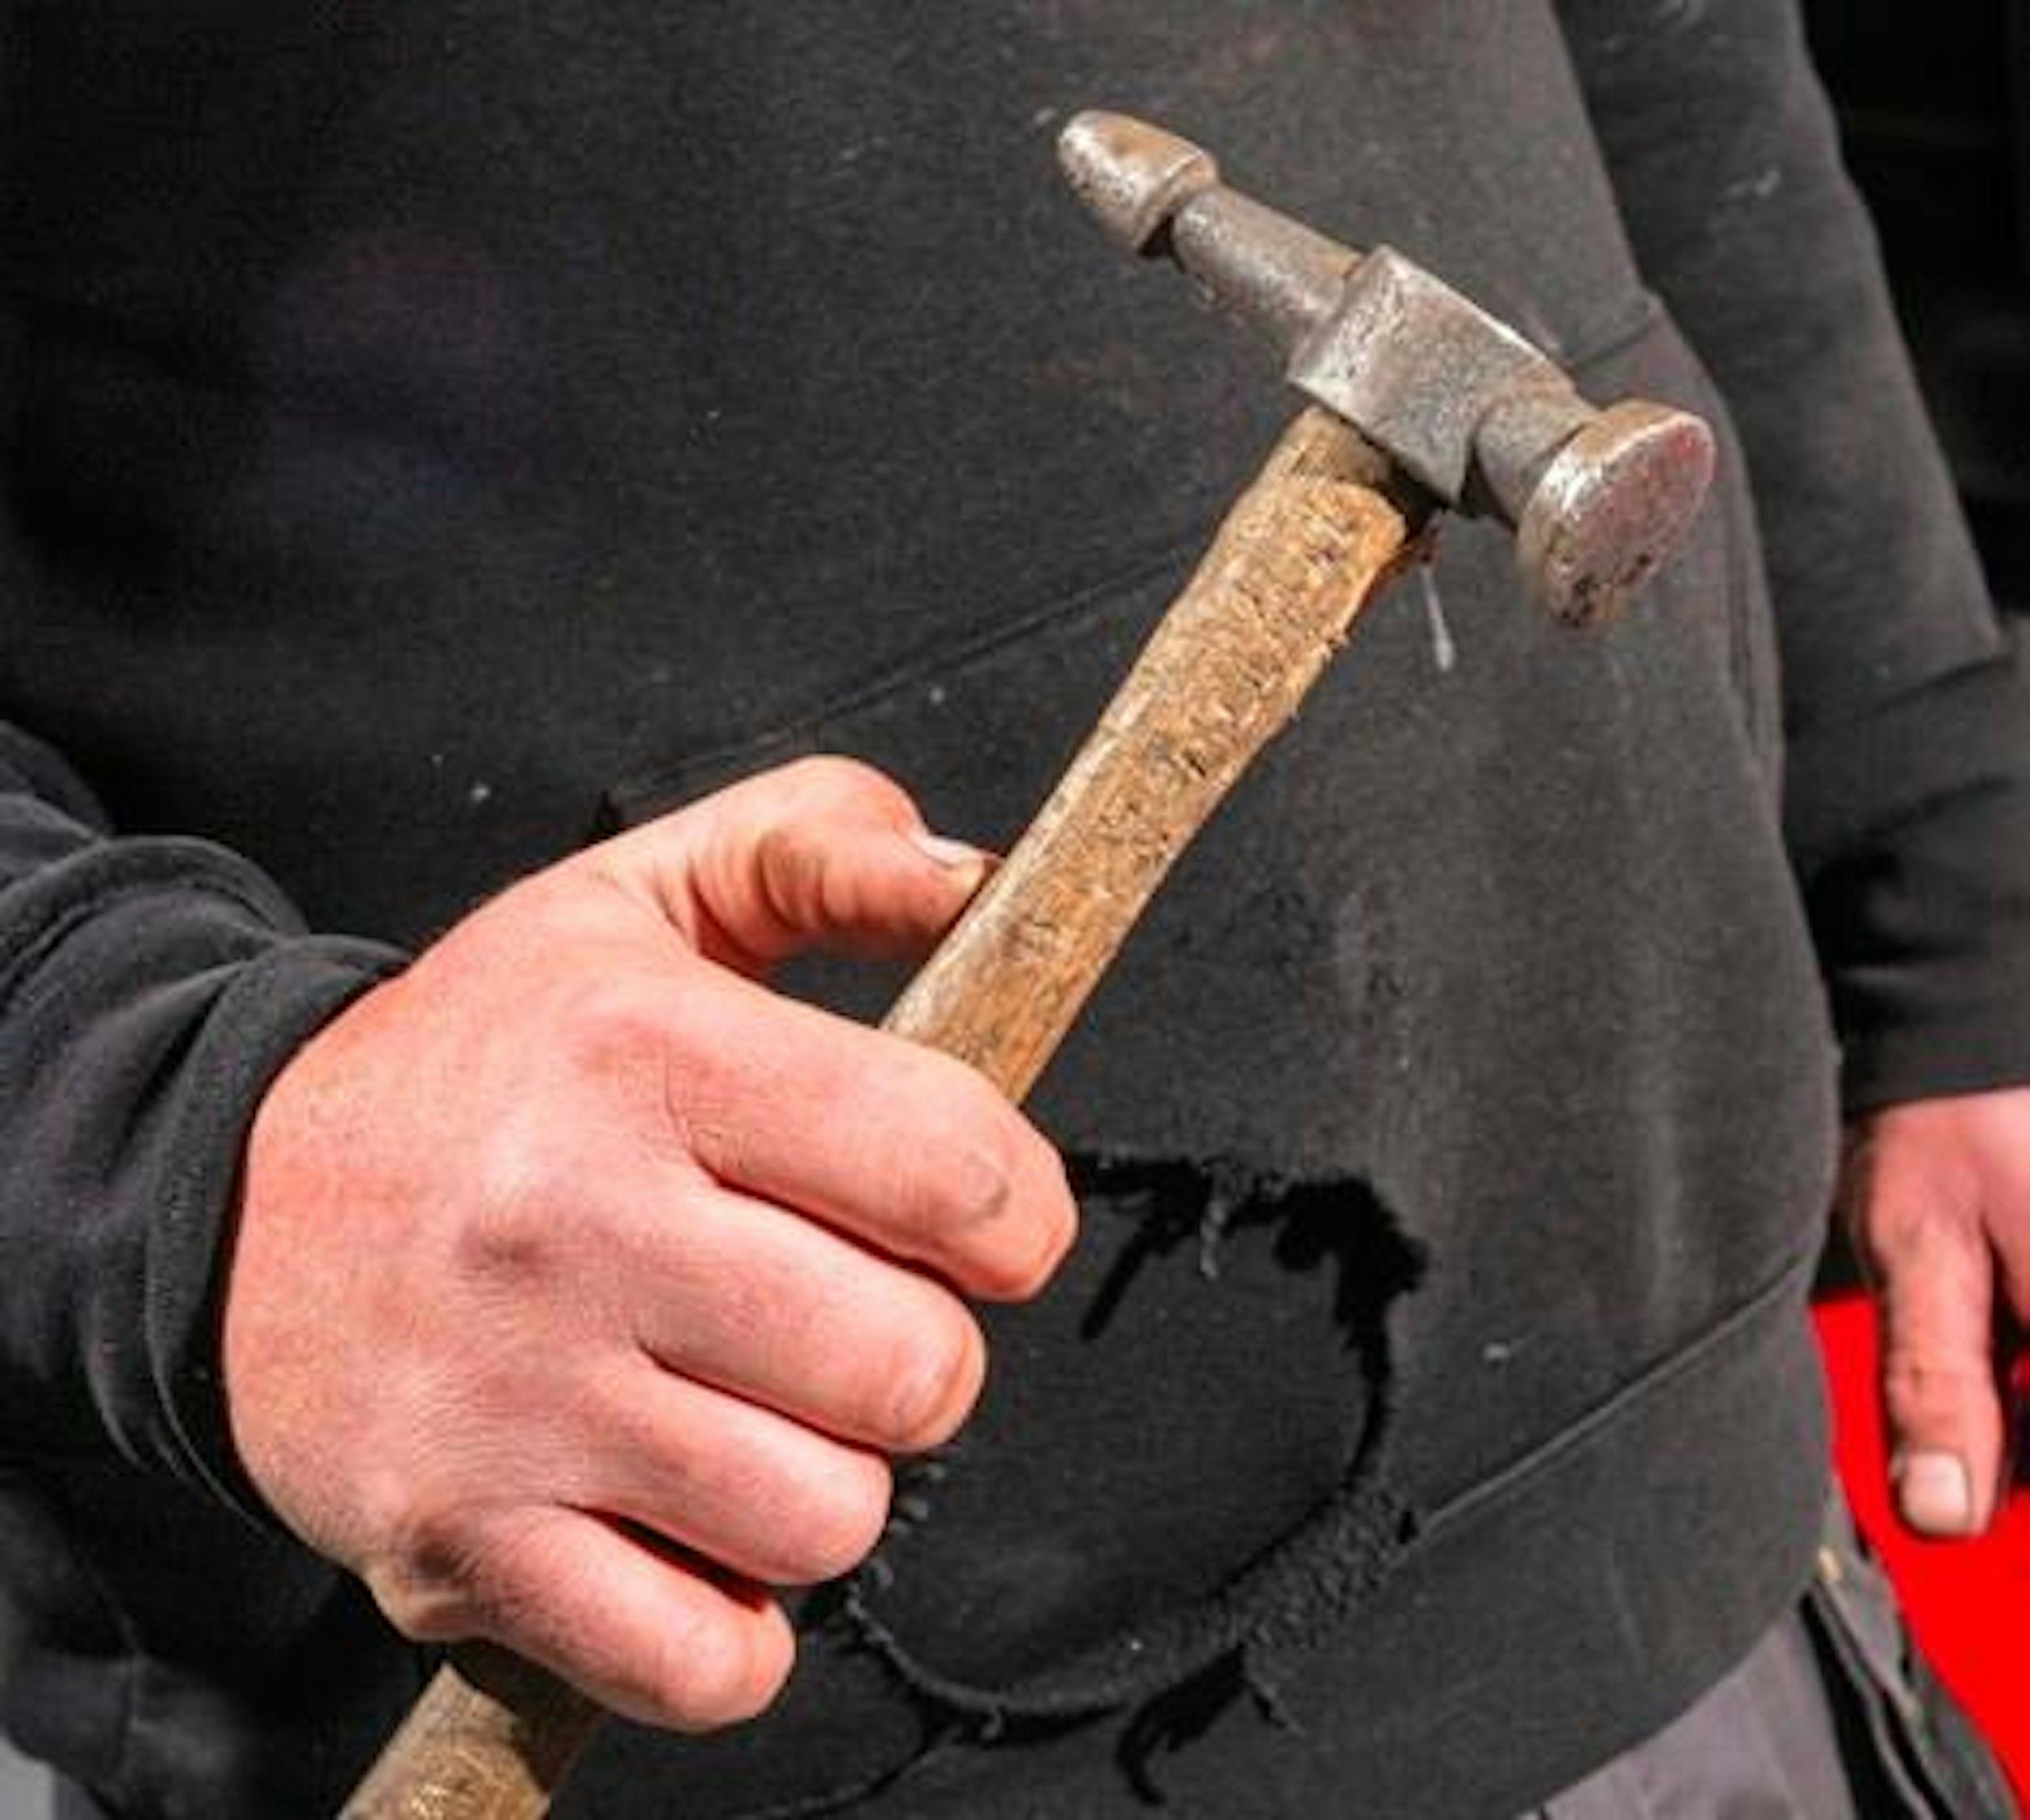
‘My panel hammer. I’ve had it since I was 16 years old and I use it daily when repairing bodywork. It’s weird, but no other hammer feels quite the same.
‘I’m sure other people in the trade would agree; you just get used to the weight and the swing of it, and just how it works in certain areas. I used it on this restoration when fabricating the Capri’s bodywork and I can’t see it ever being replaced.’
Epic Restoration of the Year
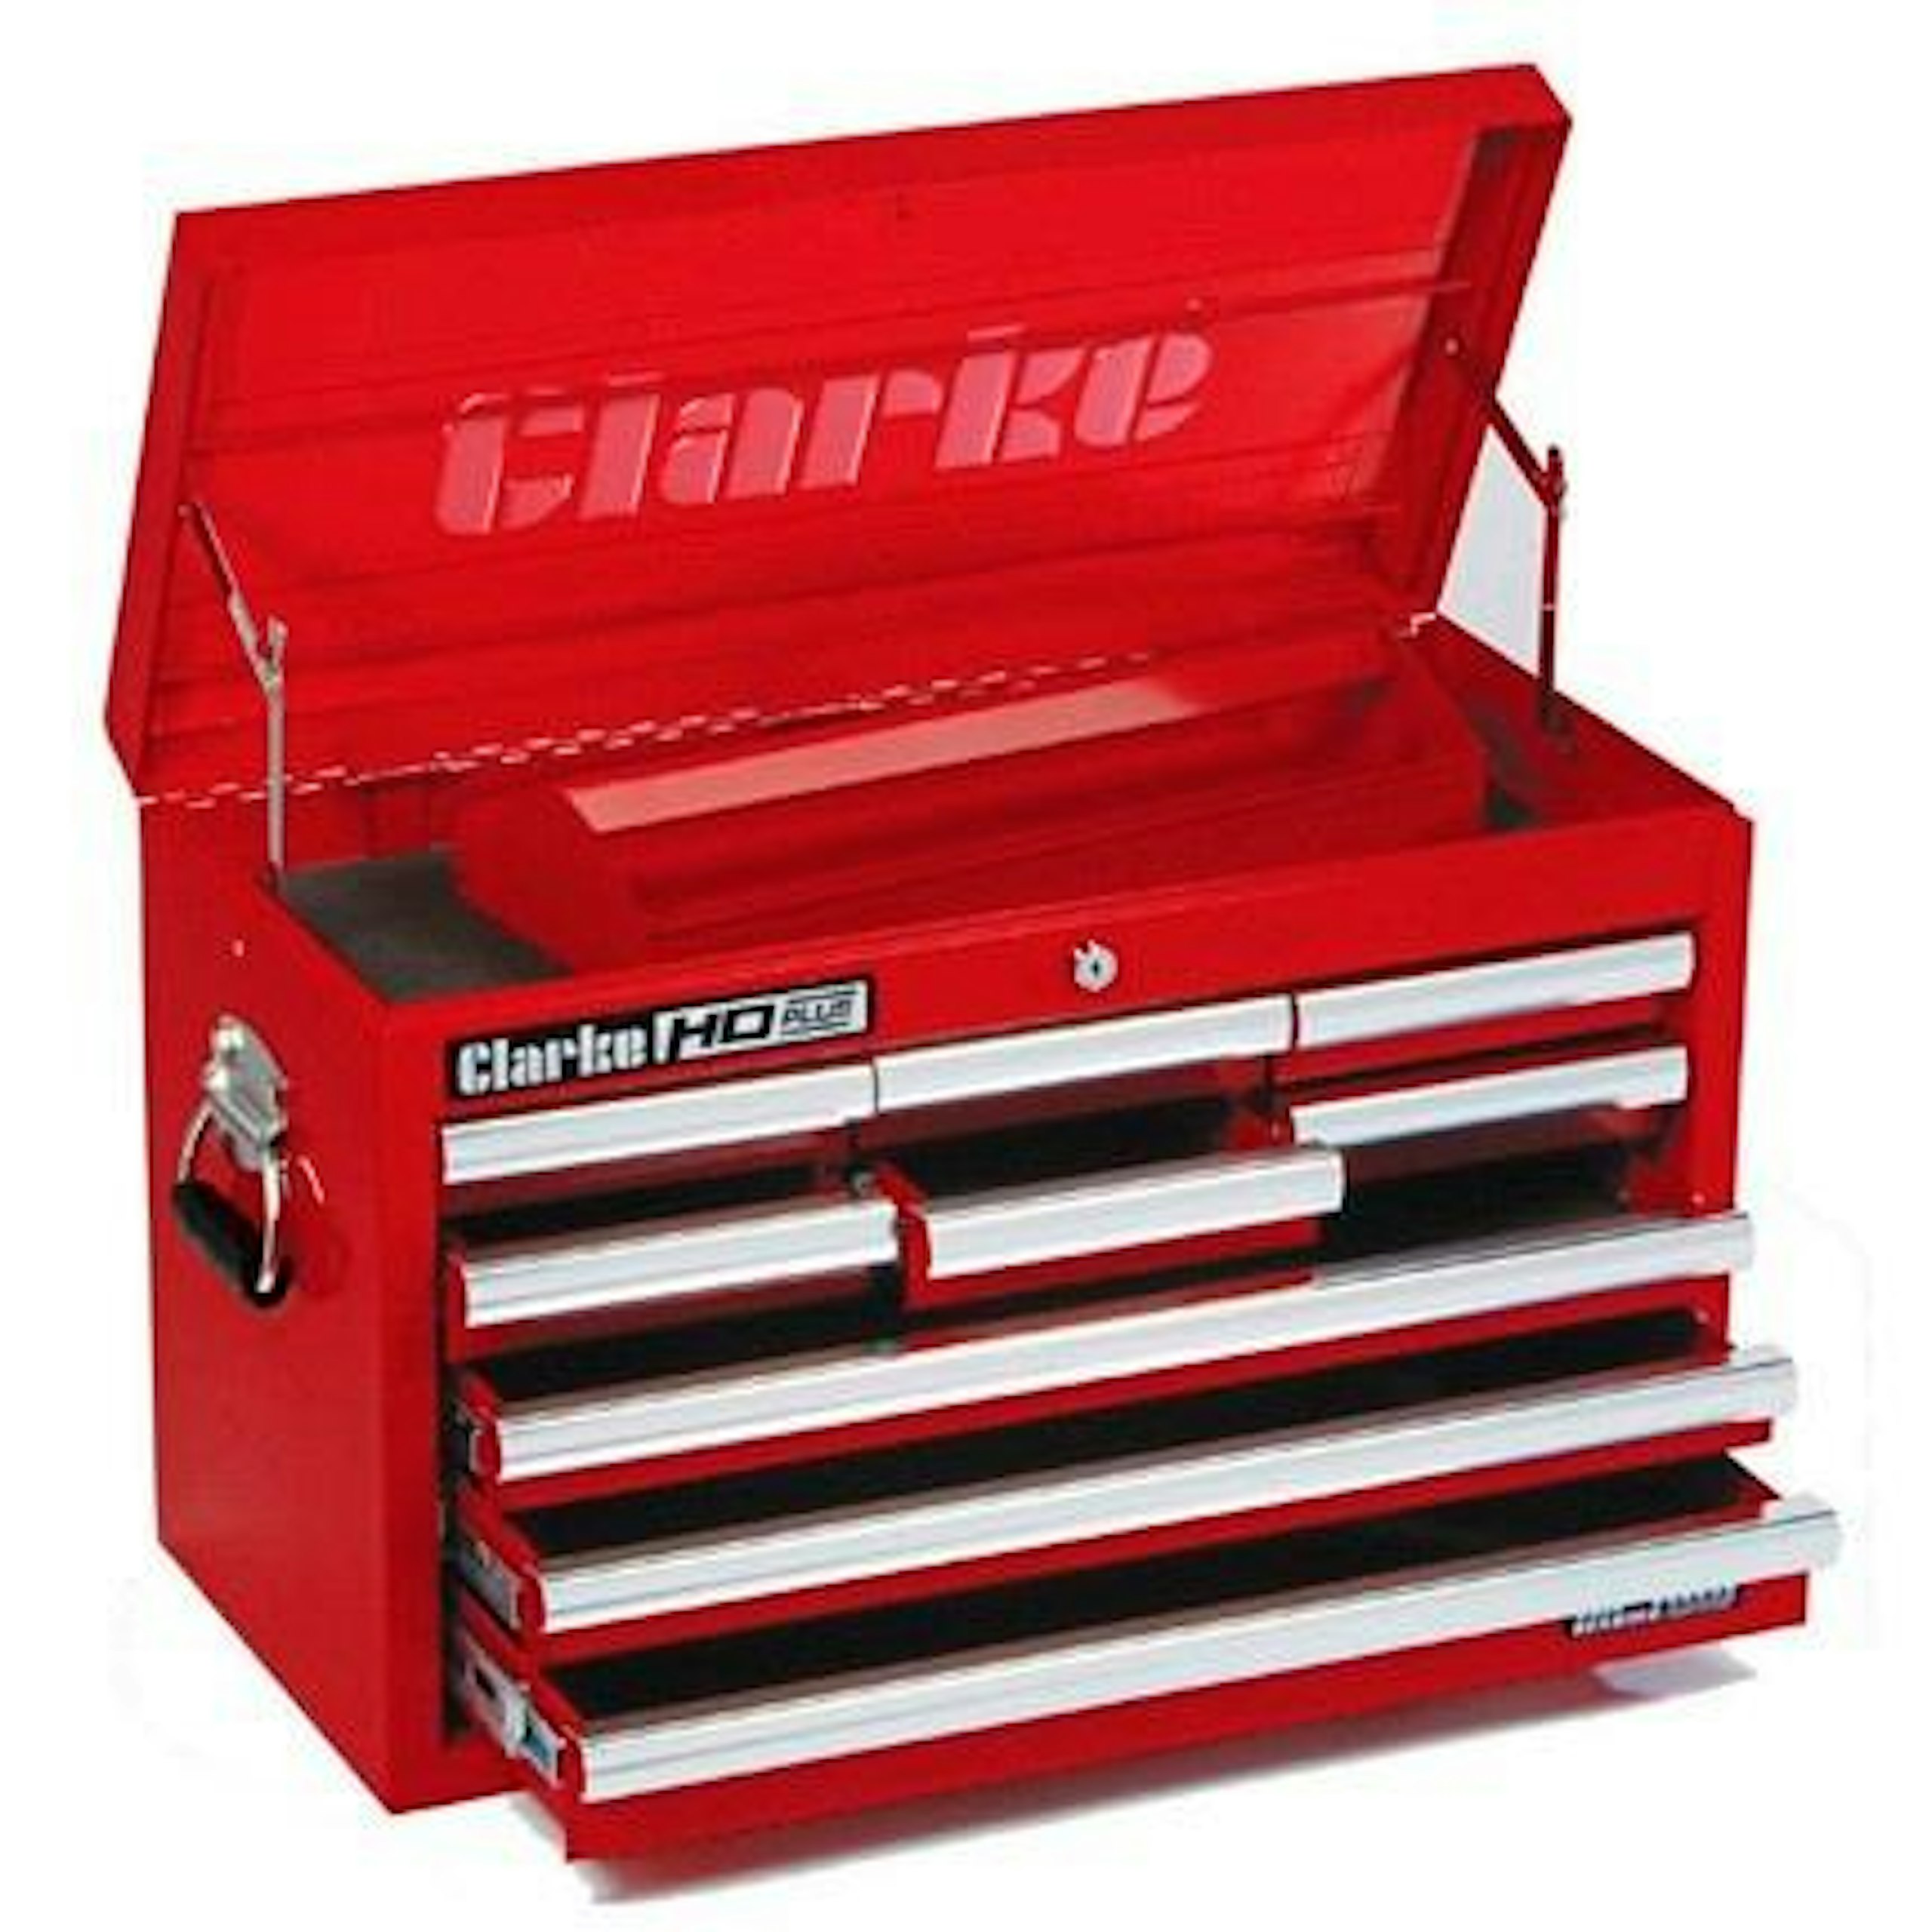
This MkII Ford Capri GL is one of 12 Epic Restorations you’ll be able to vote for in 2027, with the chance for you to win fabulous prizes of premium workshop gear from Machine Mart, including this *Clarke CBB209C HD Plus 29in red and silver nine-drawer tool chest. classiccarsmagazine.co.uk/EpicRestoOfTheYear. T&Cs apply.

*Prizes subject to change. They will be confirmed by the May 2027 issue.
Subscribe to Classic Cars today. Choose a Print+ Subscription and you'll get FREE UK delivery, instant digital access and so much more!