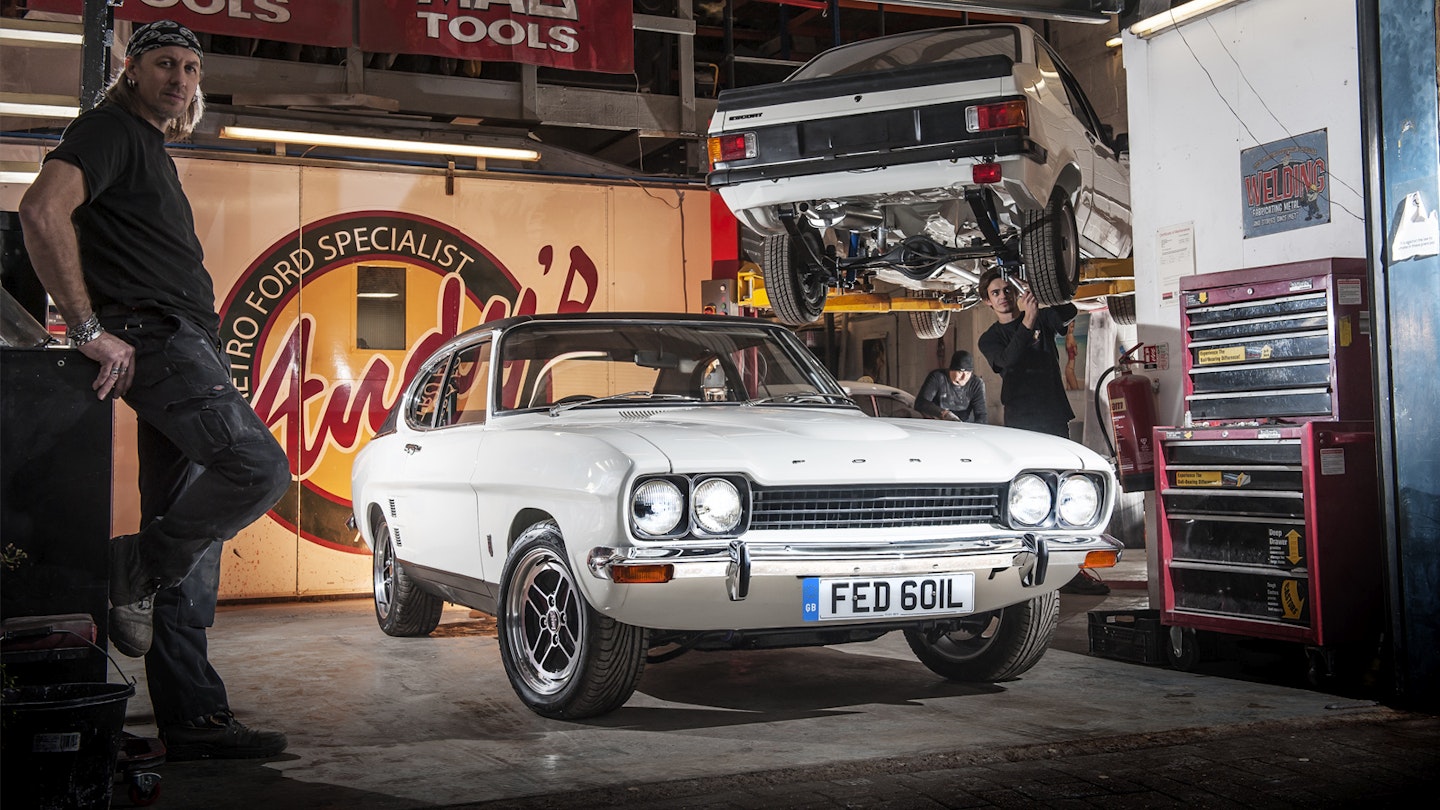
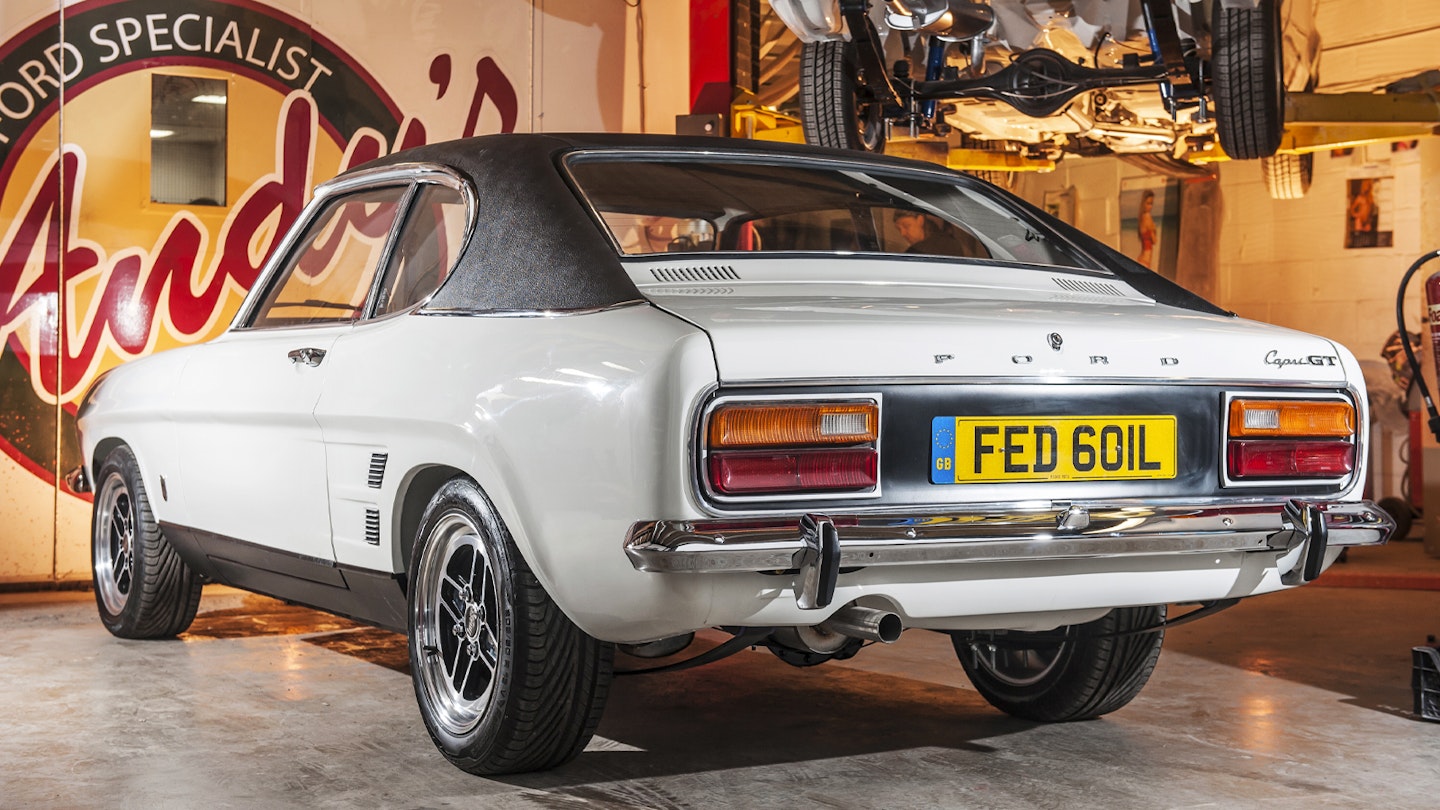
Once the filler was stripped away, little remained of this Ford Capri MkI 3000GT. But with few survivors left, Paul Bailey was determined to see it back on the road
Sometimes even a collection of supercars isn’t enough to shake off nostalgic feelings for our formative years, as this Capri’s owner Paul Bailey explains. ‘The reason I bought a 3000GT is because as a teenager this was absolutely the car to have. It had a reputation of being a very fast driver’s car and was one of the quickest cars of its day. The MkI choice was because I wanted to get the earliest model that I could find – for me the earlier cars look the best.
‘The car was very hard to track down. In real terms I simply bought the first one I could find. Although the purchase was in the dark of the night it didn’t really matter as I was stripping the car anyway. The facelift model wasn’t a must-have requirement but twin headlights was, so Andy [Pawis] has had to fit these retrospectively– though it would be the matter of a few screws to put the original single units back in.
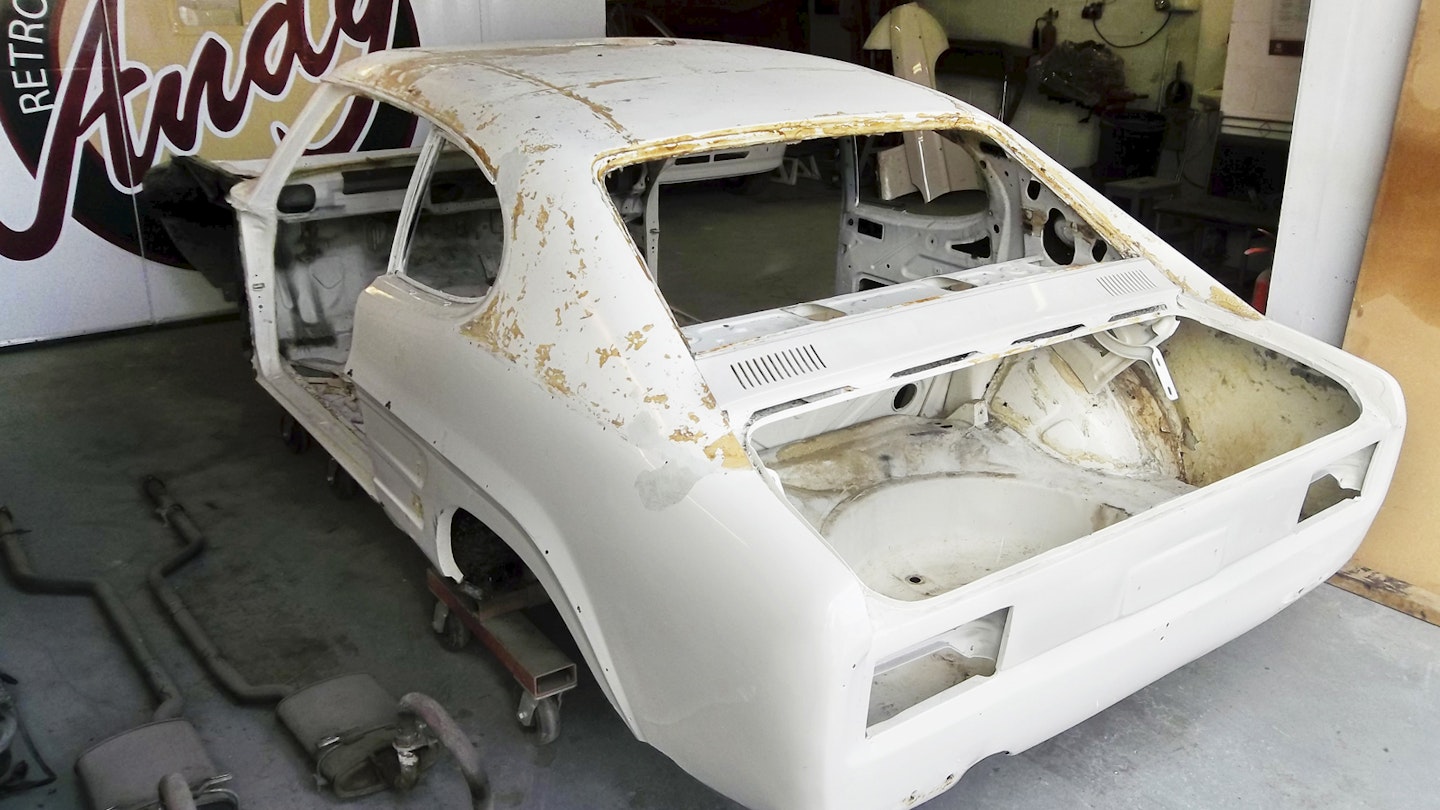
‘First impressions were that the car appeared to be in reasonable condition but how wrong was that assumption! The initial restoration project was to be mainly cosmetic but the deeper we dug the more of an issue it became. My only choice was to have the car stripped back to nothing and every component rebuilt. When the car was shotblasted there was significantly less to work with than I had thought so a huge number of panels were made and the project took shape.
‘Very little information on the car’s background came with it, but the Capri Owners’ Club was very helpful. So too were the DVLA, whom I wrote to for any information that they may have. I got back all the owner history and was able to find out the original factory colour and confirm I had matching numbers for the chassis and the engine. I initially wanted the car to be as original as possible but once I had decided to have the engine completed to a Stage 5 specification it was important to also ensure that transmission, brakes and suspension were up to the job. It is definitely a well thought-out restoration with as few upgrades as was sensibly possible, and everything is easily reversible.’
ASSESSING AND STRIPPING
Andy’s Auto Body specialises in restoring Sixties to Eighties Fords, so main man Andy Pawis is well used to their foibles. But nothing had quite prepared him for the extent of rot and bodged repairs that would come to light in Paul Bailey’s Capri GT.
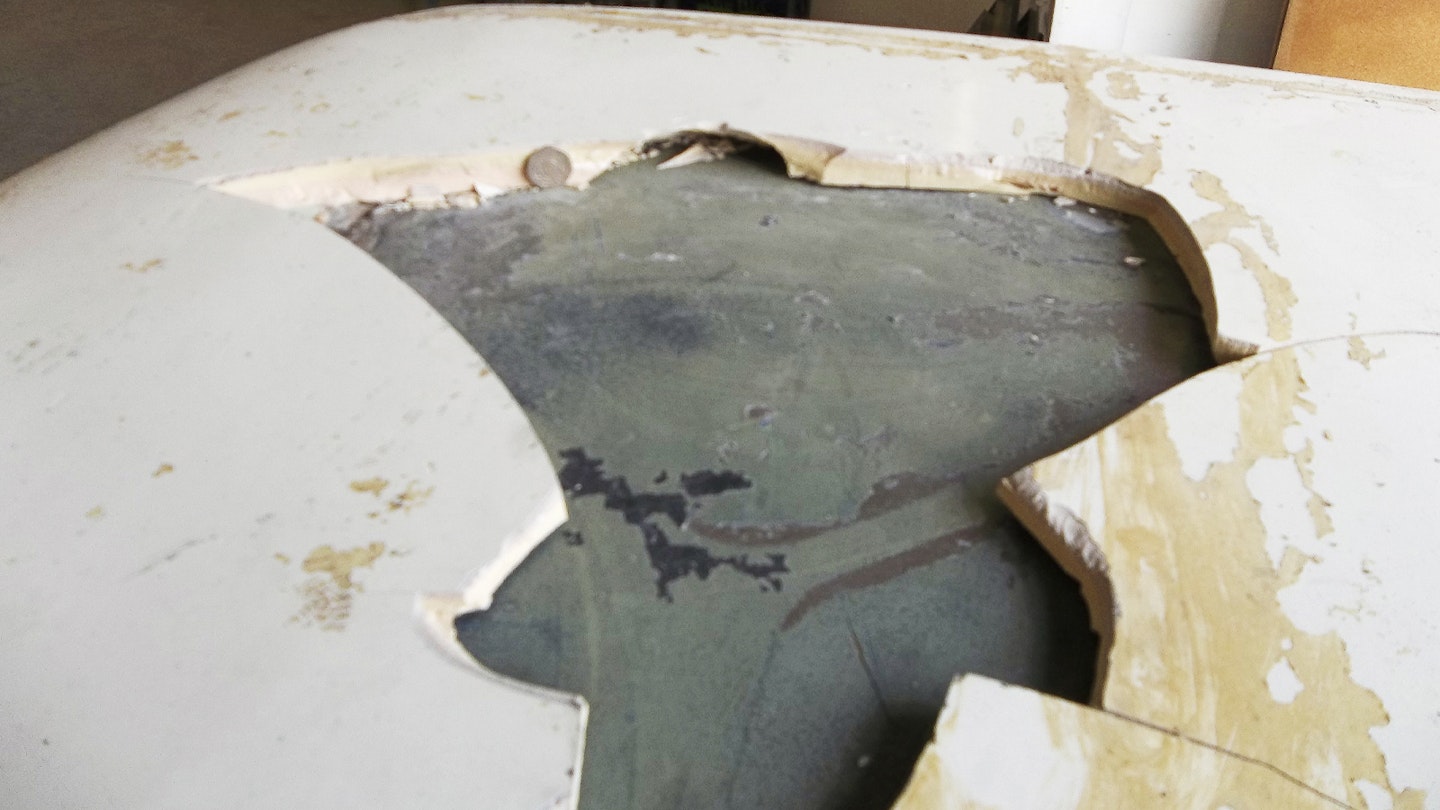
‘It arrived partially stripped and with the vinyl roof removed. First impressions were that it had a very dubious repaint and was full of filler. That’s about par for the course. But the more we stripped away, the more the full extent of the Capri’s corrosion and dodgy repairs became evident. There was an inch of filler spread over most of the roof alone. It was ironic because Paul specifically wanted a car without a sunroof and rejected a few before he found this, but a plate had been welded in to replace a previous sunroof and this had distorted the panel to the point that it was unusable even before you factored in all the rust round its edges.’ Hence the vast amount of filler that had been hidden under the vinyl roof. But that was only the start of it.
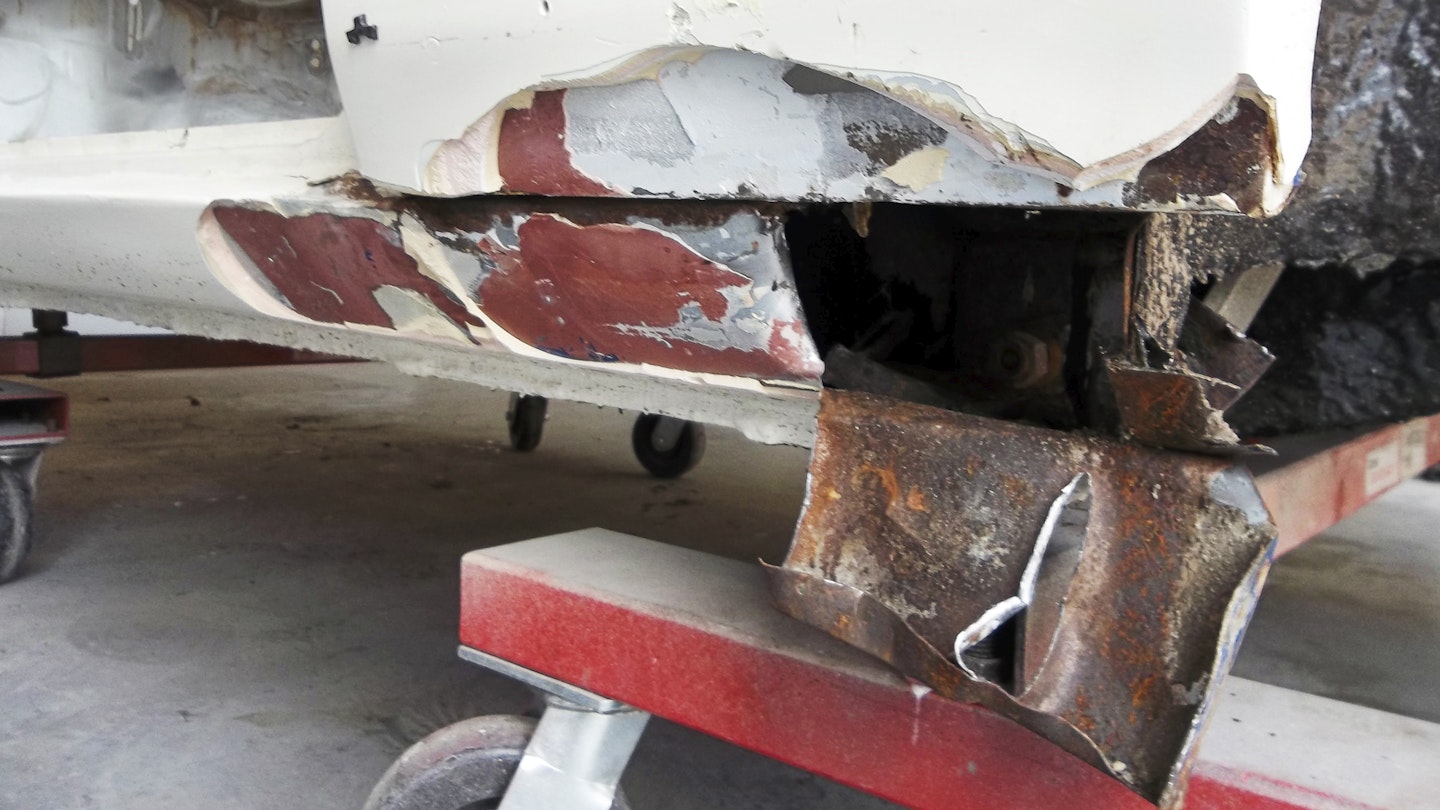
‘Almost every single panel had rust holes. Sadly the blasting firm we used no longer exists, but I know the medium it used was garnet, which is fast and effective on steel. Where there wasn’t rust there was a lot of bad welding and plated repairs to remove. Some past repair panels had been welded in places, then not joined to anything for 18 inches where the body had been too bad to weld to. I don’t know how it stayed together.
‘Also, not one but two front strut top repair plates had been welded over the originals, without cutting any rot away, and they’d been stuffed with newspaper. At least after cutting these away we found enough of the GT’s chassis number to confirm it was genuine. We could now make a shopping list of the panels needed, and it was pretty much everything. The only external panels we could re-use were the doors and bootlid, and they probably weren’t this Capri’s originals.
‘Fortunately, Ex-pressed Steel Panels now makes the majority of panels required for these, so that got us 90 per cent of what we needed, and we set about rounding up the rest from Capri Club International or Tickover. The latter was able to remove a complete roof panel from another Capri MkI by unpicking the spot welds.’
REBUILDING THE BODY
This was obviously going to be a long job so Andy took precautions. ‘To protect what was left and to stop it getting any rustier now it was exposed to the elements, the first job was to spray the whole body with red oxide primer. Then we mounted it on our jig to keep it straight during repairs – it needed that!
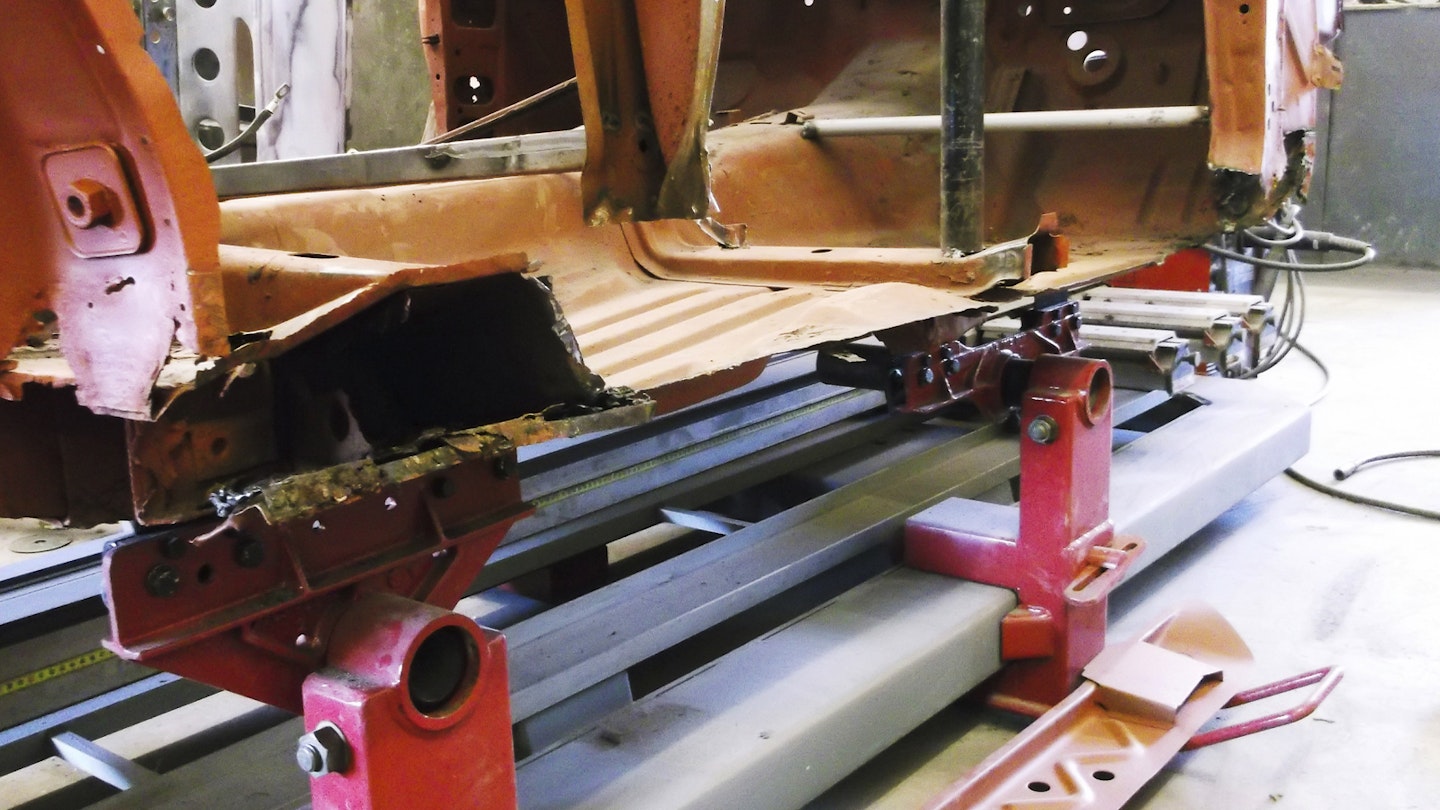
‘To put some strength and reference points into the structure we started by replacing the sills, then fitted complete new rear chassis leg/spring hangers. With these you must fit the extra internal strengthening that’s used on 3.0-litre cars.’ While it’s great that they’re now available from Ex-pressed Steel, prices for short-run panelwork can be sobering, and provide an indication of how much all this Capri’s new metalwork was going to cost. Including those 3.0-litre reinforcements, the chassis leg structures come in at £833 – per side. And then they need fitting.
‘Then it was the front chassis legs and the other reinforcing box sections – all were shot full of holes or poorly patched.’ With the new roof in place too, they at last had a fairly rigid shell to work with. ‘It was just a matter then of cutting out and replacing a panel at a time to build up the inner shell: A-posts, floorpans, inner wings, front and rear bulkheads, bonnet slam panel – all supplied by Ex-pressed Steel.’
If that makes it sound easy, bear in mind all that was spread over about a year, working methodically to make sure everything fitted perfectly, and with breaks while working on other customer cars and waiting for supplies from Ex-pressed. ‘They’re producing good stuff up there but it takes a while; they’re busy chaps and often struggle to keep up with demand. You just have to work around that and be patient,’ says Andy.
‘Once all the repair sections had been welded into the rear quarters of the car – that’s the complete rear wings up to the roof section – I took them off.
‘That sounds drastic but it’s just a matter of popping a few spot welds and I can then dress the back of the panels to the same standard as the front. They’re only single-skinned so it’s all visible on the finished car and we were aiming for perfection.’
With all the structural welding done it was time to paint all the inner panels. ‘I put the car on a rollover jig so it was all easy to get at. I prefer to get all this done before the outer panels are fitted. That way you know everything’s got plenty of paint on.
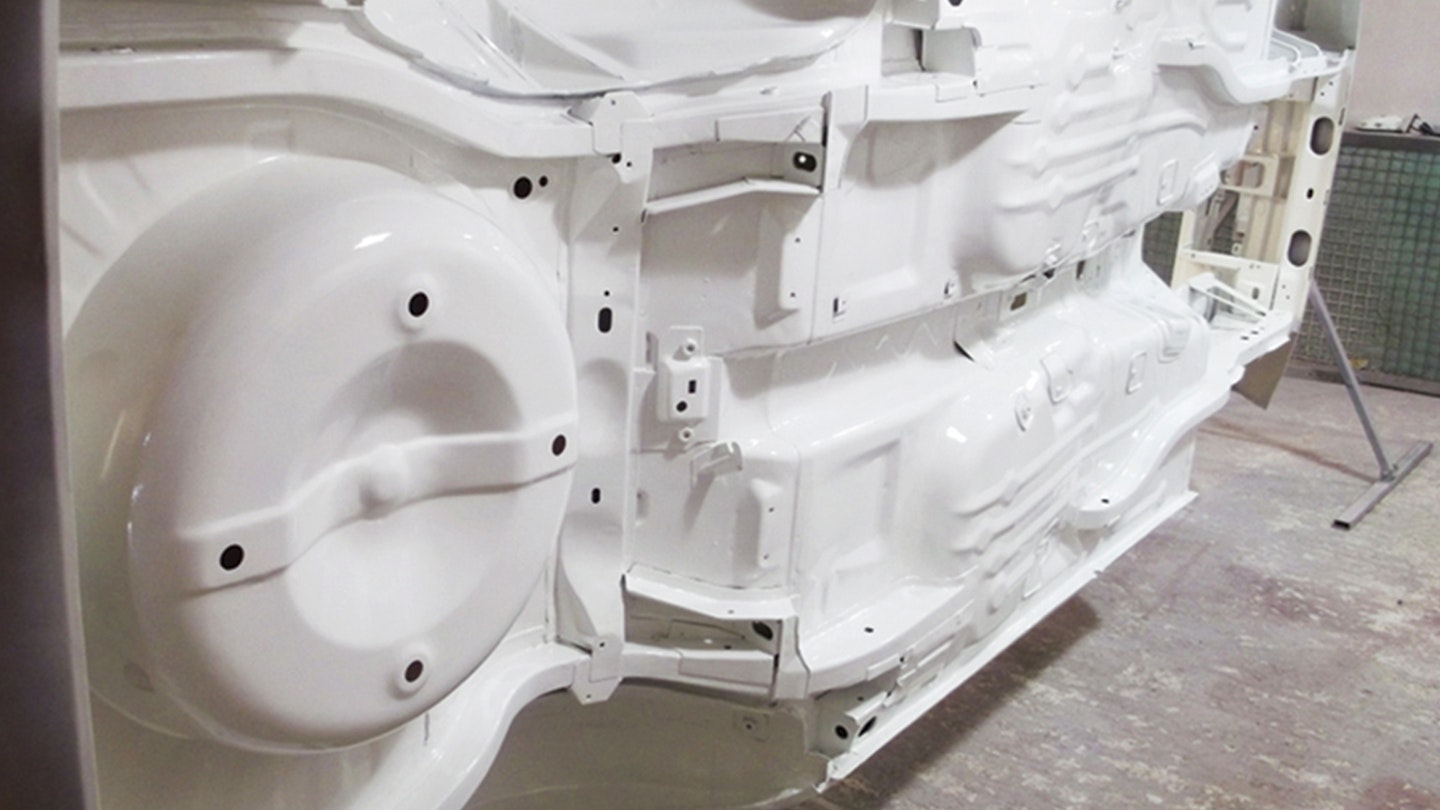
‘The floorpan was done first, then I worked upwards from there. I use the same preparation and paint system as I do for the outer panels, which is time-consuming but the end result is worth it.
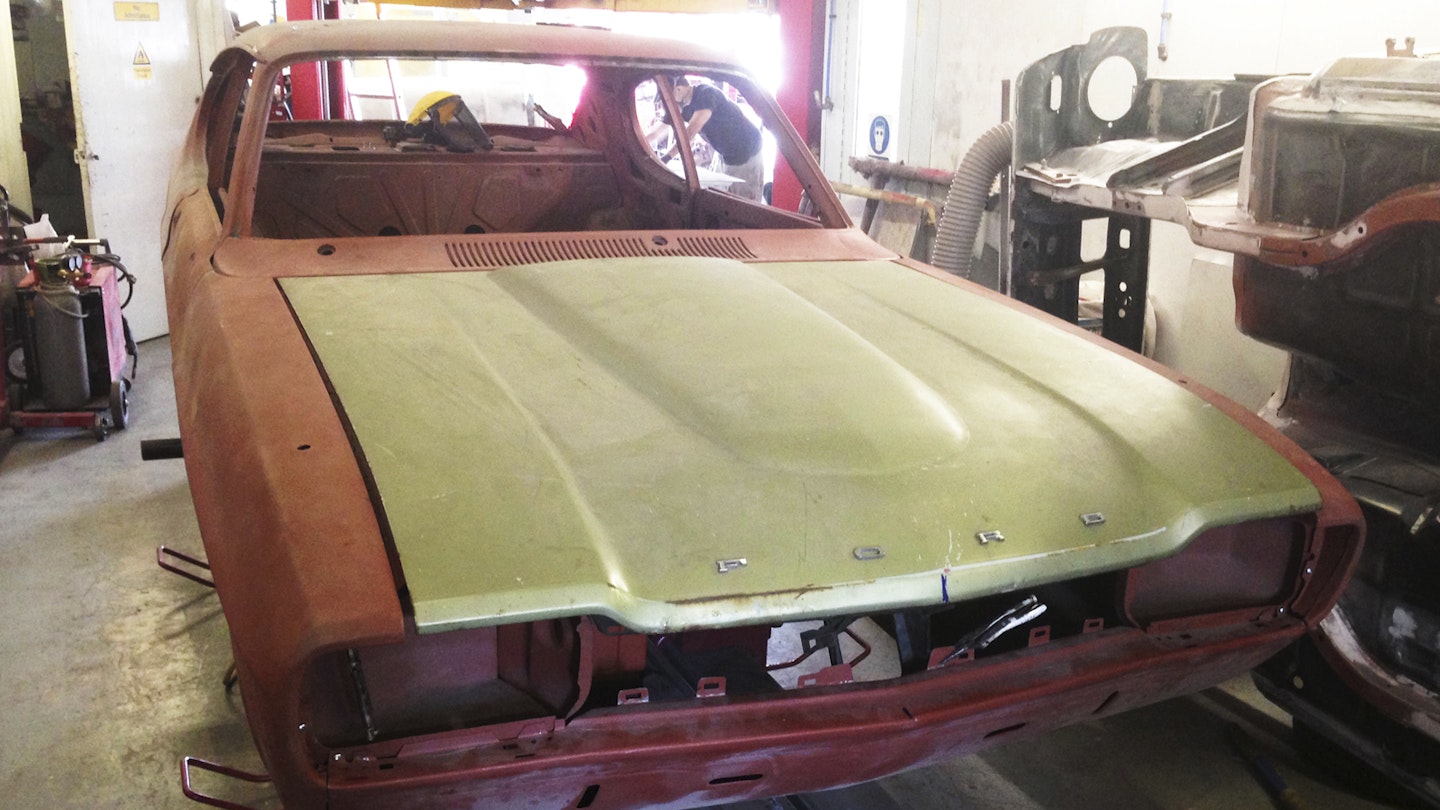
‘Luckily a pair of new front wings came with the car – even repairable used ones are £200 each now. The bonnet was a rust-free one sourced from the Capri Club’s spares section. The doors were trial-fitted but taken off again for the painting stage.’
PAINT AND REFIT
Having started out as a panel beater, Andy Pawis learned to paint at Vauxhall before setting up his restoration business three years ago. ‘I still like to paint old cars old-style to get an authentic finish. For solid colours like this I use an ICI two-pack – you can’t get the shine with the new water-based paints without using lacquer, and that doesn’t look right.
Paul’s Capri was treated to Andy’s usual method. ‘After the car had been filled and primed I gave it a guide coat and blocked it back with first 120- then 400-grit, and any imperfections revealed were dealt with before it was primed again. After that, laying the topcoat on was the easy part. That was left for two days to dry and settle. Some say you should leave it longer but then it sets like rock and is really hard to polish back. I do that by hand with 1500- then 2000-grit paper then finish off with a polishing compound. I’ve done stuff that way that still looks good 12 years on.
‘The refit was the hardest bit of the project and took longer than the rest of the build. This threw up some interesting problems, like the passenger door being from a pre-facelift Capri. They’re nearly the same but the interior handles are in different positions. So not only did they not line up with the new door cards, but as the winder was in a different position the window wouldn’t go all the way up. We elongated the bolt holes in the door to move the handles into the right positions.’
Those door panels, along with the rest of the interior trim in the correct vinyl and cloth pattern, came from Aldridge Trimming in Wolverhampton, and proved simple enough to fit. ‘The Capri Club came to the rescue with some hard-to-find bits like the dash top, parcel shelf and replacement column stalks – the originals looked like they’d melted. At least the rare Rally Pack option console was still okay and just needed a clean-up. Thankfully most of the chrome was with the car, and we sent that off for replating by CE Design in Folkestone. The thin bootlid trim strips had to be replaced, via a firm in Belgium. We got the factory look under the bonnet with repro stickers from Classic Reproductions and a chassis plate from VINtagsUK.’
ENGINE & MECHANICALS
Apart from getting it off and back on, most mechanical work was farmed out. ‘We try to do as much in-house as possible and often do engine and gearbox rebuilds, but it depends on the customer – sometimes they want to send it to a preferred builder,’ says Andy.
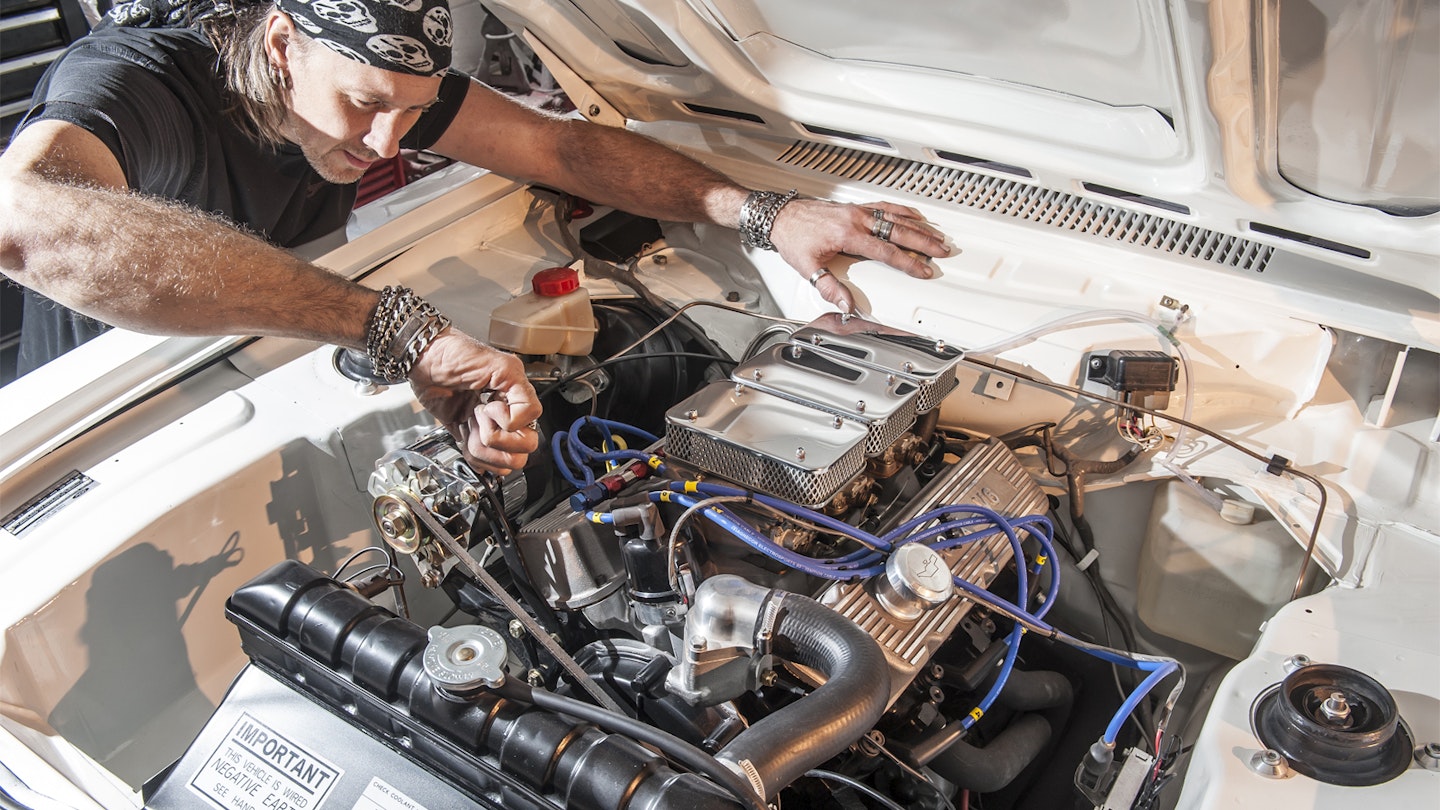
In this case the engine and box went to Specialised Engines in Grays, Essex. ‘We’d already checked it over and the engine was shot, and it had no oil in it, so it’s a good thing no one tried to run it,’ Andy says. ‘The gearbox was equally bad – you could tell by the internal corrosion that it had been full of water. The engine was going to be rebuilt to standard spec, but after it went to Specialised Engines plans escalated – it was bored to 3.1 litres, fitted with three Weber 40DCNF carburettors and upgraded to Stage 5 tune.’
CONCLUSION
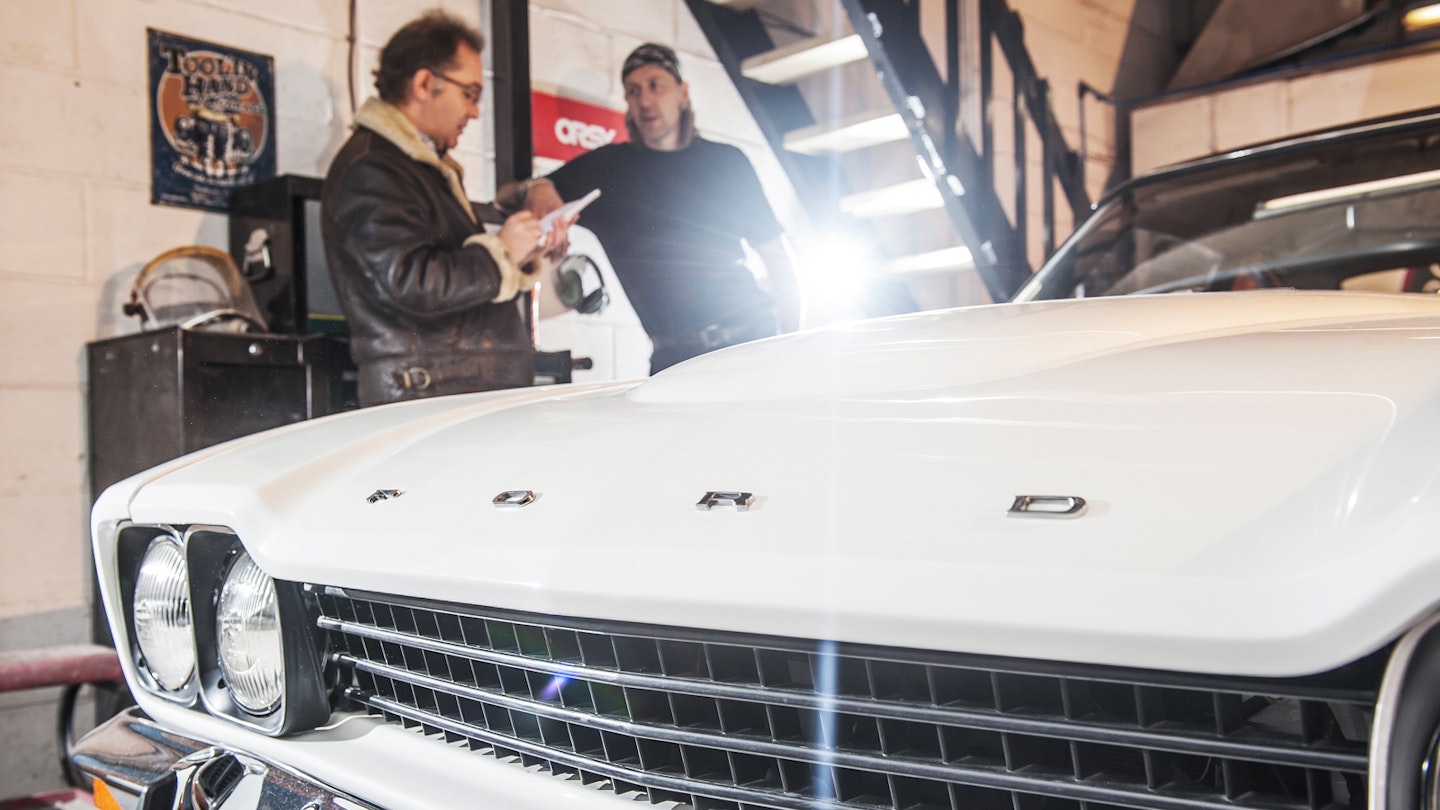
Paul Bailey is candid about how far this Capri’s rebuild spiralled beyond pure financial sense – the total bill was around £59,000 – but doesn’t regret a bit of it. ‘This has been a great project but one that cost tens of thousands more than I budgeted and took four times as long as expected. The end result, however, is one of the best Capris around and I understand the facelifted 3000GT was always a rare bird, only sold for 18 months.’
Poor survival is due to freedom from meaningful rust protection and later popularity among tyre-smoking younger drivers. ‘There were only three facelifted MkI 3000GTs registered in the UK with the DVLA at the last count. That alone made this worth saving.
‘The car looks fantastic. I’ve decided that I’m going to drive it rather than put it away, so hopefully some of the readers will see the car around.’